CHAPTER 15
PROFILE CHANGEOVER PROCEDURE
56
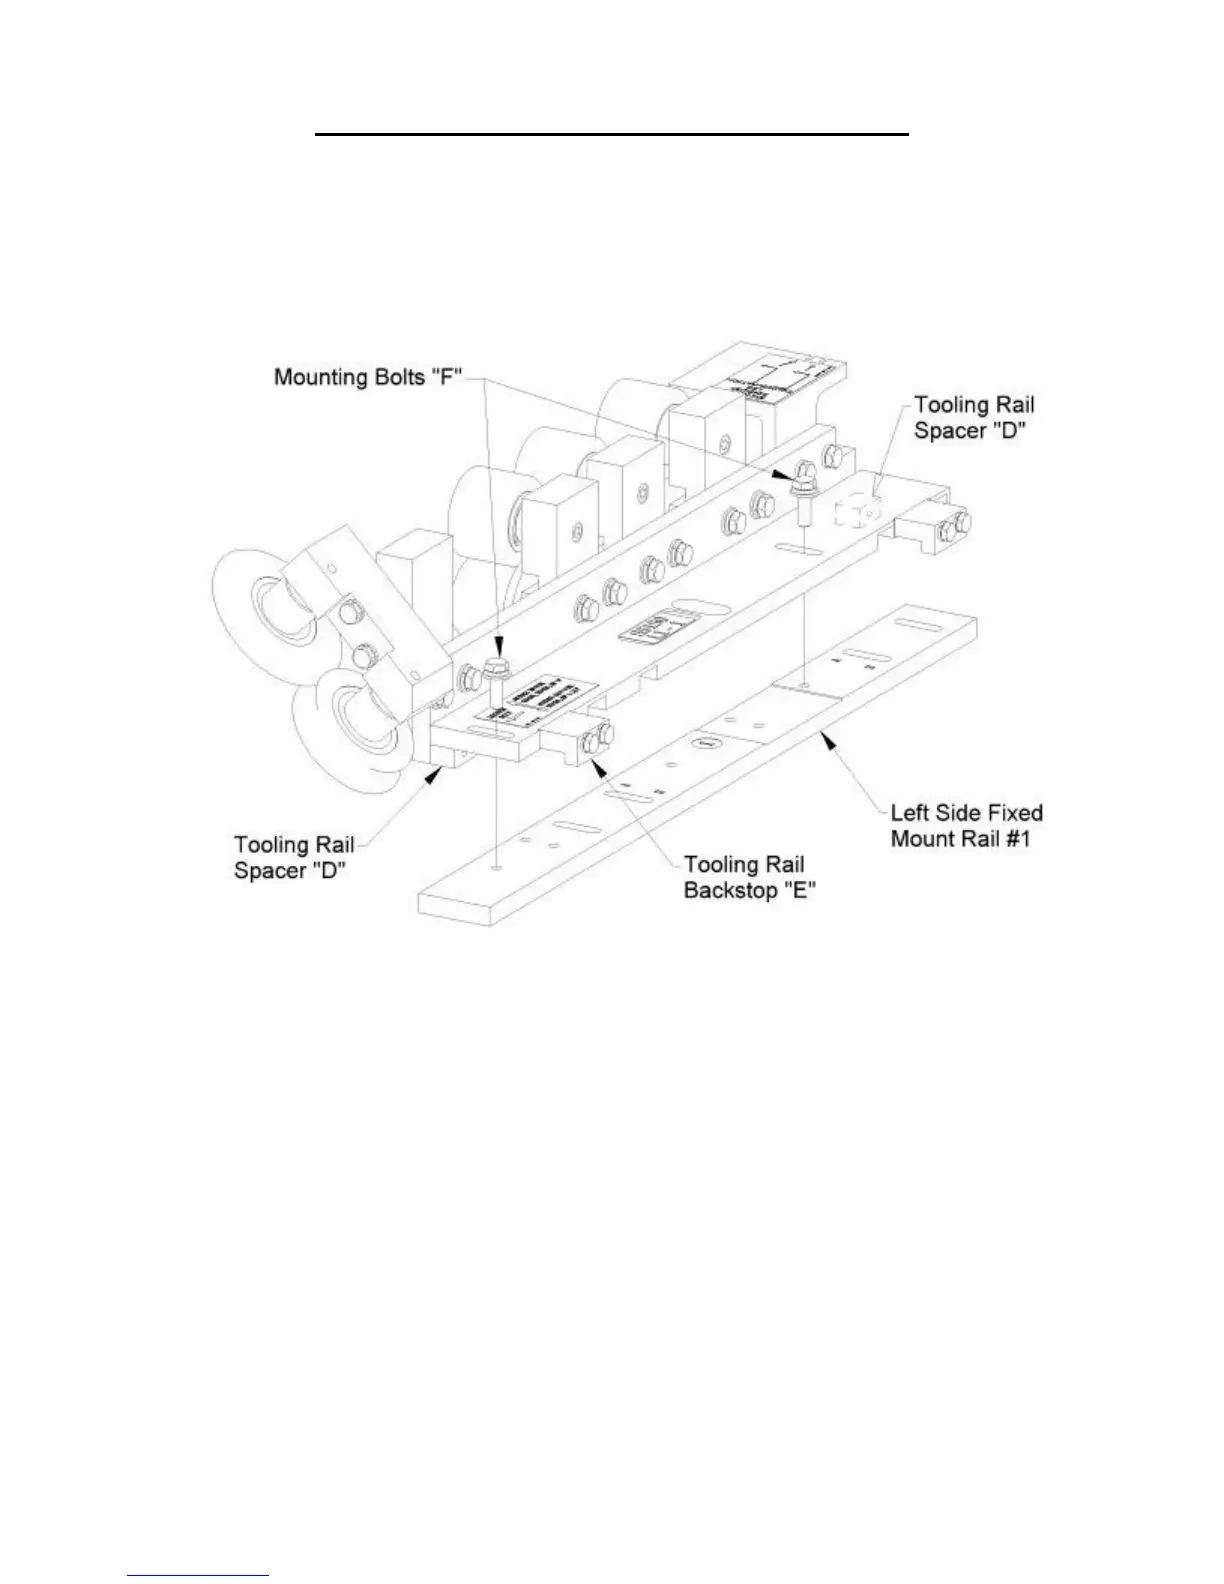
(Figure 49). When mounting the Tooling Rail Assembly for use with the
SS100, SS450, or BP 1" profiles push it toward the center of the machine
until the Tooling Rail Backstops "E" contact the Left Side Fixed Mount Rail
#1 (Figure 49). Once it is positioned properly, tighten the two Mounting Bolts
"F" using a 1/2" wrench.
Figure 49: L1-1 Special Instructions
9. Loosen the two “A” Bolts on the Right Entry Guide (Figure 50). Slide the entry
guide to the left or right until the alignment pin, located on the end of the top shoe
of the entry guide, is directly under one of the notches on the Tooling Rail Marker
Plate. Make sure to choose the notch that corresponds to the desired leg
configuration as noted on the decal on the top of the marker plate.
10. Once the Right Entry Guide is in the correct position, tighten the two “A” bolts.
11. Loosen the two “A” bolts on the Left Entry Guide (Figure 50).
12. Slide the entry guide to the left or right to accept the new coil width. Make sure
that the coil is captured snugly between the entry guides and re-tighten the two
“A” bolts.