CHAPTER 15
PROFILE CHANGEOVER PROCEDURE
61
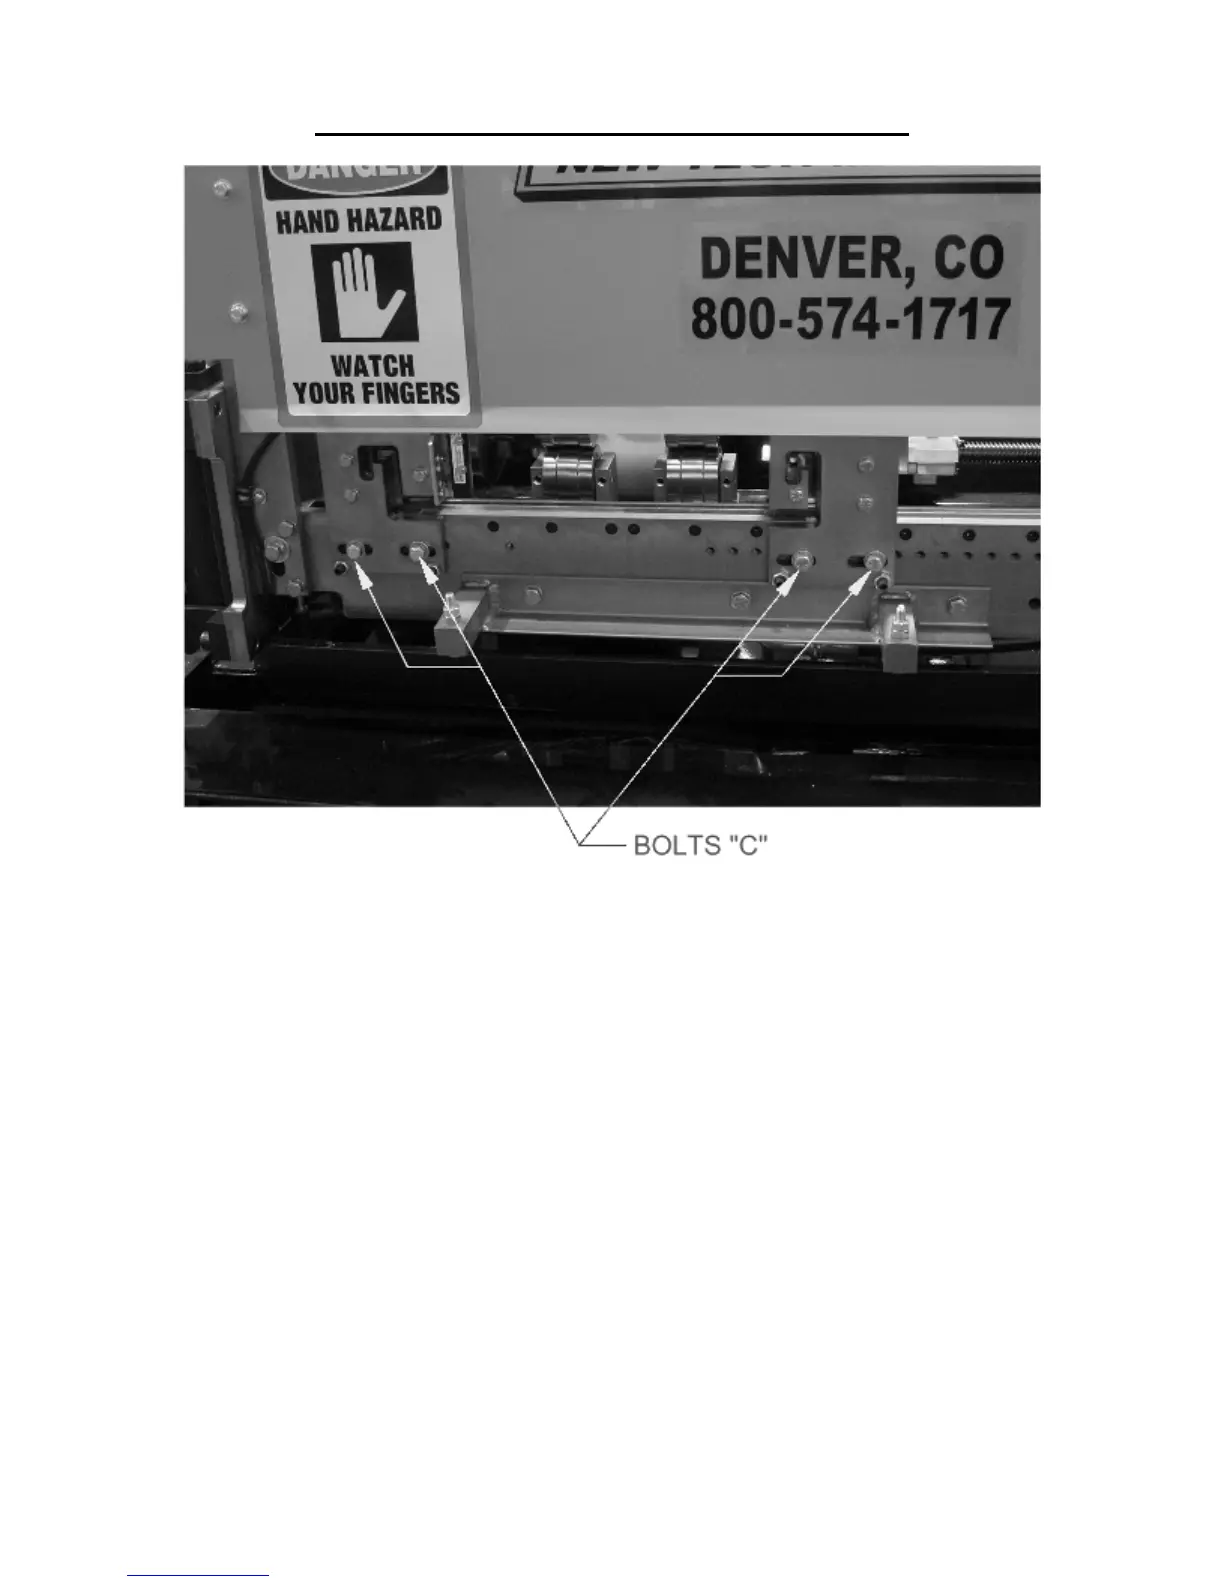
Figure 57: Remove Shear Bolts
23. Remove the two “C” bolts from the slotted holes on the entry male and female
shear die assemblies as described previously.
24. Locate the shear dies that correspond to the profile you have just installed.
Separate the male and female entry and exit shear dies.
25. Set the Male Entry Die on top of the Bottom Die (Figure 20 - Detail A on page
32). Visually sight through the male entry die and roughly align it to the forming
tool “line of fire” by sliding it left or right. Re-install the two “C” bolts into the
holes that correspond to the slots. Do not tighten the bolts at this time, just snug
them up.
26. Install the male exit die in the same manner aligning it to the entry die and again,
just snug the bolts.
27. Repeat steps 23 through 26 for the Female Dies.
28. Start the machine and carefully jog the panel up to the shear. Check to see if the
panel will pass through the entry male and female shear dies. If not, FIRST
SHUT THE MACHINE OFF, then move the male and/or female entry dies so
that the panel will pass through them.
Adjust the entry die so that it is as close to the outside vertical portion of the leg
as possible without touching it. Once this is done, tighten the two “C” bolts on
these assemblies.
29. Check the exit male and female shear dies to ensure that the material will pass
through them. If not, adjust as necessary.