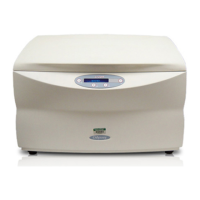
Do you have a question about the Odyssey LI-COR and is the answer not in the manual?
Details on safety precautions, laser safety, interlocks, chemical safety, and environmental conditions.
Description of the instrument's safety interlocks preventing laser access when the lid is opened.
Details on power cords, power switch operation, fuse ratings, and power requirements.
Tips and protocols for using membranes, including handling, placement, and storage.
Procedures for scanning gels, including rinsing, placement, and focus offset adjustments.
Considerations for selecting and scanning microplates, including dimensions and well properties.
Steps to manually configure the instrument's IP address using the front panel keypad.
How to initiate scans using presets saved on the instrument.
Procedure to download scan data from the instrument to the application software.
Step-by-step instructions for installing the Odyssey Application Software on a computer.
Steps to configure Windows settings, such as Date/Time and Power Options, for optimal software performance.
Instructions for connecting the Imager to a computer in a basic, stand-alone configuration.
Guide for connecting the Imager to a local network for remote access.
Steps to log on to the Odyssey Imager using an Internet browser and its IP address.
Procedure for creating new user accounts and assigning access rights via the browser interface.
How to upgrade or downgrade user account rights, such as Browse, Control, or Administrator.
Information on creating and managing scan groups for organizing scans.
Accessing and using the scan setup window via the browser interface.
Details on setting scan parameters like resolution, quality, intensity, and scan area.
Customizing scan parameters, including resolution, quality, intensity, and channels.
Steps to configure the scan, estimate scan time, and initiate the scanning process.
Tools for adjusting image appearance, including zooming, cropping, sensitivity, and inversion.
Configuration of IP addresses, net masks, host names, and gateway settings.
Procedures for updating the instrument software via CD-ROM or downloaded files.
| Brand | Odyssey |
|---|---|
| Model | LI-COR |
| Category | Measuring Instruments |
| Language | English |