CHAPTER 4
46
Connecting the Odyssey Imager to a Network
addressing. For instructions on setting up a static IP address, see
Configuring the Computer with a Static or Automatic (DHCP) IP
Address later in this chapter.)
The Odyssey
®
Imager can be connected directly to the network and
accessed remotely from any computer on the same network. The
default configurations of the computer and the Odyssey Imager are
for automatic addressing, making it easy to connect to a network
with a DHCP server.
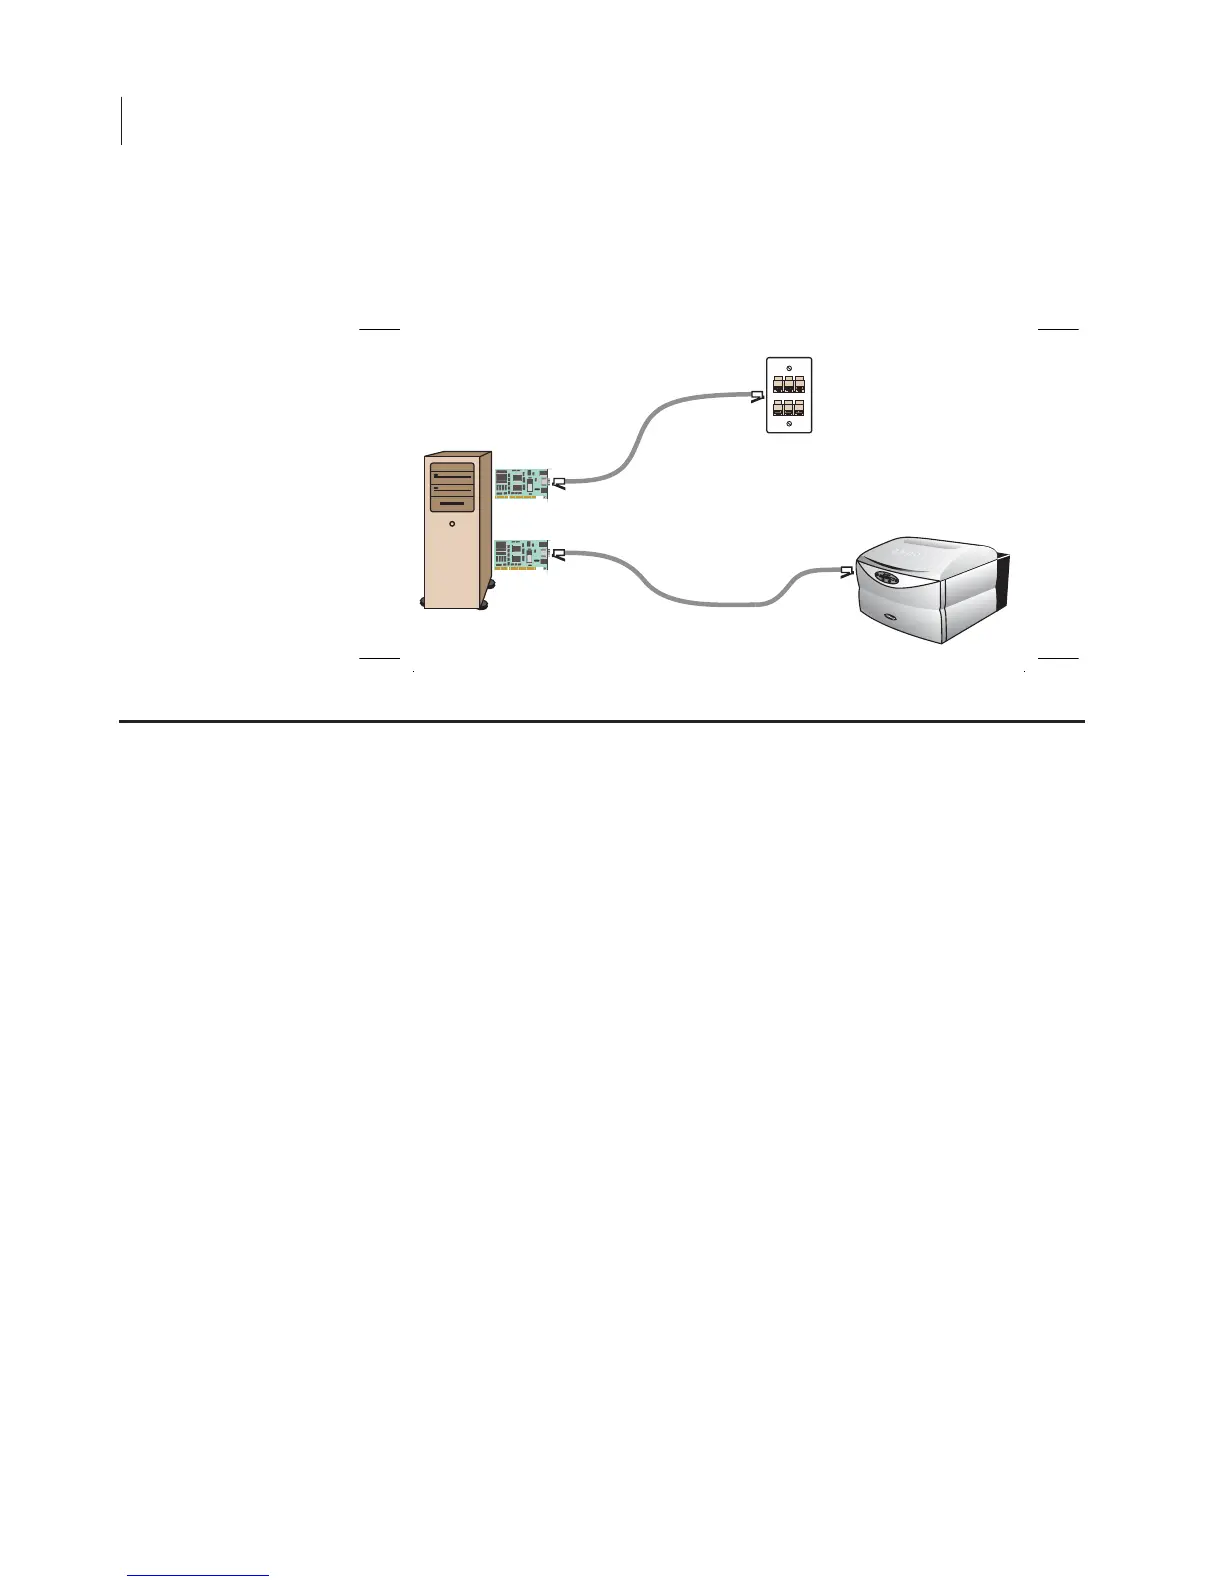
1) Start by turning off both the Odyssey Imager and the computer.
2) Connect the Cat. 5 RJ-45 cable included from the Odyssey
Imager directly to the local network port (LAN).
LAN
Odyssey
NIC-2
NIC-1
Static IP
172.24.41.181
Static IP
172.24.41.180
DHCP or Static IP
Assembling the Networked Configuration