49
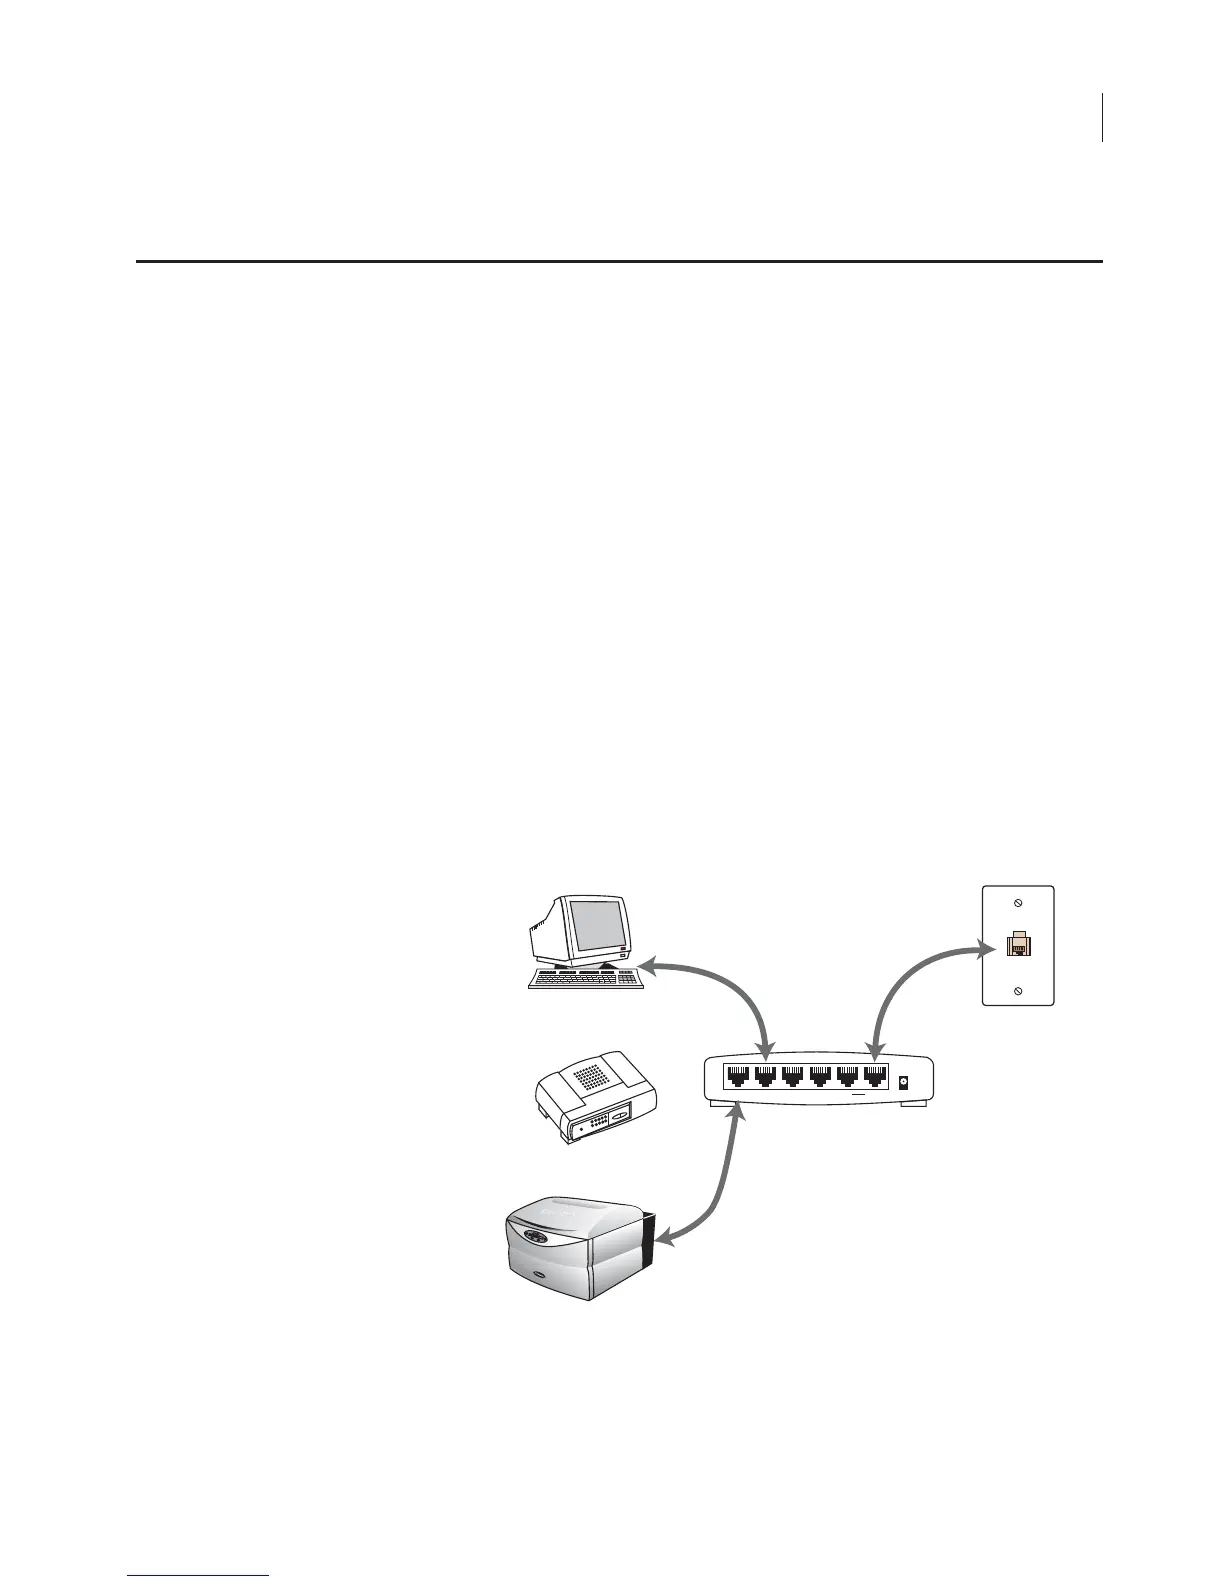
An ethernet switch may be included and can be used to connect the
Odyssey
®
Imager and computer to the network. With this scheme, it
is possible to connect both the Odyssey Imager and the computer to
the network even if only one network port is available. Both the
Odyssey Imager and the computer are set up for automatic (DHCP)
addressing. To assign static IP Addresses to the Odyssey Imager
and/or the computer, see Setting a Static or Automatic (DHCP) IP
Address later in this chapter.
1) Start by turning off both the Odyssey Imager and the computer.
2) Make sure none of the Cat. 5 RJ-45 network cables are plugged
into port 5 on the network switch. Move them to ports 1-4 as
needed.
3) Connect the Cat. 5 RJ-45 cable included from the Uplink port on
the network switch to a port on your local network.
Connecting to a Network Using an Ethernet Switch
Network connection
using the Ethernet
switch.
Connections To
Existing Network
10 Mbps or
100 Mbps network port(s)
1 2 3 45Uplink
Power
Switch
Odyssey
Host Computer With
Odyssey Software And
Internet Browser
Ethernet Switch
Back Panel
Cat. 5 RJ-45 Cable
From Uplink Port
To Network Port