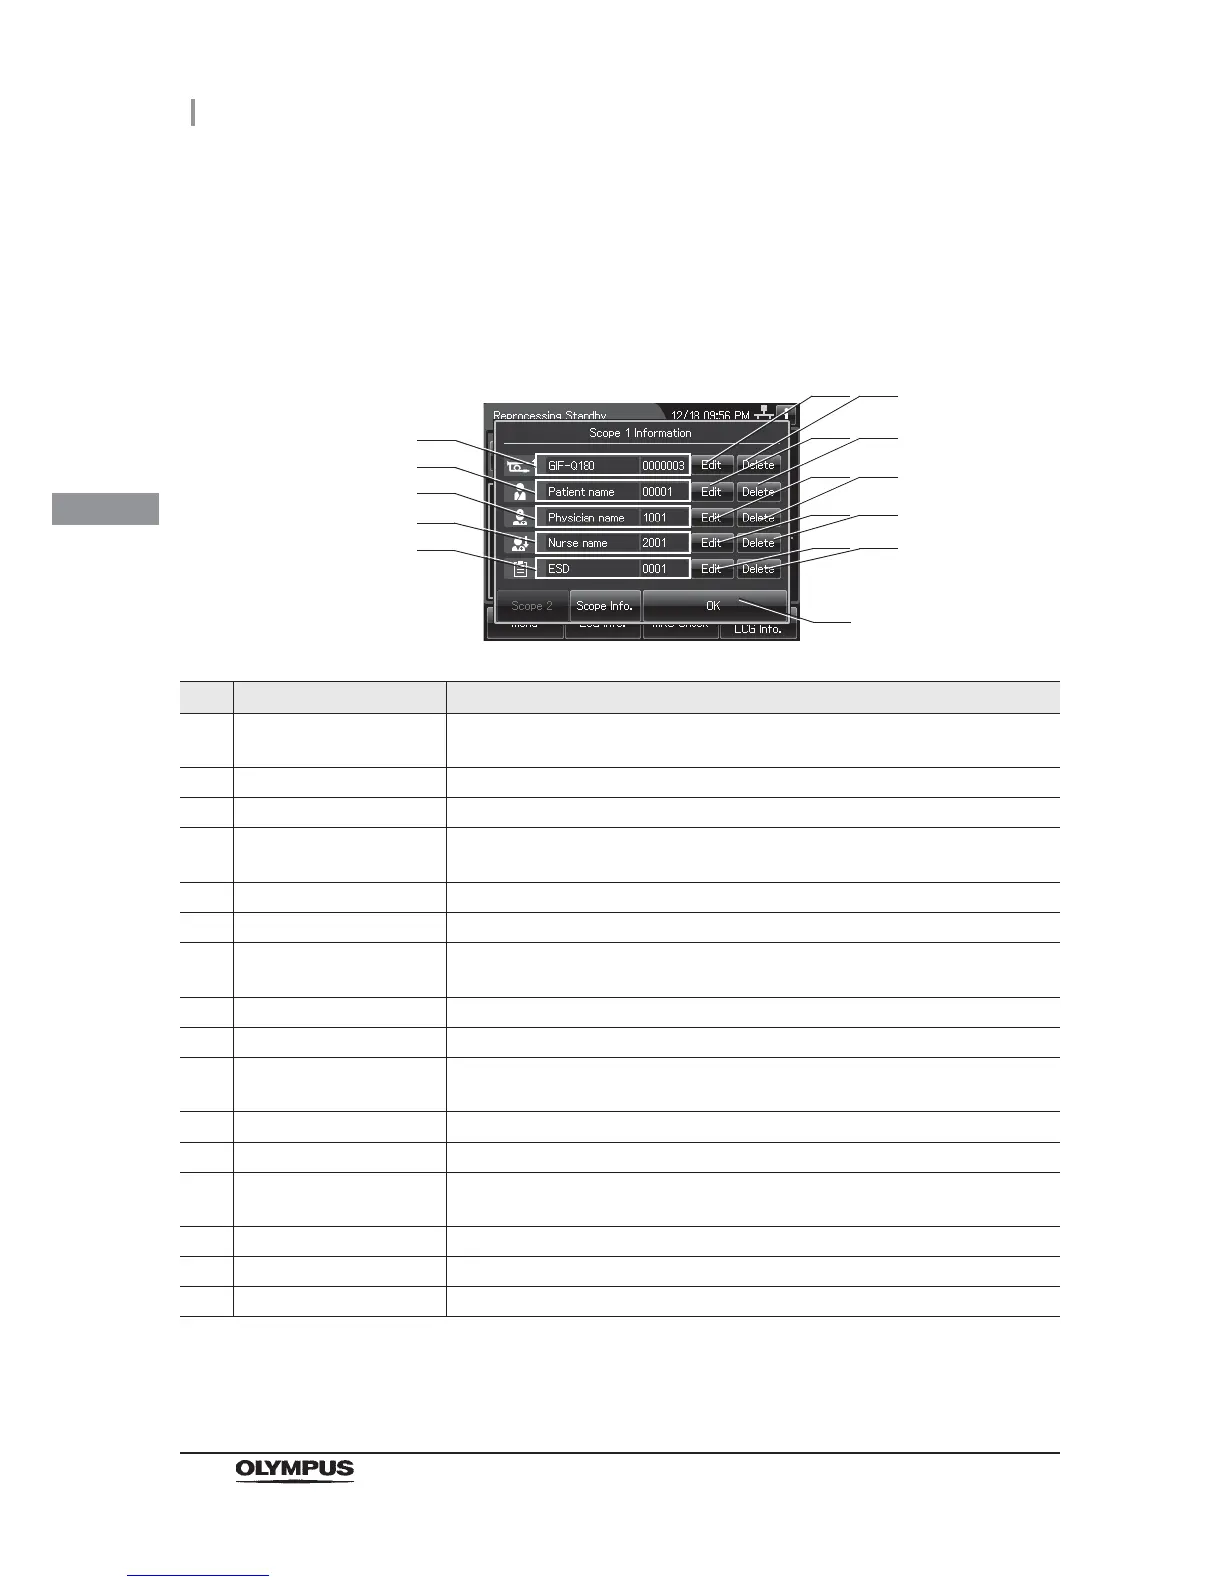
Confirmation of the input ID
1 Open the ID select screen.
2 Confirm each ID information.
No. Item/Button Note
1 View Scope ID information Displays the scope ID information (endoscope type and serial number).
This area is blank when no scope ID has been input.
2 Edit Scope ID button Opens the scope ID list to modify.
3 Delete Scope ID button Deletes the input scope ID information.
4 View Patient ID
information
Displays the patient ID information (patient name and ID number).
This area is blank when no patient ID has been input.
5 Edit Patient ID button Opens the patient ID list to modify.
6 Delete Patient ID button Deletes the input patient ID information.
7 View Physician ID
information
Displays the physician ID information (physician name and ID number).
This area is blank when no physician ID has been input.
8 Edit Physician ID button Opens the physician ID list to modify.
9 Delete Physician ID button Deletes the input physician ID information.
10 View user ID information Displays the user ID (load) information (user name and ID number).
This area is blank when no user ID has been input.
11 Edit user ID button Opens the user ID list to modify.
12 Delete user ID button Deletes the input user ID information.
13 View procedure ID
information
Displays the procedure ID information (procedure name and ID number).
This area is blank when no procedure ID has been input.
14 Edit procedure ID button Opens the procedure ID list to modify.
15 Delete procedure ID button Deletes the input procedure ID information.
16 OK button Returns to the Reprocessing standby screen.
1
16
5
4
7
10
13
6
8 9
11 12
14 15
2 3
 Loading...