4 SETUP INSTRUCTIONS
inc All rights reserved
35
4.7.4 BATTERIES COMPARTMENT INSTALLATION
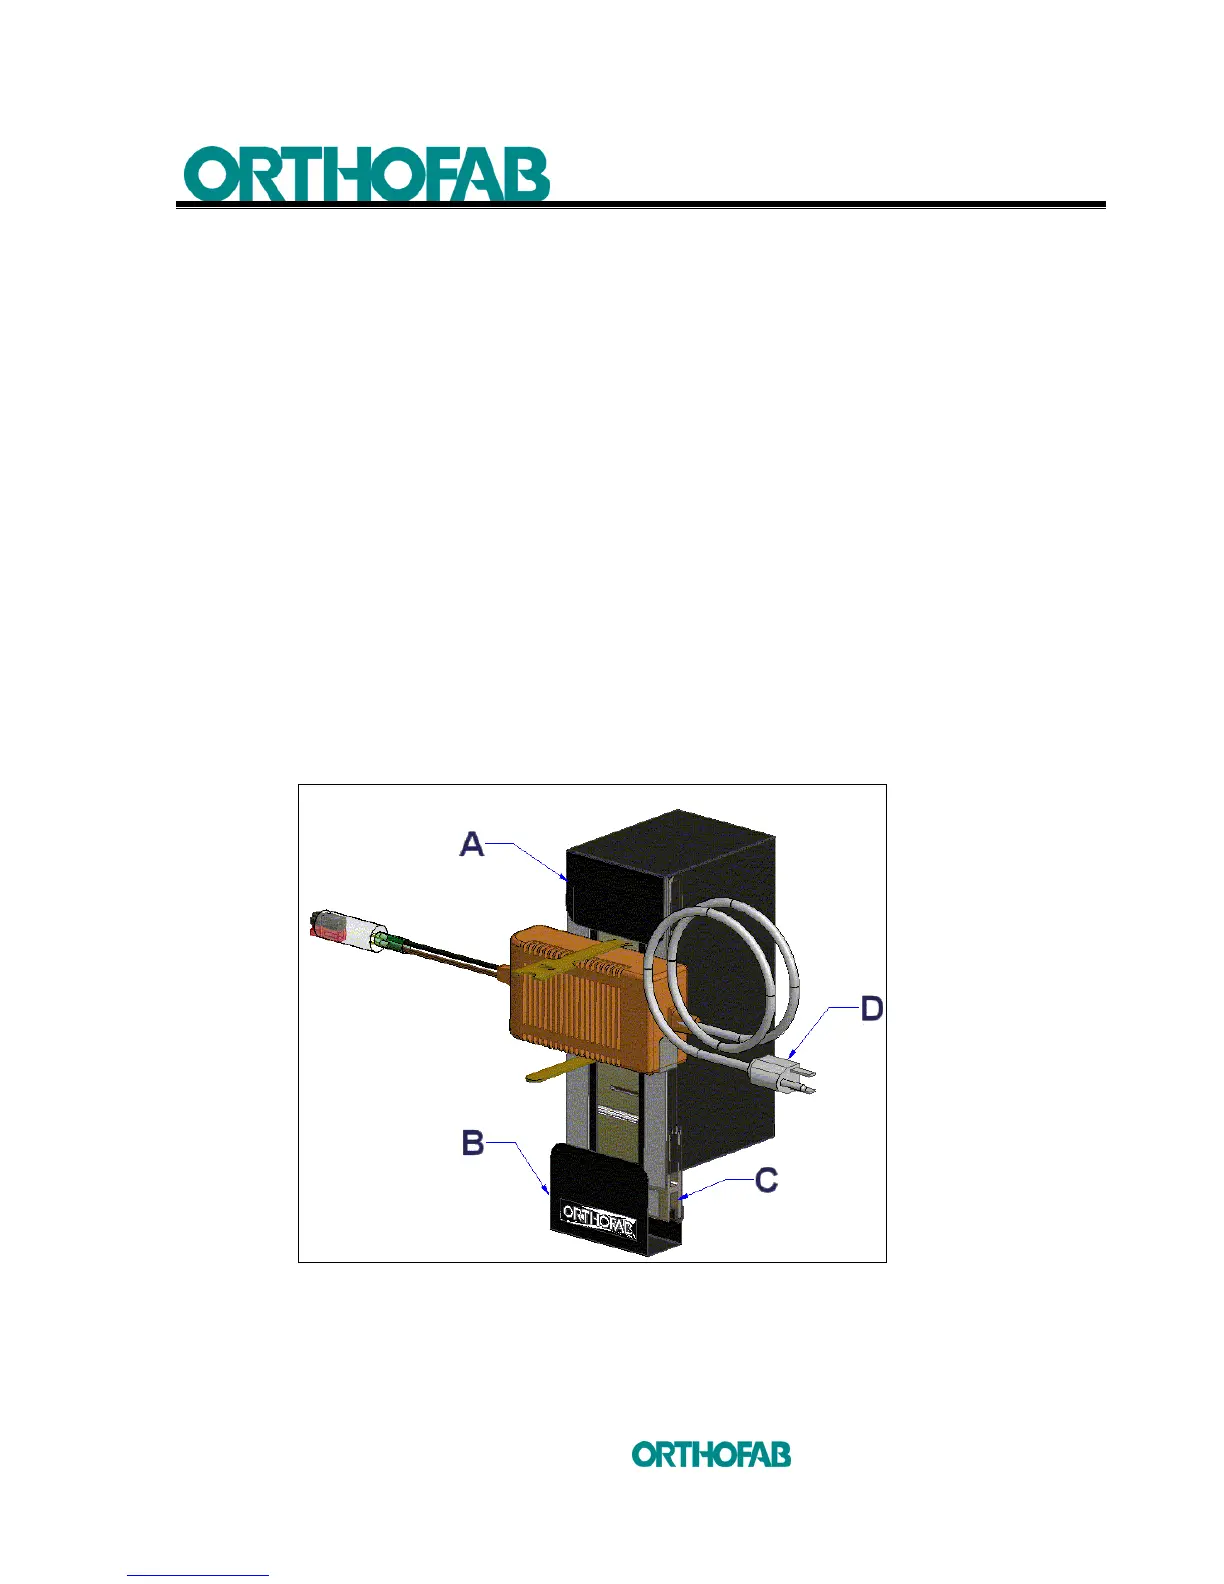
1. Open the lower flap (B) on the batteries compartment (see; figure 18-A).
2. Insert the part (C) (see; figure 18-A) of the compartment support extrusion on the
lower anchor, make sure that the insertion is complete and solid (see; figure 18-B).
3. Close the lower flap (B) over the lower anchor (see; figure 18-B).
4. Open the upper flap (A) (see; figure 18-A) and take the actuator cable (B) and make
it pass thru the bottom part of the batteries compartment (see; figures 18-C and D).
5. Plug the actuator cable (B) connector with the connector (B) on the motorized tilt
mechanism control box cable (see; figures 18-D and E).
6. Plug the red and black connector of the battery charger with the same red and
black connector (D) on the motorized tilt mechanism control box cable (see;
figures 18-E and F).
7. Plug the 3 connectors (C) on the motorized tilt mechanism control box cable, well
identified with stickers with the ones of the positioning system identified with the
same stickers (see; figure 18-E).
8. Close the upper flap (A) of the batteries compartment.
Figure 18-A : Motorized tilt mechanism batteries compartment.