Chapter 7 Using Contacts
82
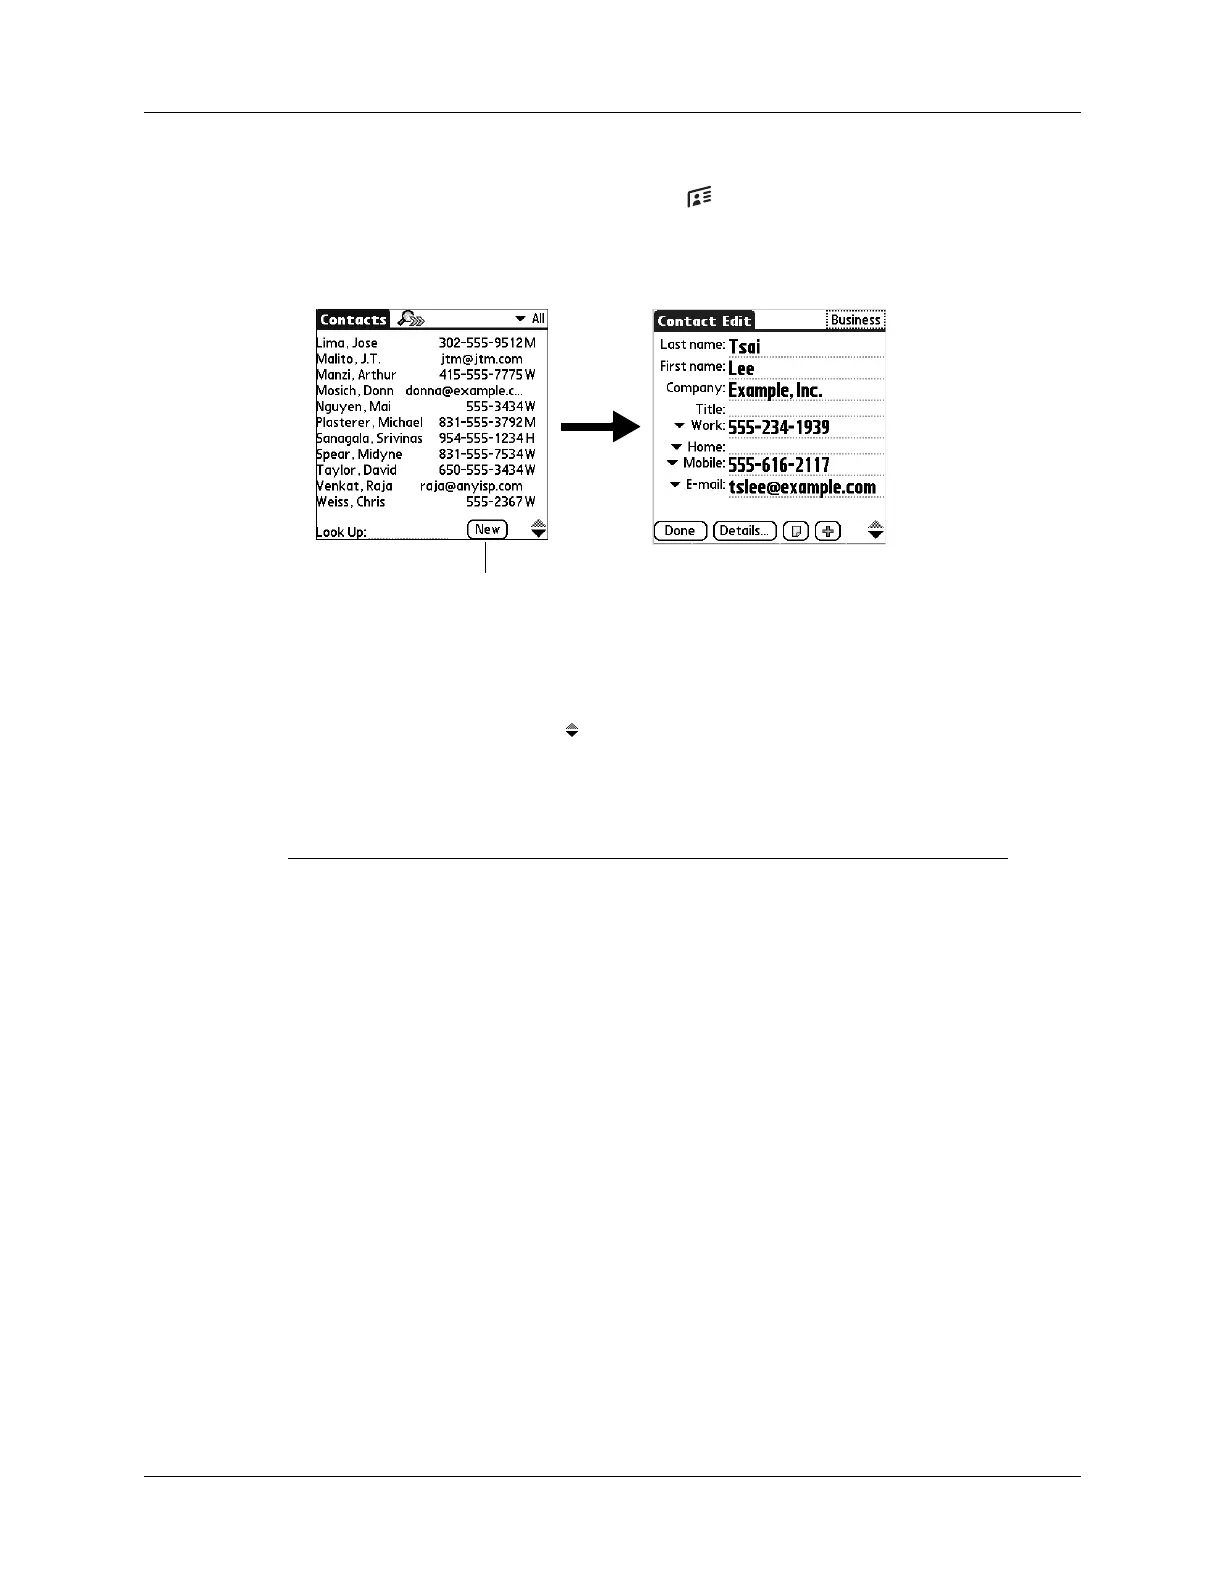
To create a new contact:
1. Press the Contacts application button on the front of your handheld to
display the Contacts list.
2. Tap N ew.
3. Tap each field for which you have contact information and enter the
information. The features described in the following table help streamline and
organize contact data entry.
TIP
Tap the scroll arrows to move to the next page of information. See
“Options menus” later in this chapter for information on the custom fields that
appear at the bottom of the Contact Entry screen.
Field name Feature
All fields except numeric and
e-mail fields
The handheld automatically capitalizes the
first letter of each field. You do not have to
use the Graffiti
®
2 capital stroke to
capitalize the first letter of the name.
Title, Company, City, and
State
Text appears for the first logical match that
exists in your Contacts list. As you enter
more letters, a closer match appears. For
example, you may already have
Sacramento and San Francisco in your
Contacts list. As you enter S, Sacramento
appears, and as you continue entering a and
n, San Francisco replaces Sacramento. As
soon as the word you want appears, tap the
next field to accept the word.
Address
You can enter up to three addresses. Each
address contains five fields: Addr, City,
State, Zip Code, and Country. You can
designate an address as work (W), home
(H), or other (O). By default, Contacts
enters the first address as work.
Ta p N e w