Chaoter
4. Trunks and Lines
Section
300-Installation
Installation
1.
Install the
G-IRK/8
or DID card in a trunk slot.
2.
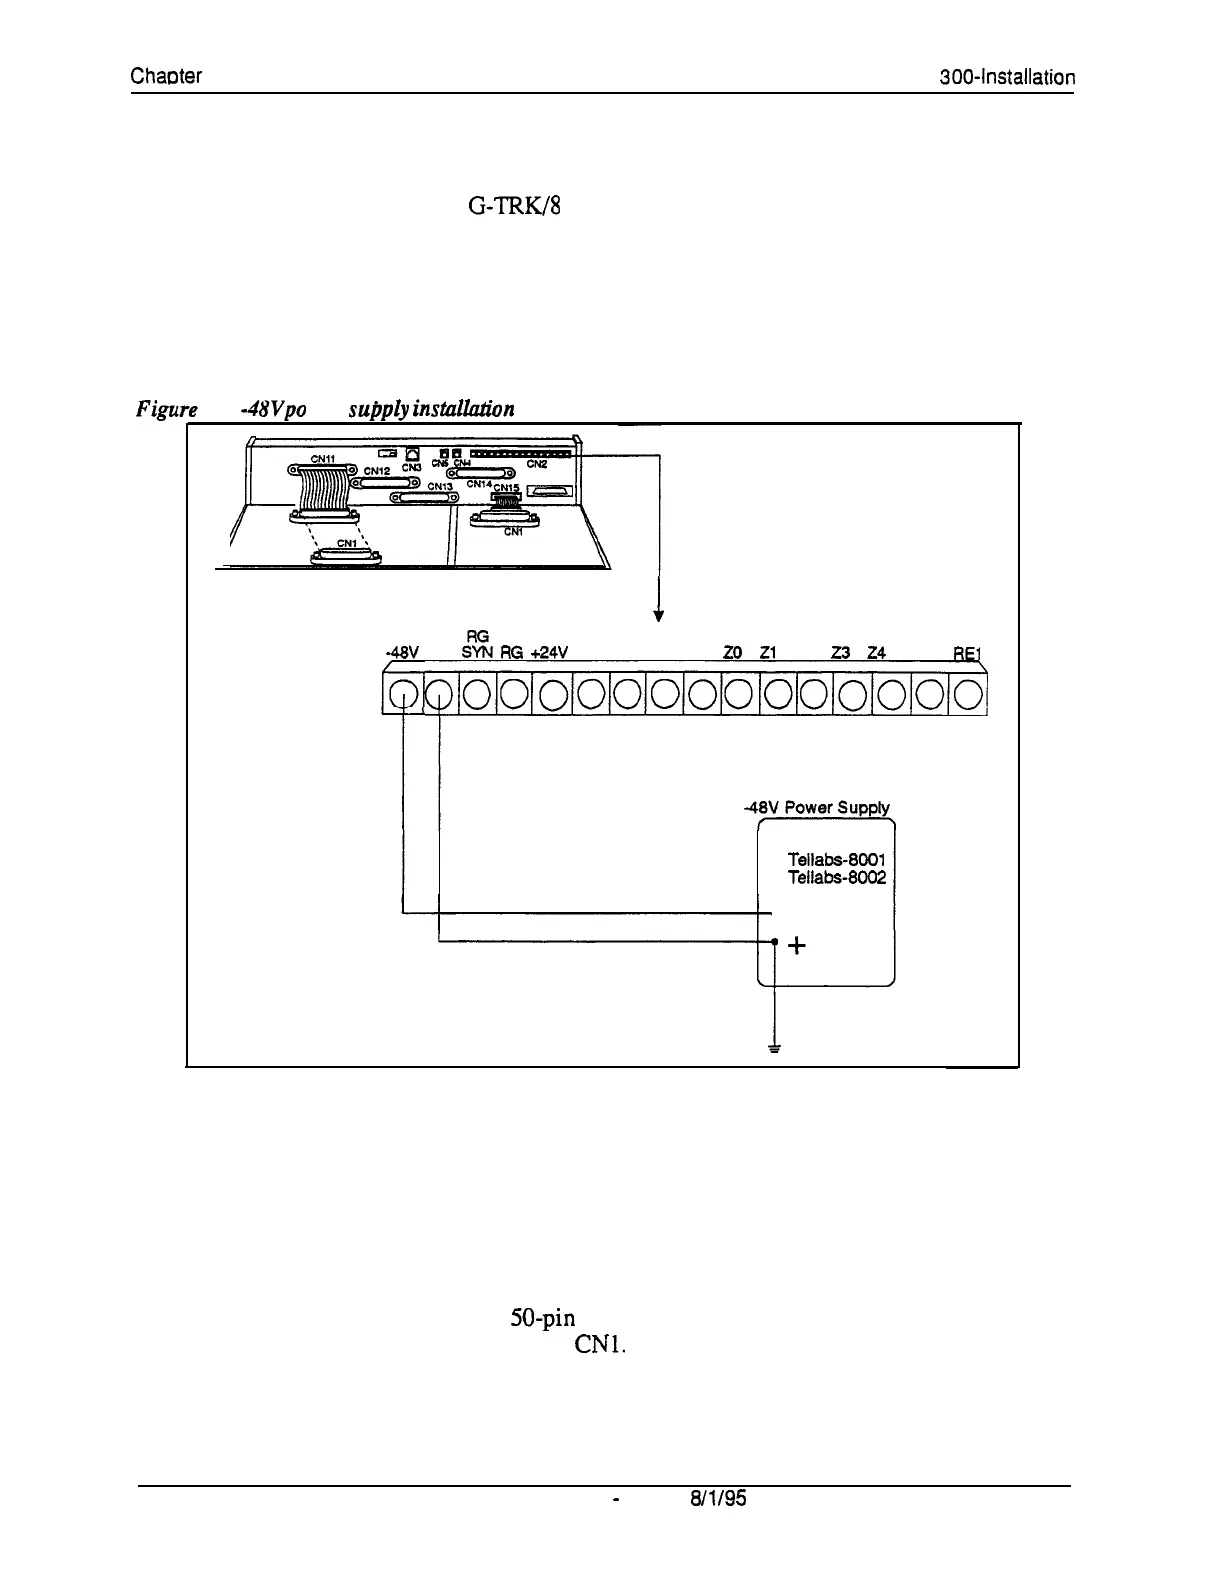
Connect the power supply by cabling the positive side to the SG
connector on CN2 (Figure 4-4).
Note: Use cables that are 18 AWG or larger
to
connect the power supply
Figu
to
the DBS.
4-4. -4W po wer
supply
installadion
1
CN2
-48V
SG
:tt
RG
+24V
GND C
8 M
20
Zl
Z2
23
24
RE2
REl
o/ololo/o1o/ololo/o/ololoioioj
Recommend:
Tellabs-8001
Tellabs-8002
3.
Ground the positive side of the -48V power supply to the building
ground.
Note: Resistance to ground must be 10 Ohms or less, and the ground cable
must be 18 AWG or larger.
4.
Install power-surge protectors between the wall outlet and the -48V
power supply.
5.
Use a standard 50-pin cable to connect the trunks from the MDF to the
main trunk connector
CNl.
6.
Use a test set to verify the polarity of the trunk.
4-10
DBS Manual
-
Issued
8/l/95
DBS-70-300
Technical Manuals Online! - http://www.tech-man.com