76180 EM -24/73-
20-2. Adjustment
① Connect the DC cord to the camera. Confirm that the camera must be turned ON without a
short circuit or leakage 5 seconds after the DC cord is connected to the camera. (Main
SW/ON: Light metering OFF: Ave. 240mA
, Light metering ON: Ave. 420mA)
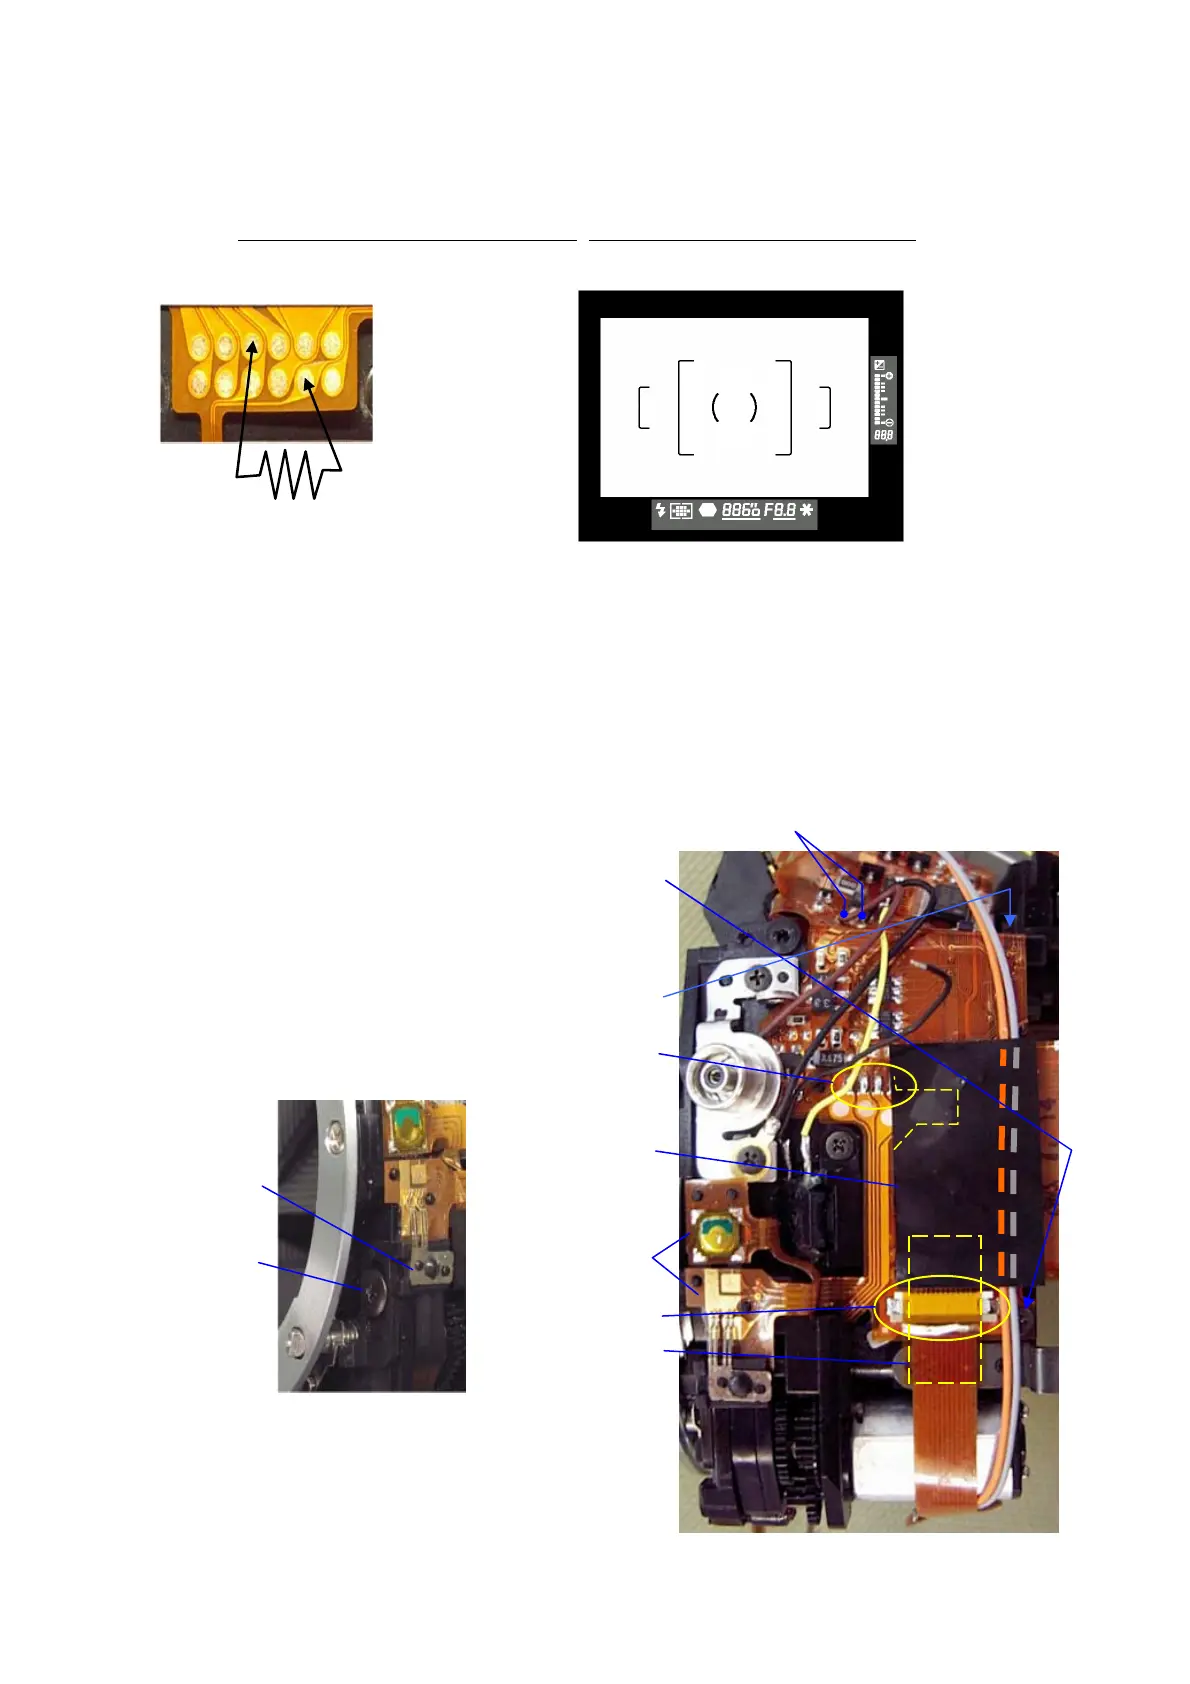
② Solder a resistance (200~250Ω) to T301 as shown in the figure.
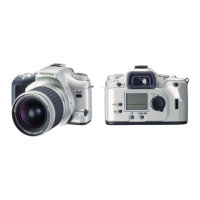
③ Confirm the all displays must be turned on. (Some beginnings productions are required
depressing the release button halfway down by using cable switch.)
④ Confirm the LCD in the viewfinder is in place as shown in the figure above.
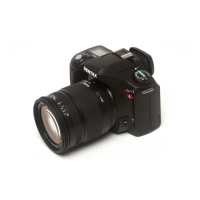
⑤ Loosen the retainer screws of LCD, and then adjust the position of LCD.
⑥ After adjustment is done, apply the screw-lock agent to 4 screws.
⑦ Remove all lead wires and a resistance.
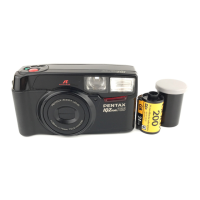
21. 0-T100 (2)
① TY-CNL-D1.4x2.5
② 0-T100・・・ DT
③ Connect the flexible board of 0-M100 to 0-T100.
④ T69 (15x8)
⑤ 0-I331
⑥ TY-CNL-G1.7x2.5
⑦ TY-CNL-D1.4x2.5 (A101, Upper left)
⑧ Solder 4 lands.・・・ S300, 0-T100
⑨ Solder 2 lead wires・・・ Brown, Black
⑩ BT (25x15) ・・・ Arrange the lead wires of S300
200-250Ω
②
⑤
⑥
①
②
③
④
⑦
⑧
⑨
⑩