76180 EM -28/73-
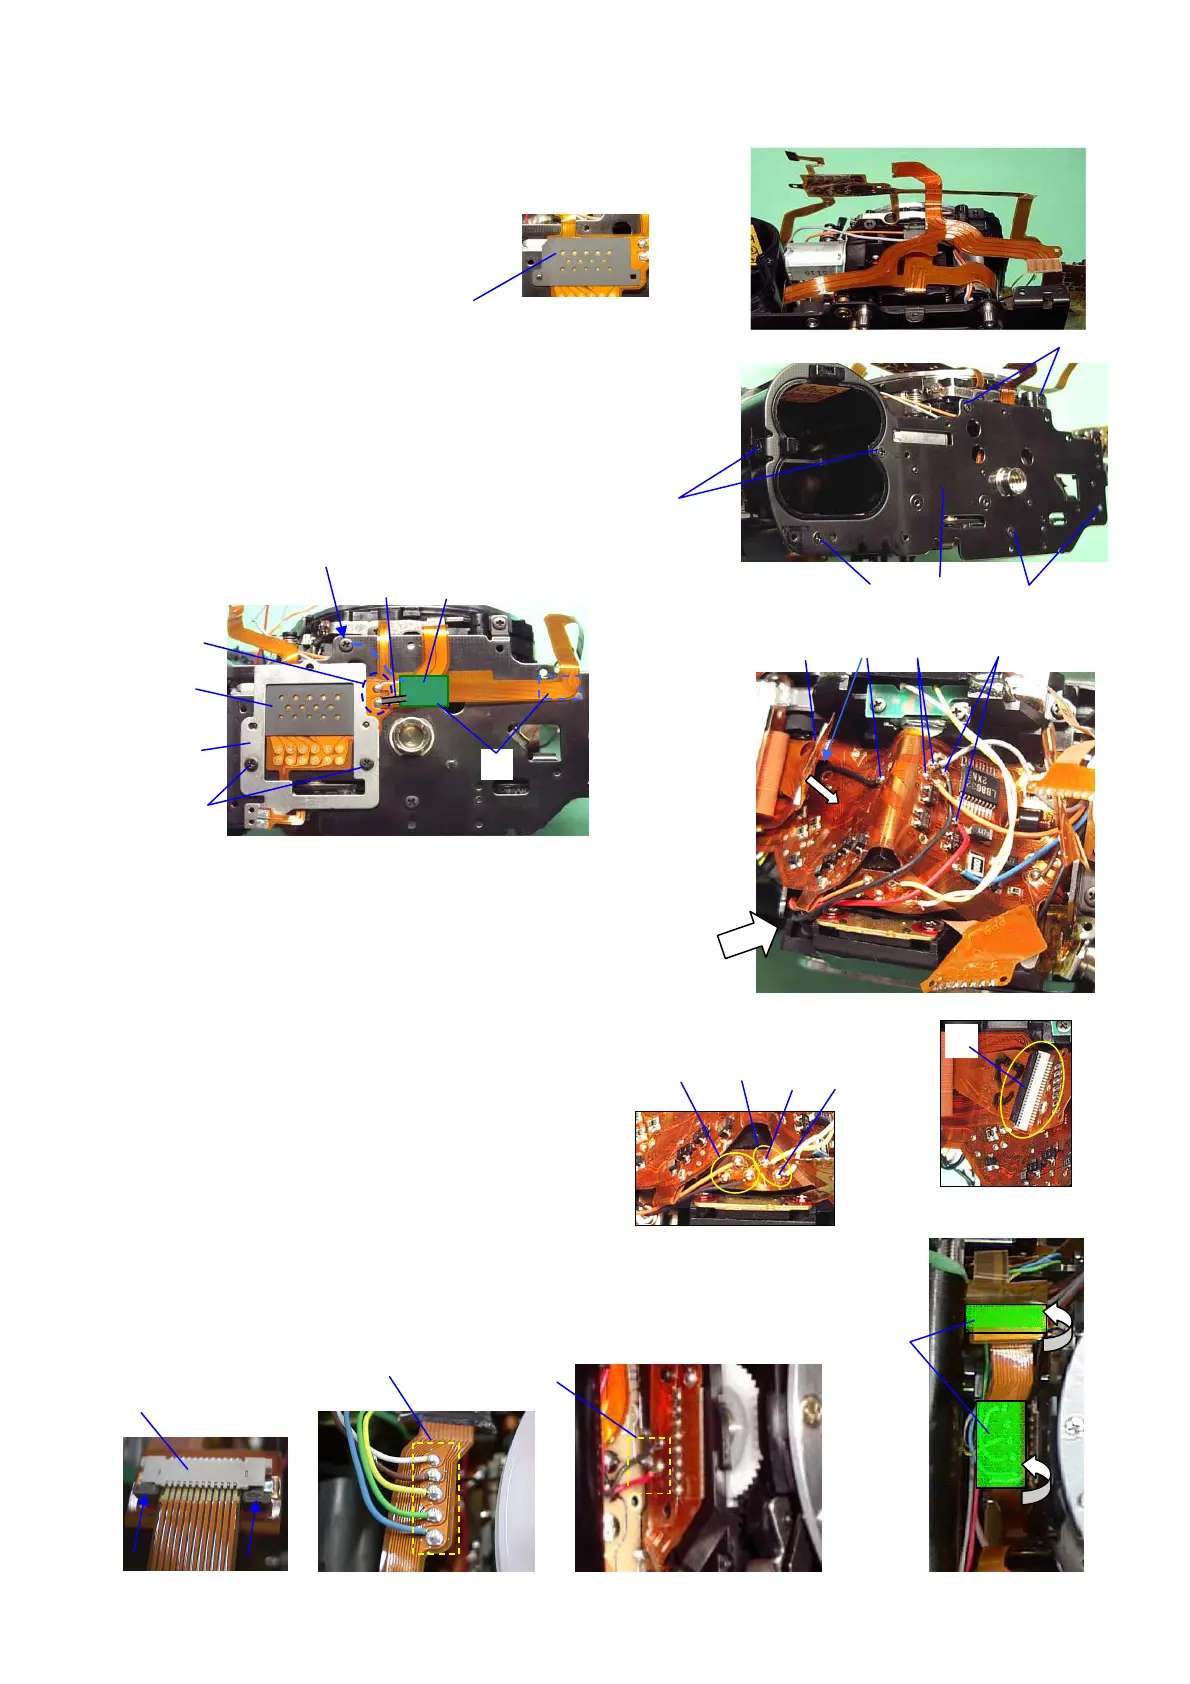
5. 0-A3 (Bottom Plate assy.)
① Arrange the flexible boards as shown in the figure.
② 0-A3 ③ TY-CNL-D1.7x4.0 (2pcs.)
④ CSM1.7x2.5
⑤ CNL-D1.7x2.5 (2pcs.)
⑥ TY-CSM1.7x4.0 (2pcs.)
⑦ A423 ⑧ A422
⑨ CNL-D1.7x2.0 (2pcs.)
⑩ Stick T301 on the bottom plate by using DT (5x5).
(T81: for CE marking)
⑪ Solder 2 lands.・・・ T301・T907
(If the lug plate is installed, tighten a retainer screw
and solder two lead wires (T81).)
6. Around Pentaprism (2)
① Solder 3 lead wires. (Orange, Brown, Black from E000)
② Solder 2 lead wires. (Yellow, White from T970)
③ Solder 2 lead wires. (Red, Black from S250)
④ Solder 2 lead wires. (Orange, Gray from S300)
⑤ Pass a black wire through hole of T100 and solder it on T100. (T900).
⑥ Stick the flexible board of T100 by DT (5x5).
⑦ Connect the flexible board of O100 to
the connector terminal of 0-T100.
⑧ Solder 2 lead wires. (Red, Black from N300)
⑨ Connect the flexible board of T301 to the connector terminal of 0-T100.
⑩ Solder 5 lead wires.
⑪ Stick T69 x2 (8x19) as shown in the figure right.
④
⑥
③
⑤
②
⑦
②
①
Ye Wh
⑧
⑨
⑦
⑪
**Gray *T81
⑩
**A429 (Gray/Black
③
⑥
⑤
④
⑦
⑨
⑩
⑧
⑪