76180 EM -39/73-
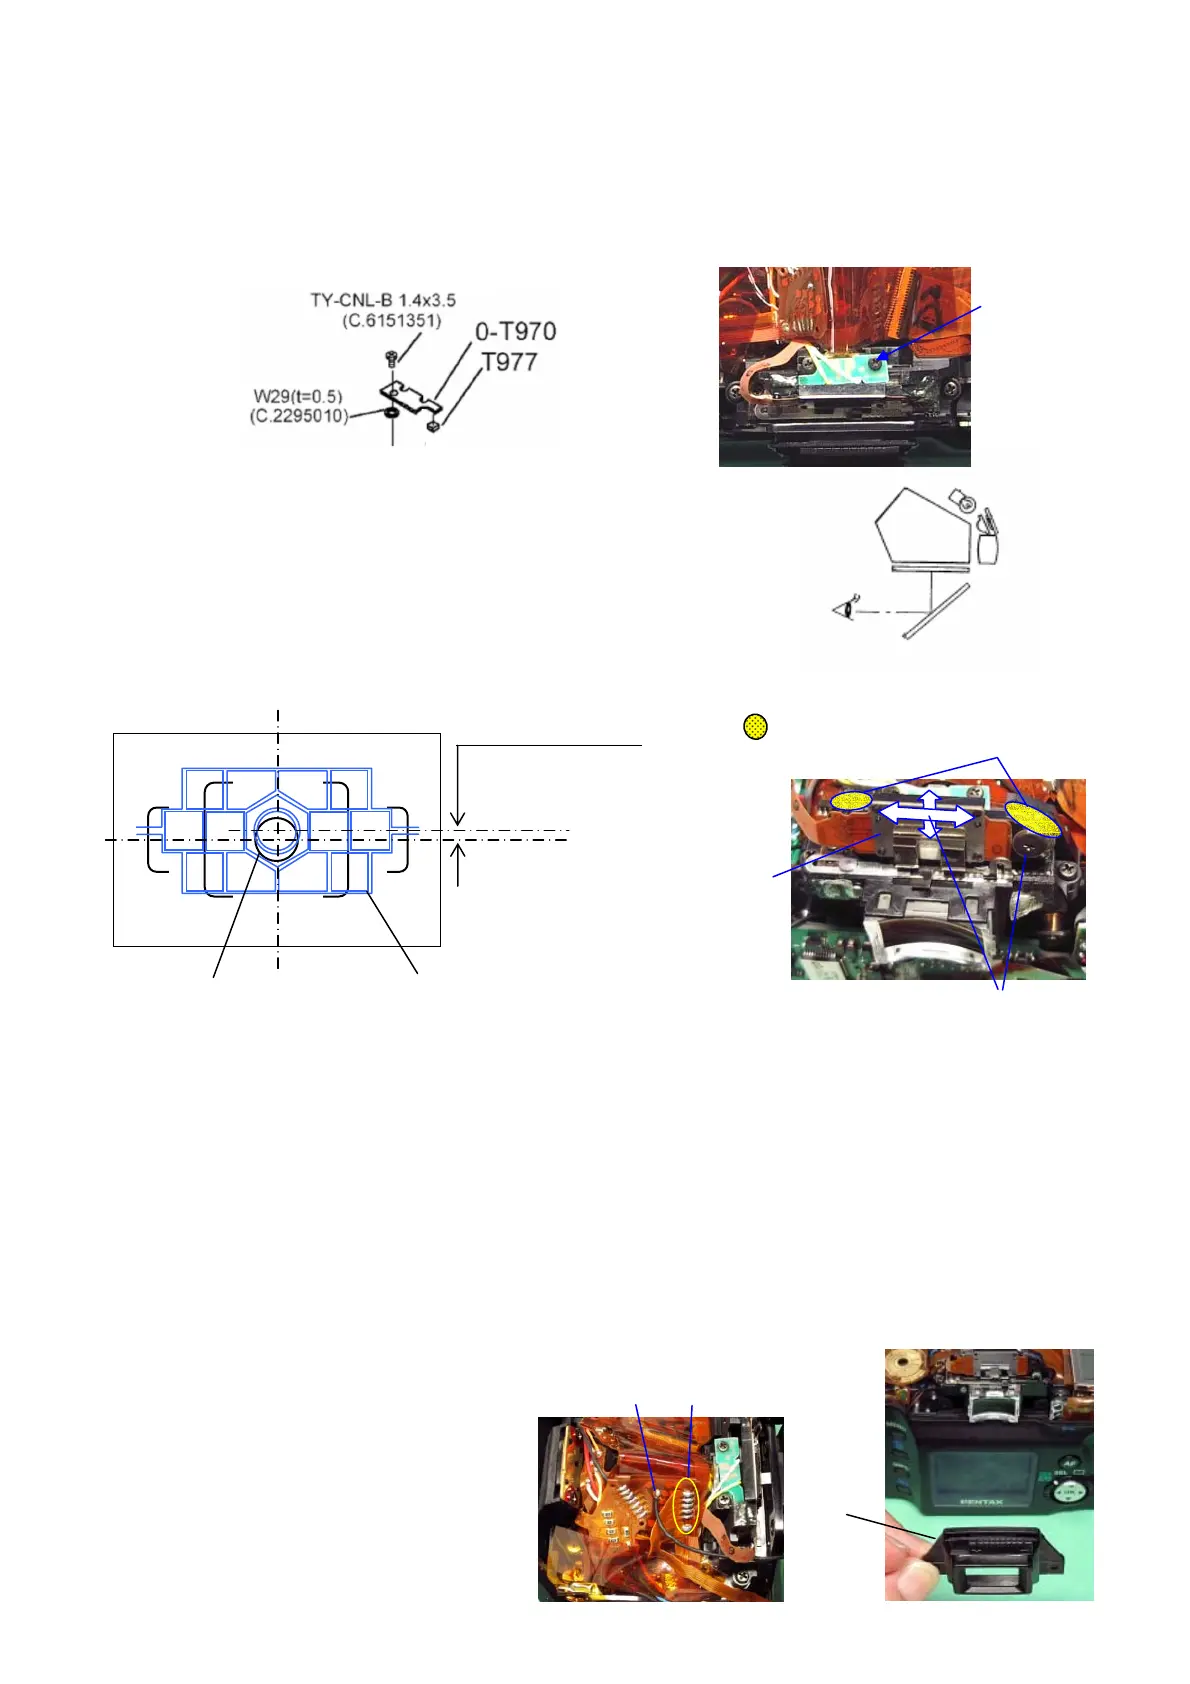
20. [ADJ] Positioning 0-J100
[Required equipment] Penlight or equivalent
① Confirm that the mirror seat is downed condition.
② Remove 0-T970 ・・・ There is a washers underneath 0-T970. Removing the lead wire is not
necessary.
③ Cover the eyepiece with a black tape.
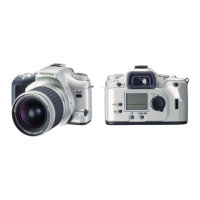
④ Strike light by a penlight to the photo sensor as shown
in the figure right, and search the position where the
pattern of the photo sensor can be seen on the 1
st
mirror from
the mount ring side.
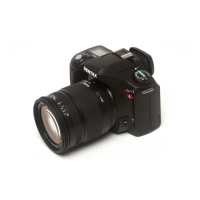
⑤ [CONF.] The photo sensor must be positioned at the center of
AF frame as shown in the figure below.
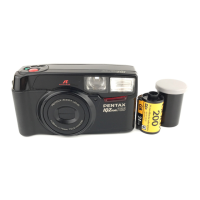
⑥ [ADJ.] Loosen the screw, and then adjust the position of sensor. Tighten screw and ensure
position is not changed. If required, repeat adjustment procedures.
⑦ After adjustment is completed, apply the screw lock agent or Super-X to 0-J100 (2 places) as
shown in the figure above right.
⑧ Install W29 and 0-T970.
[Ref.] Attaching brighter lens is advisable to assist better visibility. (Ex.: FA 50mm f/1.4 Lens)
21. 0-A301 (Top cover)
① Confirm that soldering on the main SW land of T100 is removed.
② Install M311 with engaging the Diopter adjustment lever.・・・ DT(5x5)
③ Put 0-A301 on the main body.
④ Solder a black lead wire.・・・ A330
⑤ Solder 6 lands.・・・ T51
⑥ Stick T72 (20x15) on 0-T100.
: Bonding position
AF frame for spot metering(φ3.8)
Pen-light
Sensor
②
0-J100
⑥
⑤
Photo sensor (0-J100)
Tolerance: 0.0~1.0mm
Center position of sensor
Center position of viewfinder
⑤
④
②