30
1
Before Using Your Camera
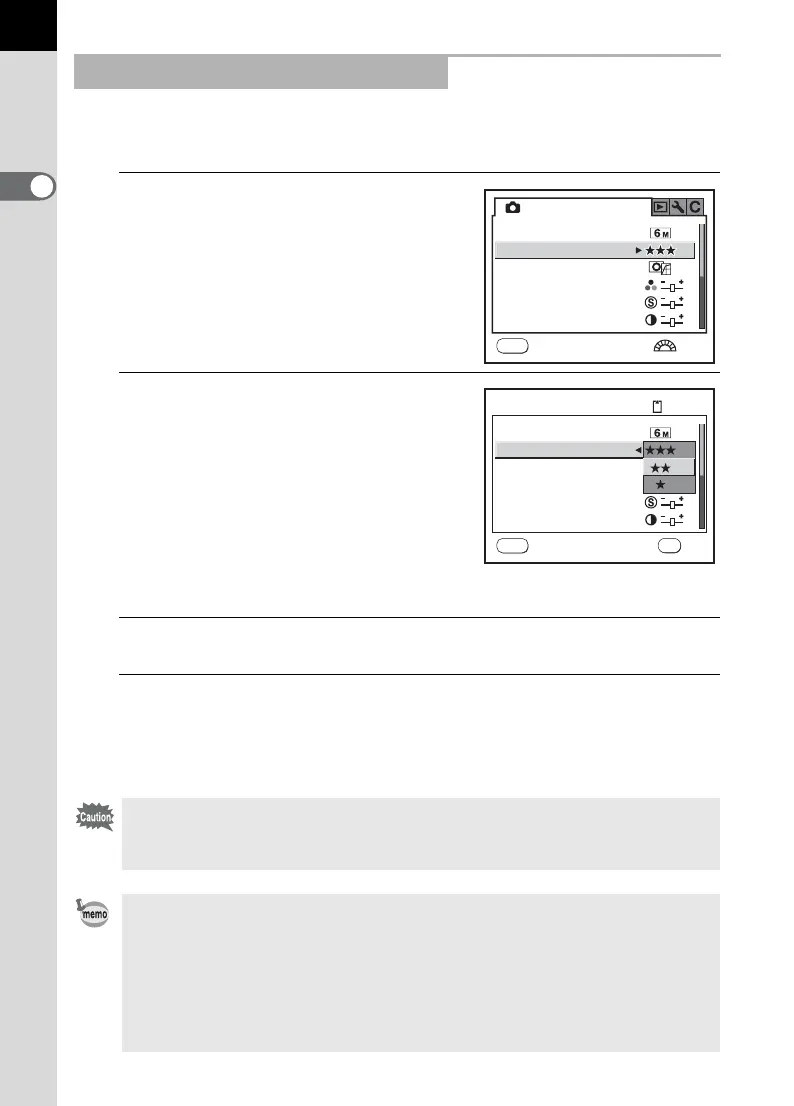
Procedure to set the [JPEG Quality] on the [A Rec. Mode] menu is
explained as an example.
3
Use the four-way controller
(23) to choose an item.
Turn the front e-dial to navigate the
menu a page at a time.
4
Press the four-way controller (
5
).
Quality levels available when recording
in JPEG format are displayed.
Press the four-way controller (
5
) to
move to the pop-up menu if there is one.
When the quality level is changed, the
number of recordable images at that quality
level appears at the top right of the screen.
5
Use the four-way controller (23) to select a setting.
6
Press the 4 button.
The camera returns to the menu screen. Next, set other items.
Press the 3 button to return to Capture or Playback mode.
Selecting and Setting a Menu Item
Even after you press the 3 button and close the menu screen, your
settings will not be saved if the camera is turned off improperly (such as by
removing the battery while the camera is on).
• You can use the front e-dial to display the previous/next page and the rear e-
dial to switch among the [A Rec. Mode] menu, the [Q Playback] menu,
[R Set-up] menu, and [A Custom Setting] menu when no pop-up menu is
displayed.
• If the 3 button is pressed in Capture mode, the [A Rec. Mode] menu
appears. If the 3 button is pressed in Playback mode, the
[Q Playback] menu appears.
1/2
MENU
Exit
Rec. Mode
Saturation
Sharpness
Contrast
Image Tone
JPEG Rec. Pixels
JPEG Quality
MENU
128
Saturation
Contrast
Image Tone
OK
OK
OK
Cancel
Sharpness
JPEG Rec. Pixels
JPEG Quality