5.13
Section 5
Maintenance
Pinnacle Operators Manual
Pickering Laboratories Inc.
Note: It is very important to remove the bottom bolts first. There are specially designed hooks in the chassis that
will support the pump.
Loosen and remove the third top screw. Use caution as this will cause the pump to lean toward you. Brace the
pump toward the wall of the Pinnacle PCX to prevent damage.
Carefully remove the pump from the chassis. If it is Pump 1, tilt the back end up and remove the pump in a
vertical position. If it is Pump 2, tilt the back end down, and remove the pump in a vertical position.
Place the pump on clean paper towels on the bench.
Wear gloves for this procedure.
REMOVE SYRINGE FROM BODY OF THE PUMP
Once the pump is on the bench, carefully remove the
syringe from the body of the pump:
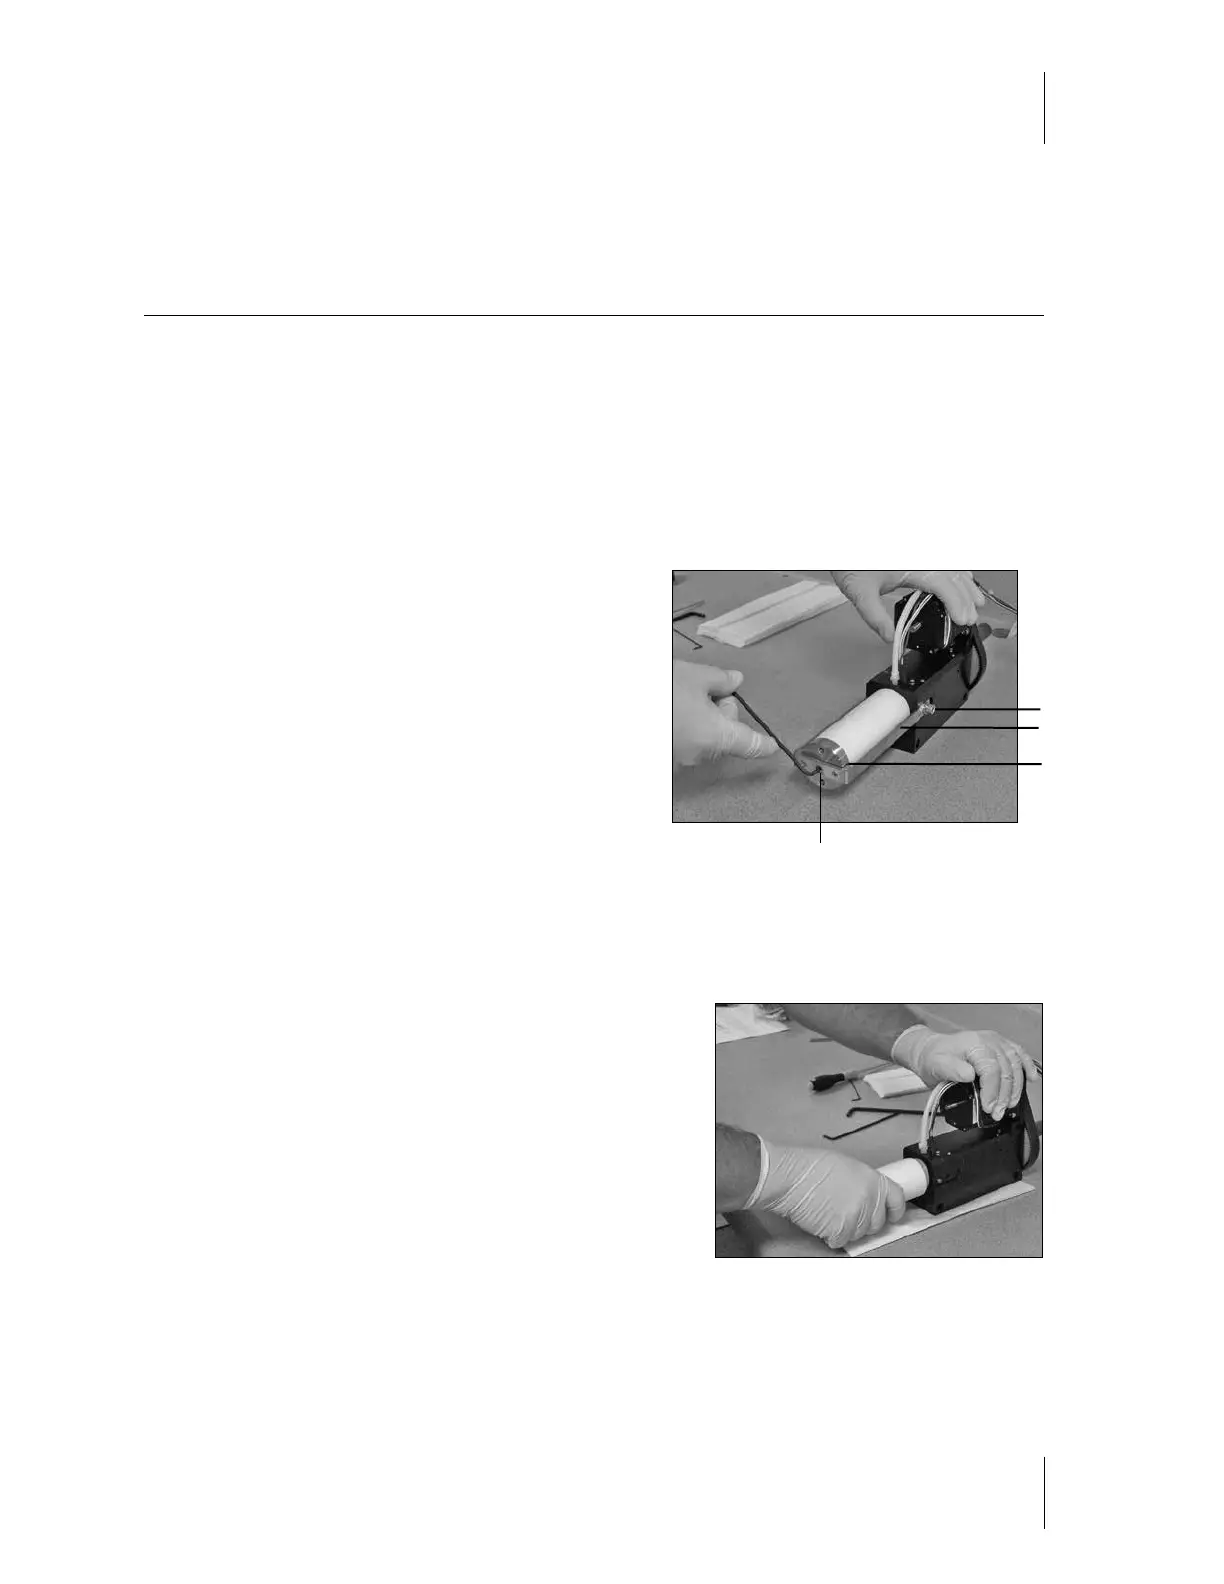
Using a 3/32” Alan wrench, loosen the set screw (DO NOT
remove set screw) at the front of the syringe. It is important
to perform this step first, as it will remove the tension from
the bracket pins and cap screws (figure 5-12).
Once the set screw is loose, using the 3/16” Alan wrench, loosen the two cap screws that secure the bracket to
the pump base.
Remove the bracket and cylinder cap by gently pulling the bracket ends out and away from the pins.
Carefully remove the ceramic syringe body by turning it in a
clockwise direction as you pull toward you (figure 5-13).
Warning: Never turn ceramic syringe body counter clockwise.
This will cause the Piston Head to unscrew and fall off inside of
the cylinder, making it very difficult to remove.
There will be some liquid inside the body, which will spill onto
the paper towels.
Set the syringe body aside on a clean dry surface.
The piston should be fully extended from the pump.
Figure 5-13
Figure 5-12
Set Screw
Cap Screw
Cylinder Cap
Bracket