5.14
Section 5
Maintenance
Pinnacle Operators Manual
Pickering Laboratories Inc.
PISTON HEAD UNIT DISSASEMBLY AND
SEAL REPLACEMENT
Note: All items to be replaced in the Pump Seal
Replacement Procedure can be found in the the
Pinnacle Pump Seal Kit (PN 1452-0122).
In the following steps, you will replace 5 items:
Brass-ended set screw
Piston Head O-Ring
Secondary Cylinder O-Ring
Piston Rod O-Ring
Three, 4 - 40 x 1/4" capnut screws and washers
Using a 1/16” Alan wrench (do not use ball wrench
because it is too weak) remove the set screw from the
Piston Head (figure 5-15).
Note: Very Important! Never re-use the set screw. It has
a soft brass end that is designed to be used only once.
A new set screw is included with the seal kit. Re-use of
the set screw can cause the piston head to come loose.
Remove the piston head by turning it in a counter-clockwise direction. It is threaded onto the leadscrew. If
needed, use a cresent wrench to lossen the piston head.
Place the piston head on the bench with the PEEK side down. Using a Phillips Head screwdriver, remove the
metal plate by removing the 3, 4 - 40 x 1/4" capnuts and washers. These cannot be reused and should be
replaced. The piston head will disassemble into 3 parts:
1. Metal Piston Face
2. Piston Head O-ring
3. PEEK Piston Head
Blow out debris from brass-ended set screw that may be inside the piston head. Remove and discard the old
O-ring. Sonicate the metal plate, PEEK piston head, and new O-rings in a beaker of water.
Note: Do not over tighten cap screws. Over tightening will strip the threads on the PEEK piston head.
Rinse with DI water and reassemble the Piston Head using the new O-ring and cap screws. Set the reassembled
Piston Head Unit aside until Pump Reassembly.
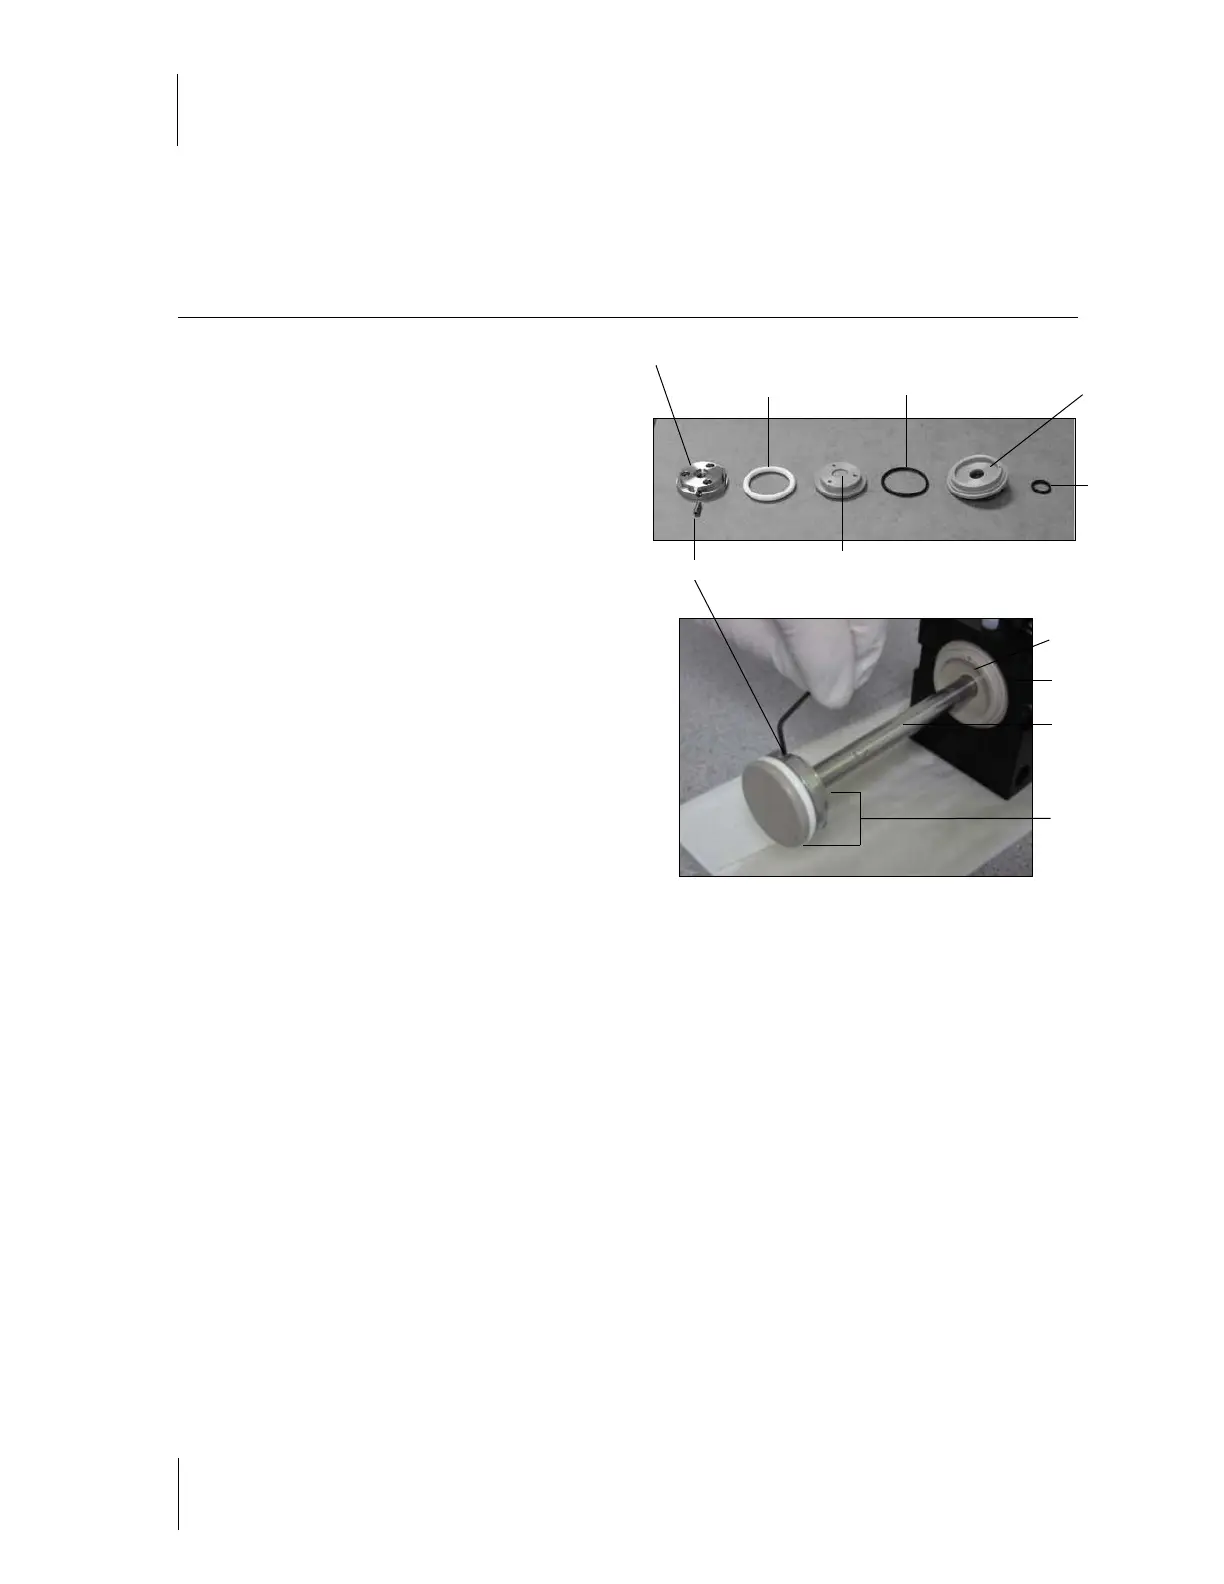
Figure 5-14
Set Screw
Figure 5-15
PEEK Piston Head
Piston Head O-Ring
Metal Piston Face
Secondary Cylinder O-Ring
Piston Rod
O-Ring
Piston O-Ring
Guide
O-Ring Guide
Pump Base
Lead Screw
Piston Head
Unit