5.15
Section 5
Maintenance
Pinnacle Operators Manual
Pickering Laboratories Inc.
SECONDARY O-RING REPLACEMENT
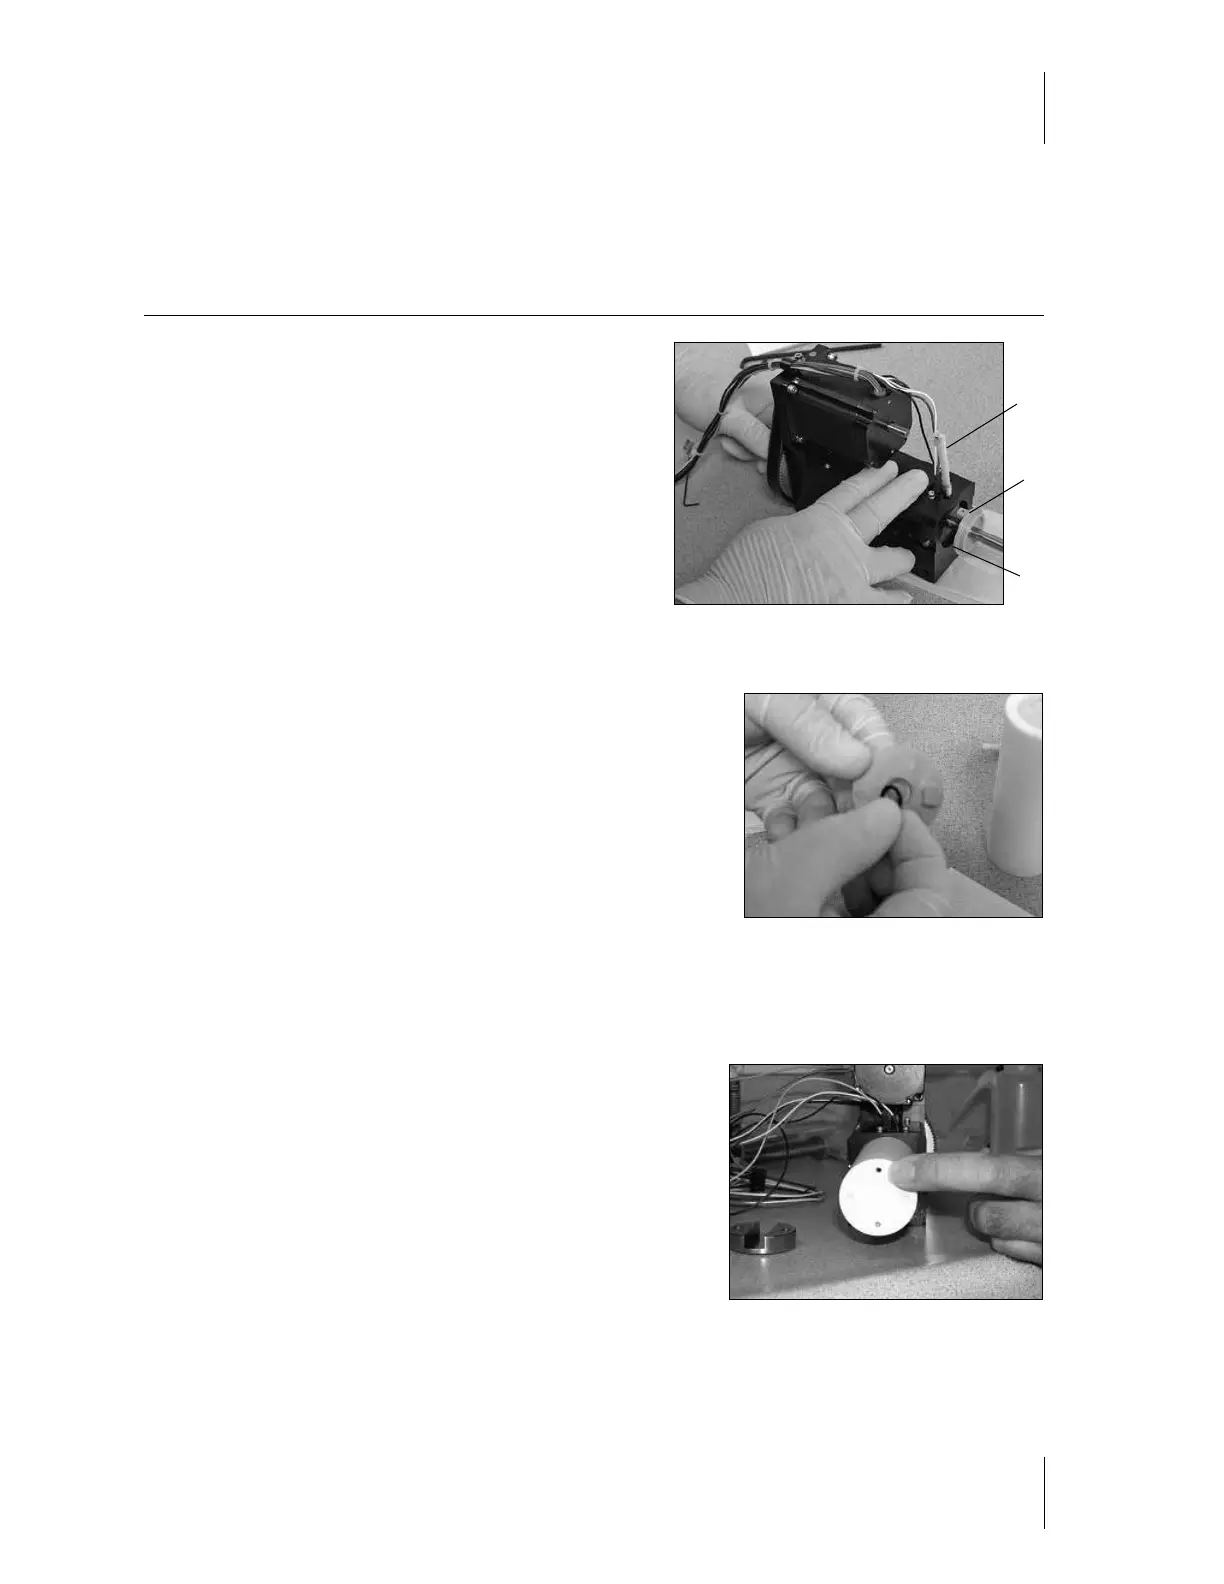
To replace the secondary O-ring at the base of the pump,
first remove the piston wash connection and then “back
piston” by turning the lead screw 4 to 5 full turns manually.
Reverse direction of turn by 4 to 5 full turns by turning the
lead screw in the opposite direction. This will extend the
O-ring guide at the base of the pump (figure 5-16).
Note: O-ring guide will not come out with piston wash
connection still attached.
Slide the O-ring guide out and replce the small piston rod
O-ring that is located at the back of the guide (figure 5-17). Slide the guide back to the base of the pump and
replace the large secondary O-ring with the new one (figures 5-14
and 5-16).
PUMP REASSEMBLY
Screw the newly assembled Piston Head Unit onto the head screw
(hand tight).
Using a new brass-ended setscrew, tighten the setscrew with the
1/16" Alan wrench. It is important to make this tight.
Lubricate the ceramic body with some methanol or isopropanol. Turning it in a clockwise direction, push it
back over the piston, using care to keep it horizontal. Ensure that the through holes are
orientated top and bottom (figure 5-18).
Place the cylinder cap onto the head of the cylinder and the
bracket on the pins, but do not tighten the cap screws. Reference
figure 5-12.
The set screw at front of cylinder has “adjusment” depression
to center bracket. Center the bracket by sliding it back and forth
a little bit until you feel it in the depression. Once it is centered,
tighten the set screw. Tighten the set screw so that the syringe is
tight against the base of the pump.
Finally, tighten the cap screws using the 3/16" alan wrench.
Figure 5-16
Piston Wash
Tubing
O-ring Guide
Placement of
Secondary
O-ring
Figure 5-17
Figure 5-18