Home
Planmeca
Dental equipment
Compact i3
Planmeca Compact i3 Installation Manual
5
of 1
of 1 rating
106 pages
Give review
Manual
Specs
To Next Page
To Next Page
To Previous Page
To Previous Page
Loading...
3.
Place the adapter mounting plate to its position (1). Secure the mounting
plate to its position with attachment screws ISO 7379 12.9 M10/12x25
(2) and M8x30 DIN 912 (3).
4.
Place the adapter cover plate to its position.
7
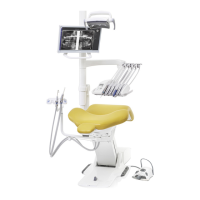
Installing OP delivery arm
Installation manual
Planmeca Compact i3
23
26
28
Table of Contents
Table of Contents
3
Introduction
5
Contents of Packing
5
Associated Documentation
5
Original Manufacturer
6
Pre-Installation Requirements
7
Floor Strength
7
Environmental Requirements
7
Transportation Conditions
7
Storage Conditions
7
Unit Operating Conditions
8
Plumbing Requirements
8
Air Supply
8
Water Supply
8
Suction
9
Electrical Requirements
9
Mains Voltage
9
Mains Frequency
10
Internal Mains Fuse Ratings
10
External Mains Fuse Recommendation
10
External Mains Switch
10
Grounding
11
Power Supply Cable
11
Power Consumption
11
Cabling for Options
11
Network Connection
12
Network Architecture Requirements
12
Patient Area
14
Fire Stopping of Installation Site
15
Unit Configuration
17
Attaching Chair to Floor
18
Installing Junction Box
20
Attaching Junction Box to Floor
20
Connecting Mains Cable
23
Connecting Chair Cables
23
Installing Foot Control
25
Installing OP Delivery Arm
26
Attaching OP Delivery Arm to Chair
26
Installing Delivery Arm Cables
32
Installing Safety Switch
36
Attaching Covers
36
Dental Units Without Operating Light and Monitor
37
Connecting Water and Air Tubes
38
Installing Clean Water System
42
Installing Vertical Arm
47
Installing Monitor
57
Adjusting Friction of Monitor Arm Joint
61
Chair Swivel
63
Installing Suction Element
64
Attaching Suction Tubes and Assistant's Syringe
73
Attaching Chair Upholsteries
74
Attaching Upholstery Support Plate
74
Attaching Seat Upholstery
75
Attaching Backrest Upholstery
79
Attaching Armrests
80
Attaching Headrest
82
Attaching Tray Table Assembly to OP Delivery Arm Balanced Arm Instrument Console
84
Installing Instruments
85
Attaching Balanced Instrument Arms
85
Attaching Hanging Tube Instrument Holders
86
Attaching Instrument Hoses
87
Installing Apex Locator Assembly
88
Instrument Console with Balanced Instrument Arms
88
Instrument Console with Hanging-Tube Instruments
90
Testing Apex Locator Function
91
Bleeding Spray Water System
94
Final Adjustments
95
Adjusting Friction of OP Delivery Arm Joints
95
Switching on Dental Unit
97
Adding Service Contact Details
98
Resetting Yearly Maintenance Counter
99
Planid Reader Settings
100
Post-Installation Checklist
101
Other manuals for Planmeca Compact i3
User Manual
252 pages
5
Based on 1 rating
Ask a question
Give review
Questions and Answers:
Need help?
Do you have a question about the Planmeca Compact i3 and is the answer not in the manual?
Ask a question
Planmeca Compact i3 Specifications
General
Brand
Planmeca
Model
Compact i3
Category
Dental equipment
Language
English
Related product manuals
Planmeca Compact i5
326 pages
Planmeca Chairside PlanScan
180 pages
Planmeca Chairside PlanMill 40
180 pages
Planmeca Sovereign
184 pages
Planmeca Viso
112 pages
Planmeca ProScanner
62 pages
Planmeca Sovereign Classic
298 pages
Planmeca Viso G7
112 pages
Planmeca ProScanner 2.0
68 pages