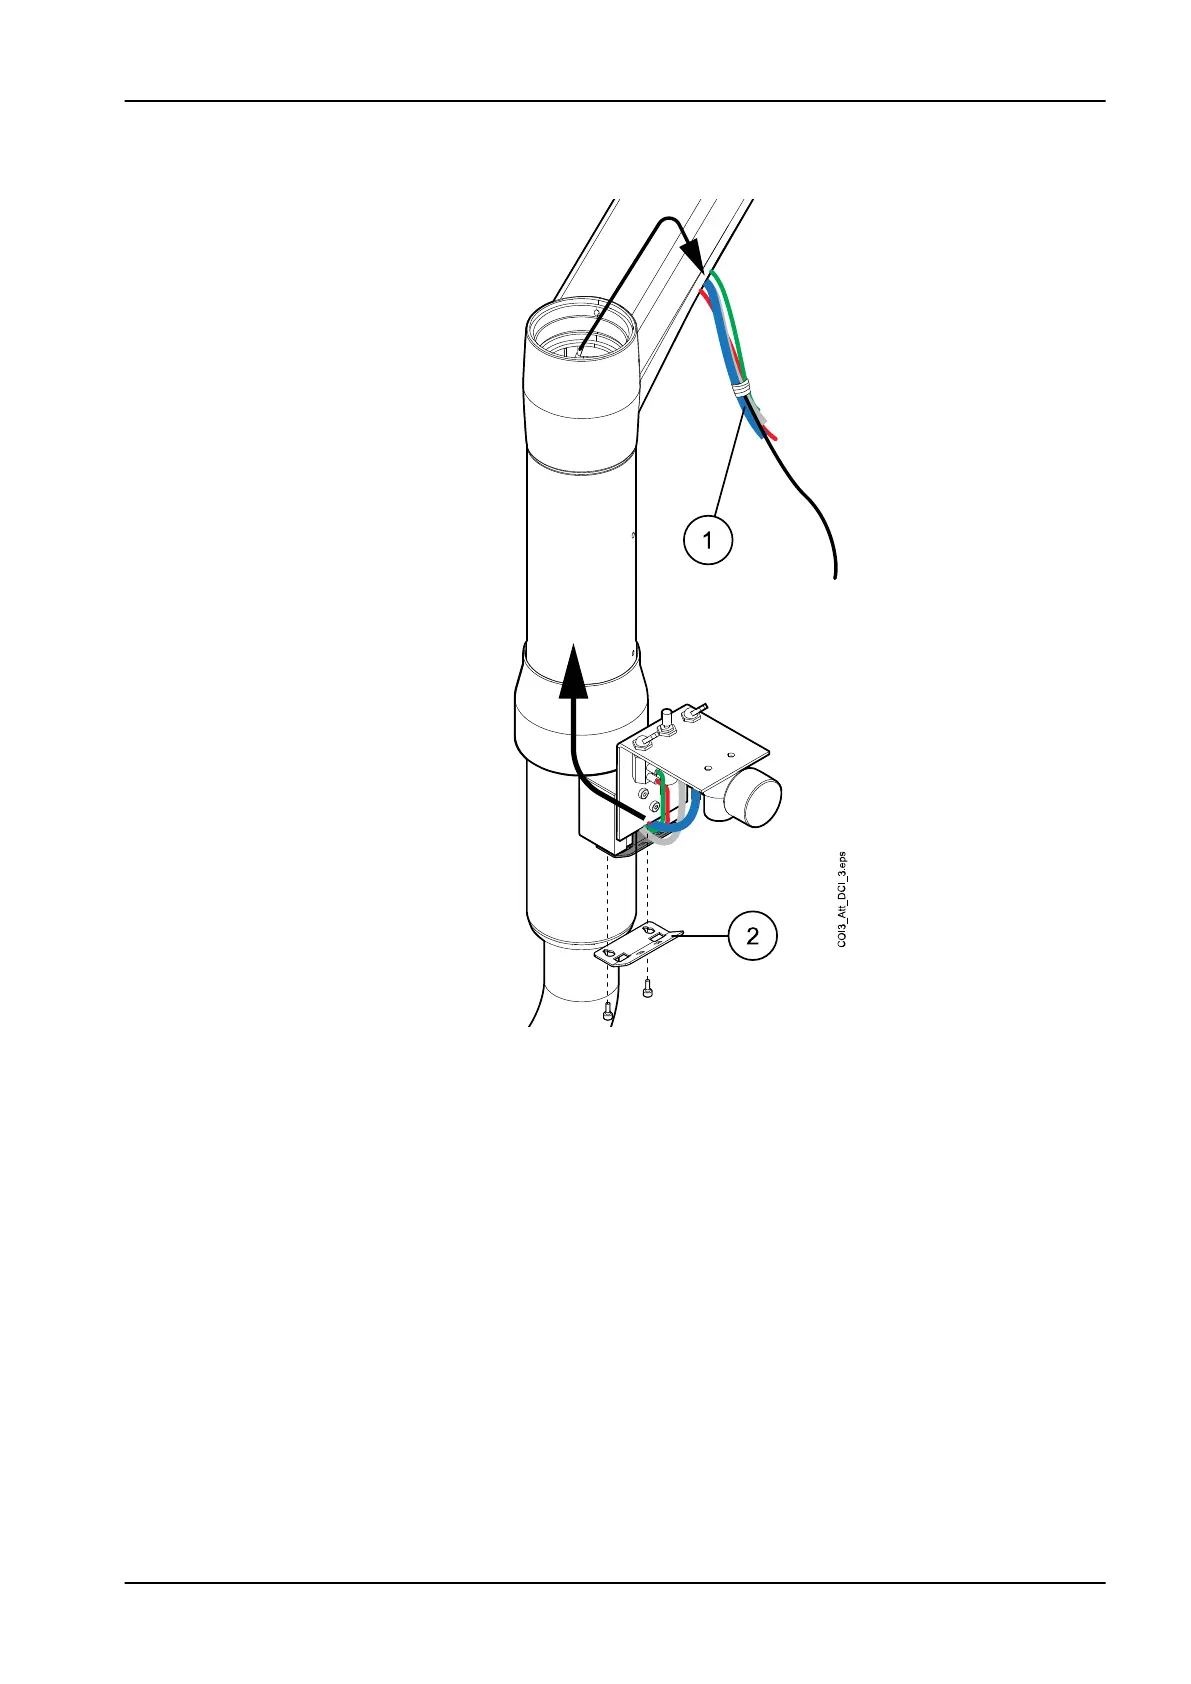
Attach the hose guide (2) to the clean-water bottle mount with two
screws DIN 912 M4x10.
5. Attach the tubing in the delivery arm. Refer to the figure about assistant's
syringe installation on section "Installing suction element" on page 60.
5.a. Cut the protective tube.
5.b. Cut the black air tube and the green water tube.
5.c. Connect the water tubes to the manifold: green water tube coming
from the magnetic valve / pressure regulator assembly, green
water tube going to the instrument console, green water tube
coming from the clean-water bottle and red water tube coming
from the clean-water bottle.
5.d. Connect the air tubes to the Y-nipple: black air tube coming from
the magnetic valve / pressure regulator assembly, black air tube
going to the instrument console, grey air tube coming from the
clean-water bottle.
6. If you are not going to install the vertical arm, attach the arm panel with
four arm panel attachment screws.
8 Installing Clean water system
Installation manual Planmeca Compact i3 41