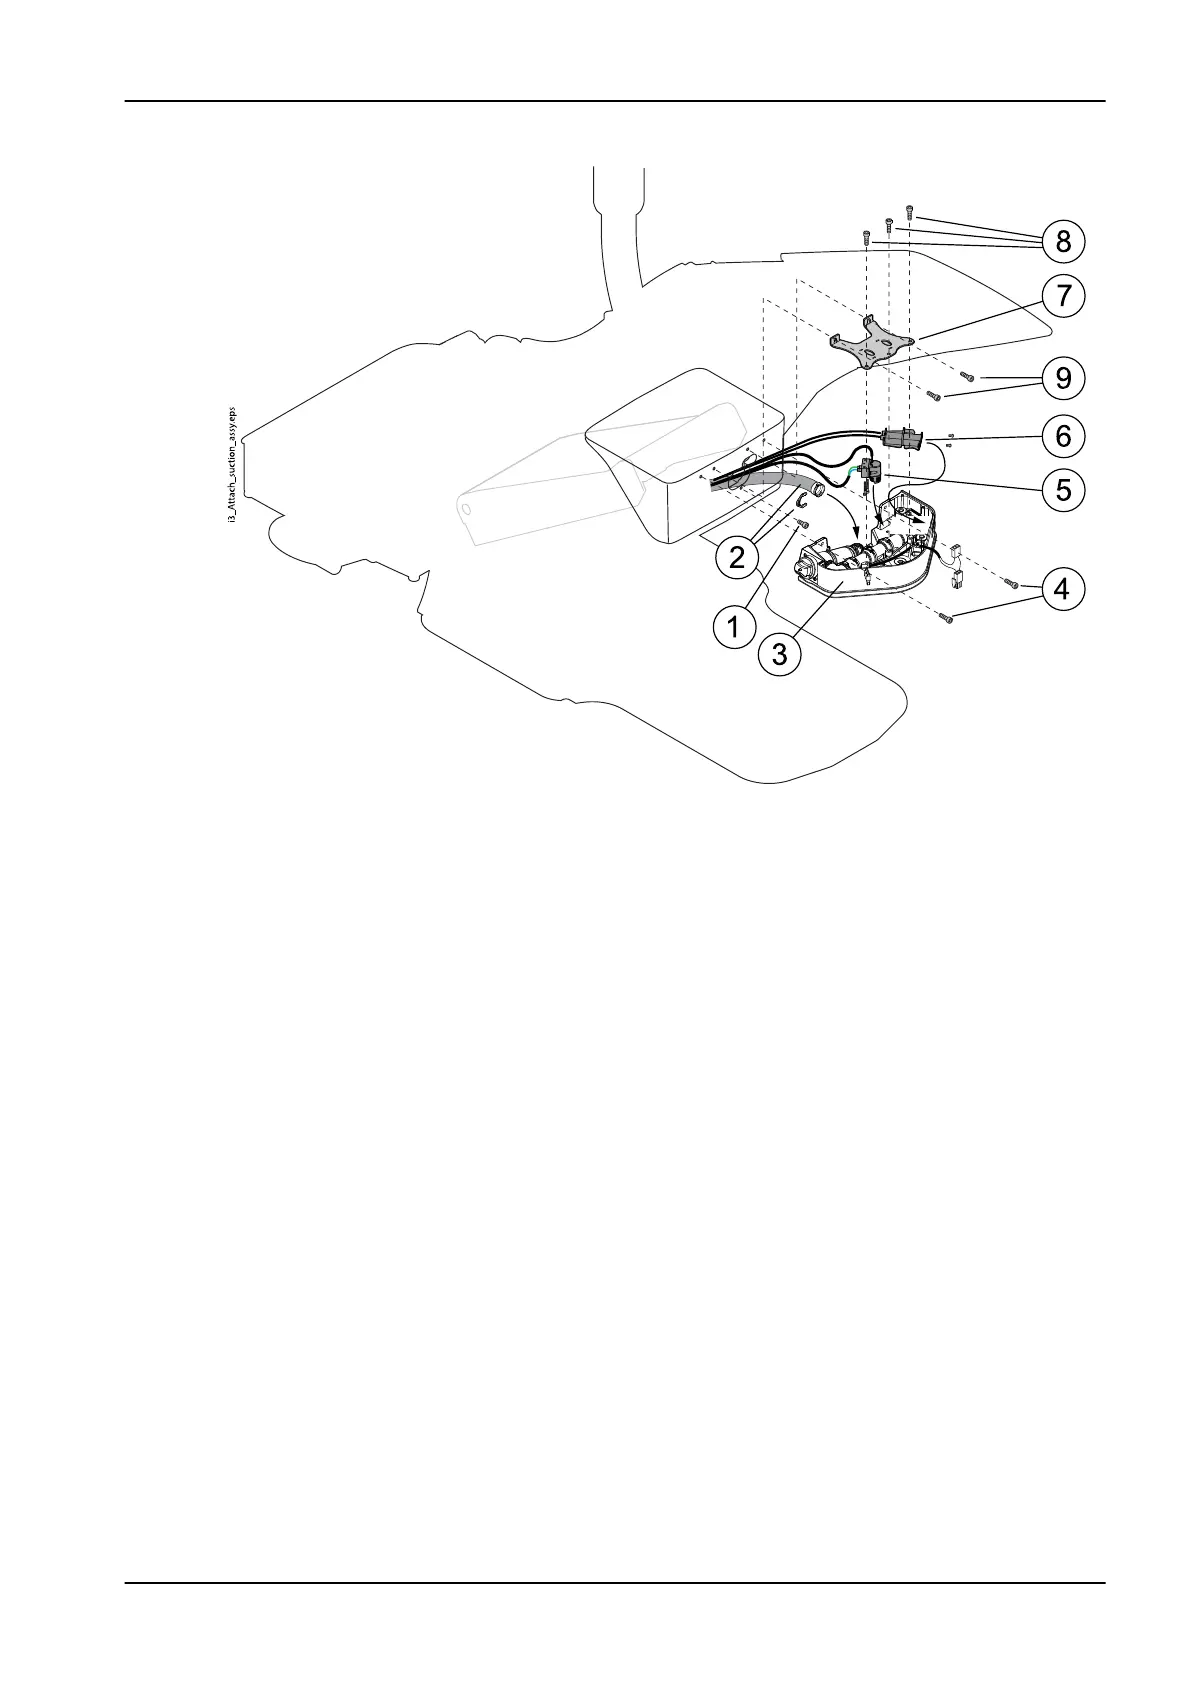
7. Install the suction arm.
7.a.
Bring the suction arm (1) to the suction element and place the
slide bearing (2) between the suction arm and the suction
element.
7.b. Route the suction arm cables through the opening in the suction
element.
7.c. Attach the suction arm from inside the suction element with one
M8x55 DIN7984 screw (3) (using an 8 mm Allen key), two
washers (4), two bearing plates (5) and one bearing (6).
7.d. Attach the suction arm with one M6x8 DIN916 screw using a 5
mm Allen key (7).
7.e. Connect the suction arm cables (8).
7.f. Attach the support plate as described in step 5f.
7.g. Secure the suction connectors to the support plate with cable ties.
7.h. Secure the cables coming from the suction arm with a cable tie
(9). Make sure that the safety plate can move freely.
7.i. Attach the suction element cover (10) with four M4x10 DIN7991
screws using a 3 mm Allen key (11).
12 Installing suction element
Installation manual Planmeca Compact i3 67