Chapter F - PATIENT SUPPORT ARM
ProMax X-ray unit with Dimax3 F-11
REPLACING THE GUI SOFTWARE
Technical Manual
3.2 Replacing GUI software chip, only for black/white GUI
WARNING
Always turn the X-ray unit off before removing the software chip from its socket.
Never turn the unit on, if the software chips are not in their sockets.
NOTE Antistatic precautions must be performed when handling the software chip. Touch any
grounded metal part of the unit before touching the software chip.
NOTE The GUI software update by changing the software chip can be ONLY done for a black/
white GUI.
Detach the user interface according to the instructions given in section 2.2 “Support arm
lower cover” on page F-8.
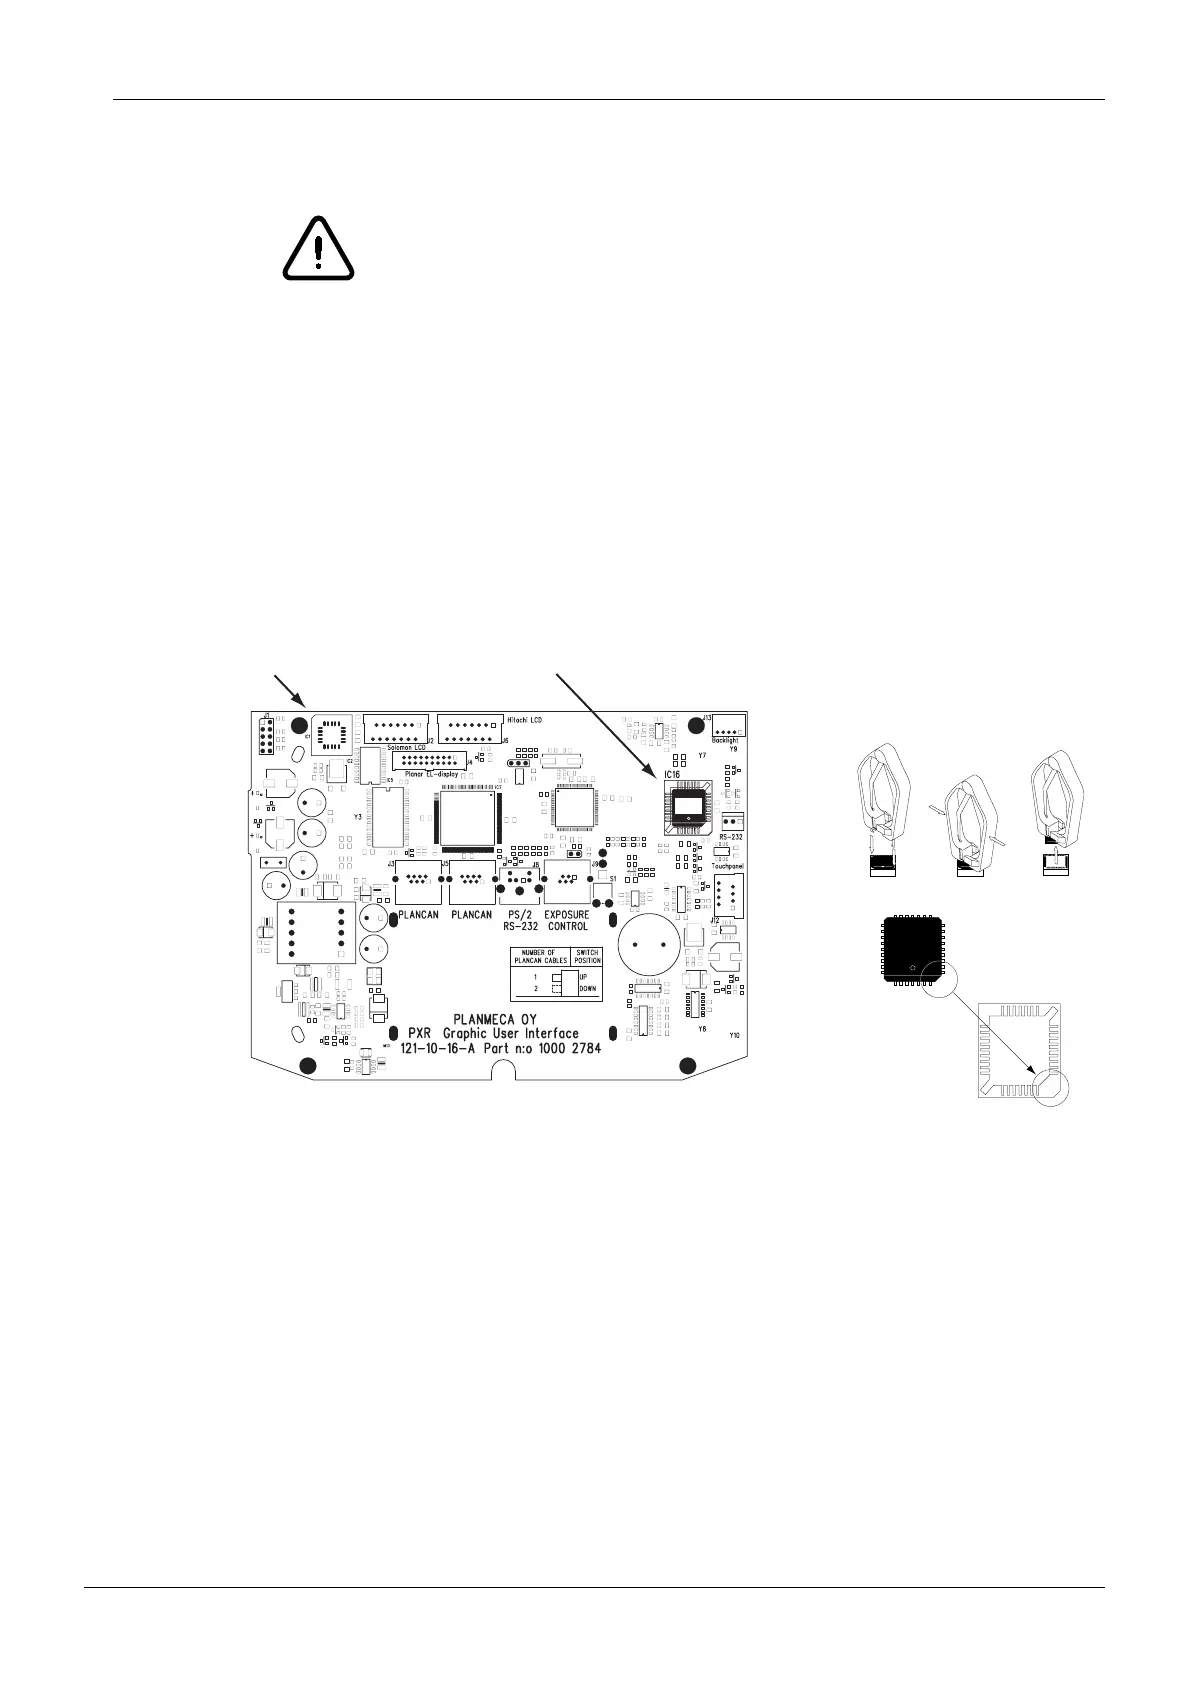
Remove the software chip from its socket marked IC16 with the special tool.
Figure 14
NOTE If an IC1 chip is present then remove it also.
Carefully place the new software chip into the socket.
Attach the user interface to the patient support arm
Lohi.ep
+
FLASH 4
FLASH 3
FLASH 1
FLASH 2
GUI
GUI.eps
IC 16IC 1

 Loading...


