Chapter G - COLUMN
ProMax X-ray unit with Dimax3 G-3
ADJUSTMENTS
Technical Manual
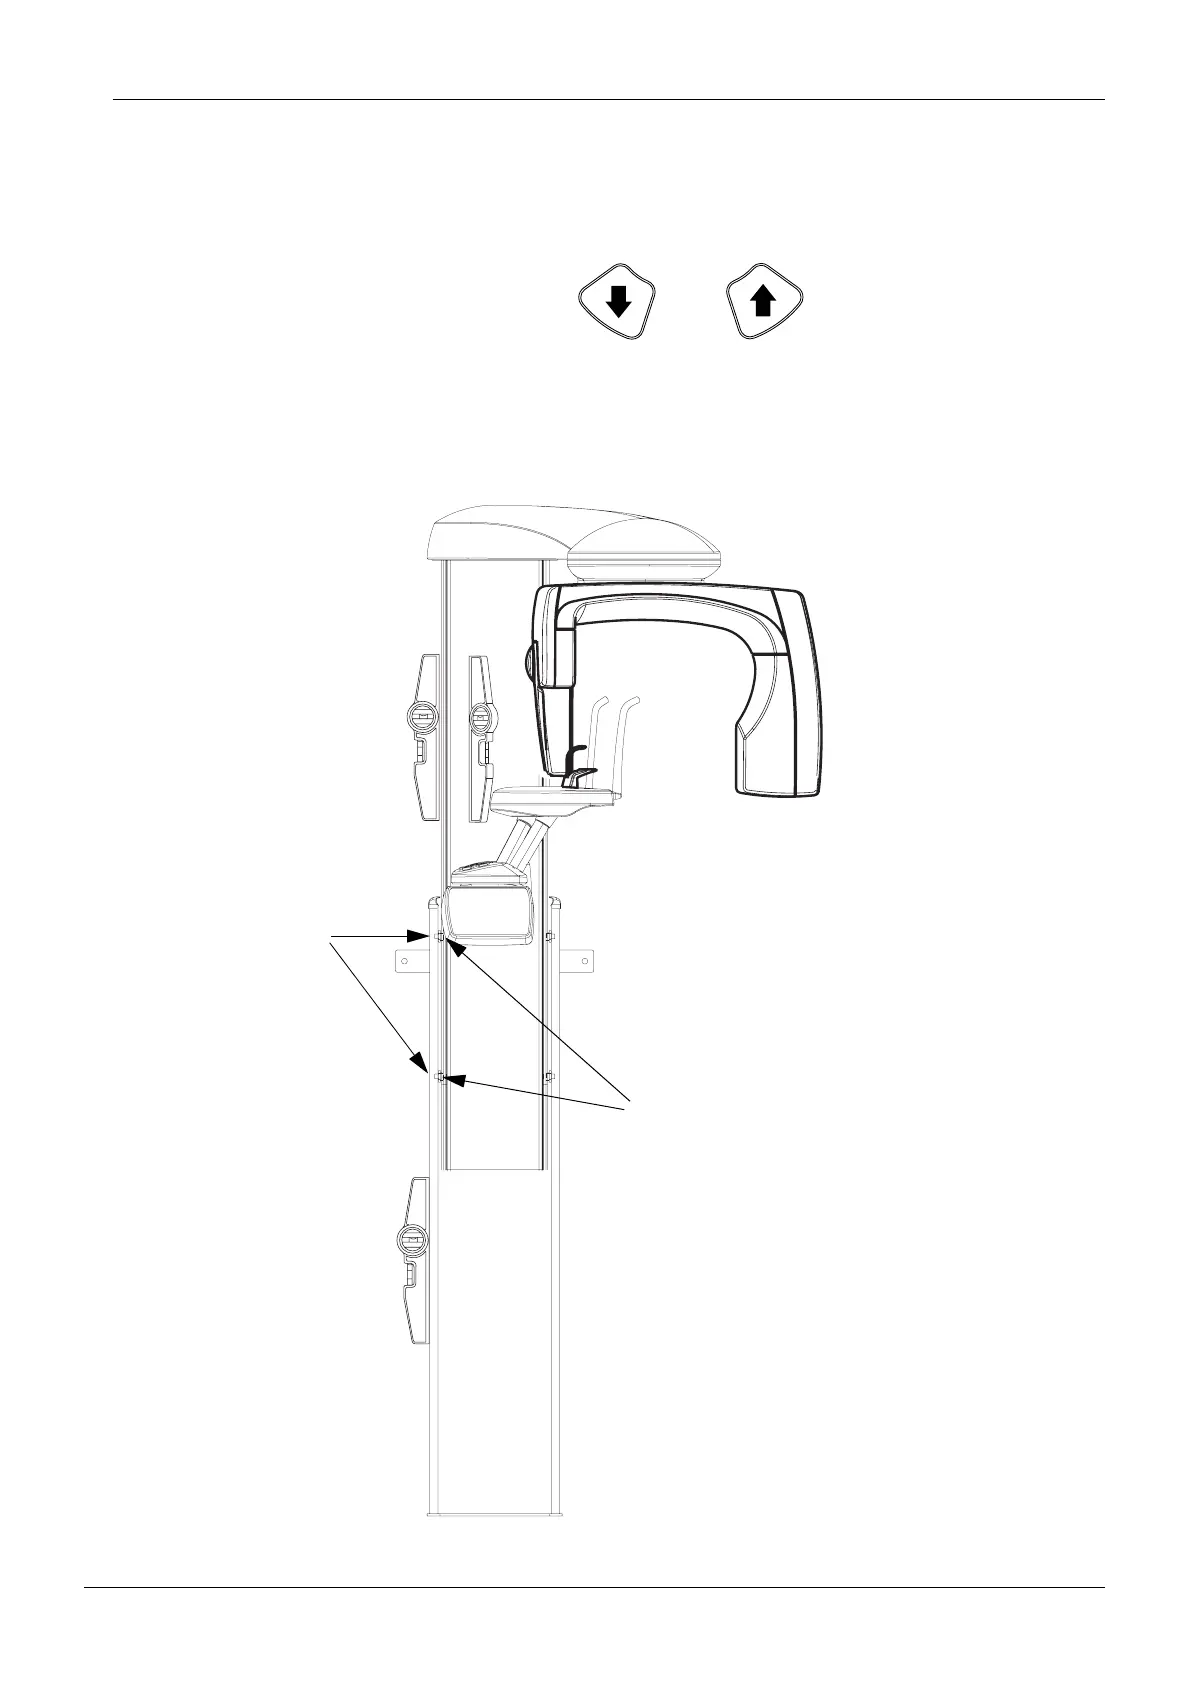
1.2 Adjusting the telescopic column position
With the height adjusting buttons drive the unit to the position shown on Fig. 3 below.
With a spirit level make sure that the telescopic column is parallel with the stationary column
both in depth and sideways. To adjust the sideways position loosen the two attachment
screws on the left side of the column. Rotate the nuts located between the columns so that
the space between the columns on the left side is equal to the space on the right side, and the
telescopic column is parallel with the stationary column. Tighten the upper attachment screw.
Figure 3
Height adjusting buttons
Down
Up
Digi_adj_telesc_sidew.eps
Loosen left side
Adjust the column sideways
position with these nuts.
attachment screws.

 Loading...


