THE ART OF WELDING
P6 HW
BT 22
BT 24
BT 25
BT 13
PN-0110008 Rev. 12 57-100
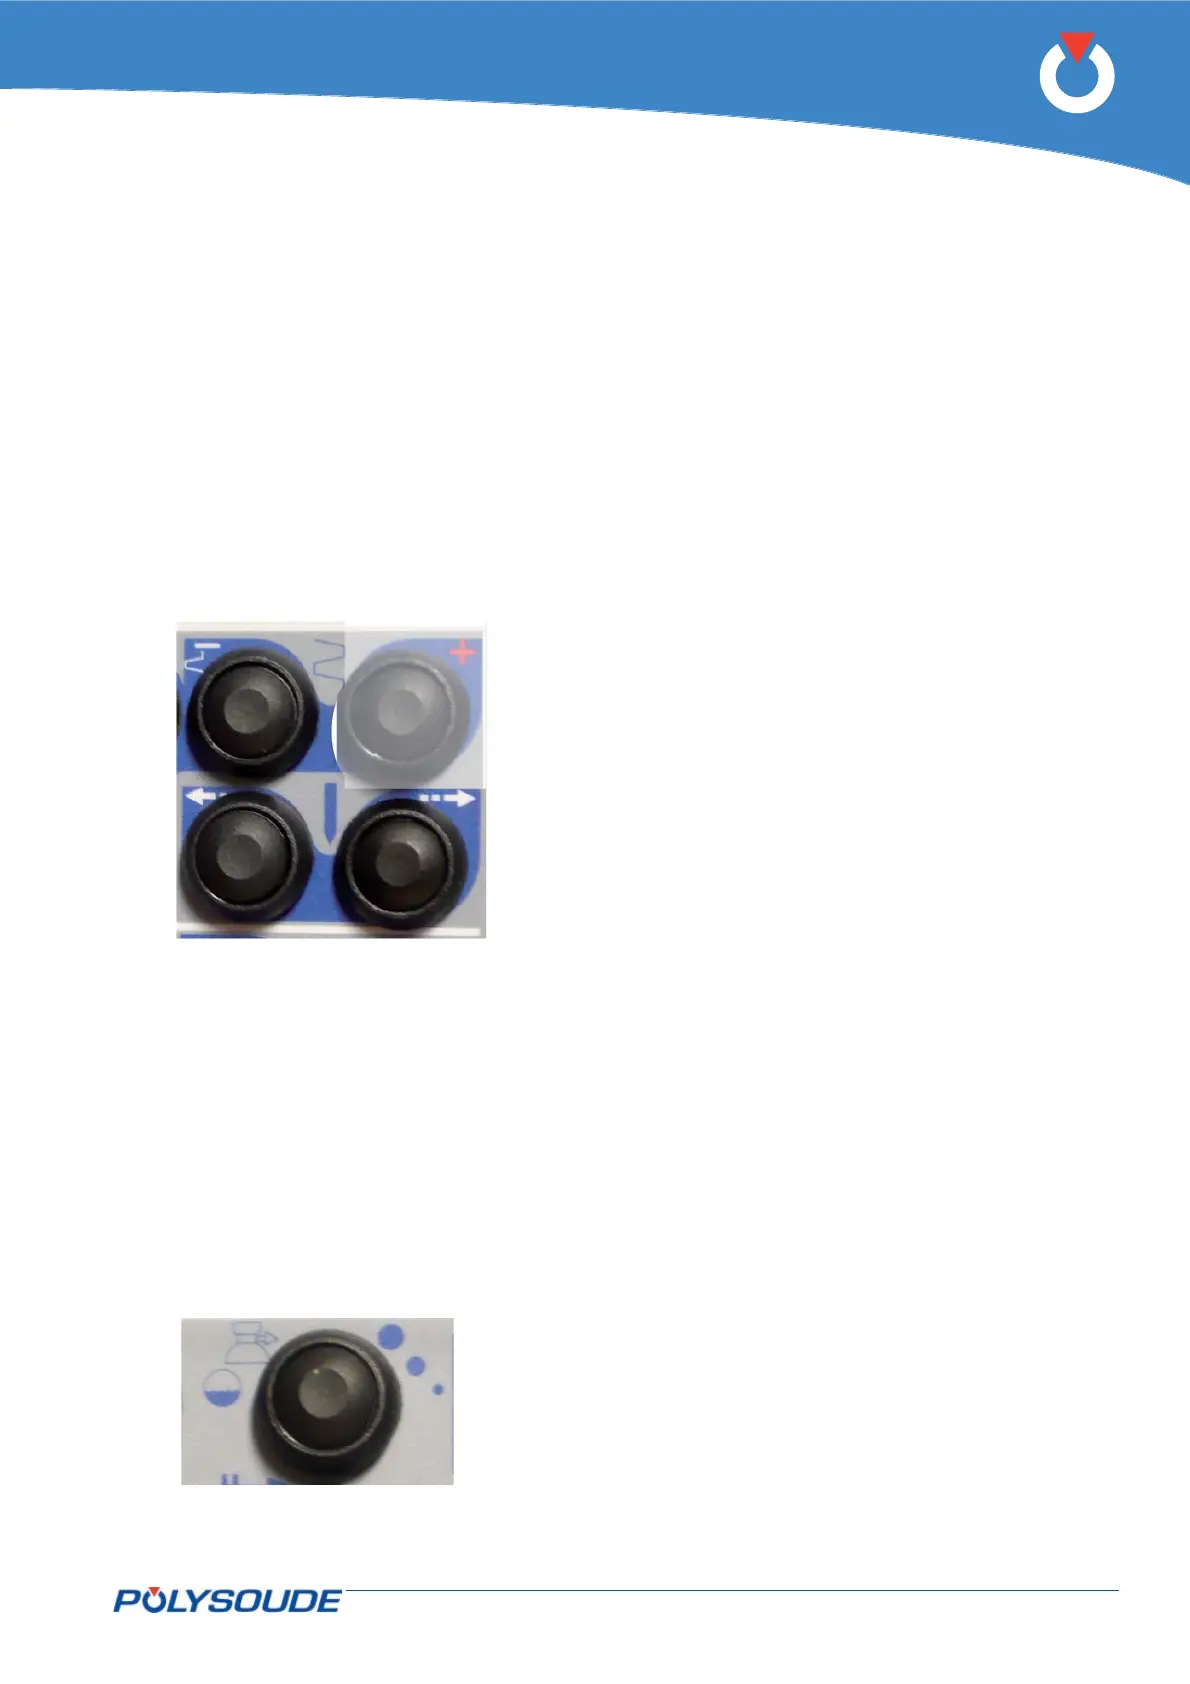
Adjustment of the oscillation5. 1. 5.
Using buttons BT 24 and BT 25 on the remote
control, you can position the electrode in the axis of
the joint. This position is considered as the reference
point for the program. This operation is simplest for
welding without bevels. For welding with bevels and
edges it is possible to self-centre the torch. In order
to do this, position the torch between the two edges
using BT 22. Pressing BT 22 results in automatic
centring of the electrode by touching the sides. This
implies that the workpiece voltage measurement
wire and electrode must be connected.
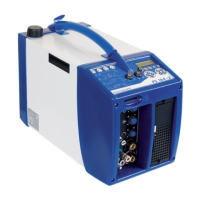
Adjustment of the gas fl ow5. 1. 6.
The gas fl ow is adjusted with a fl ow meter installed
on the gas bottle or the supply network. Pressing BT
13 starts the gas fl ow manually.
Fig. 5.3 - Controls used for adjusting the oscillation
Fig. 5.4 - Push button for testing gas - testing cool-
ant - and restarting the coolant pump
Switching on the coolant pump5. 1. 7.
After changing a welding head, and particularly if
an extension cable is used, the coolant pipes may
be empty. Therefore a fault in the cooling system
may be detected when starting a cycle again. Using
pushbutton BT 13 which restarts the coolant pump,
you can fi ll the pipes before starting the fi rst cycle.