PowerFleet
®
VAC4 and VAC4S Hardware User’s Guide
SECTION 7: VAC TROUBLESHOOTING
Recommended maintenance tool list
Socket sets (metric, fractional inch)
Combination wrenches (metric, fractional inch)
Pliers (channel lock, needle nose)
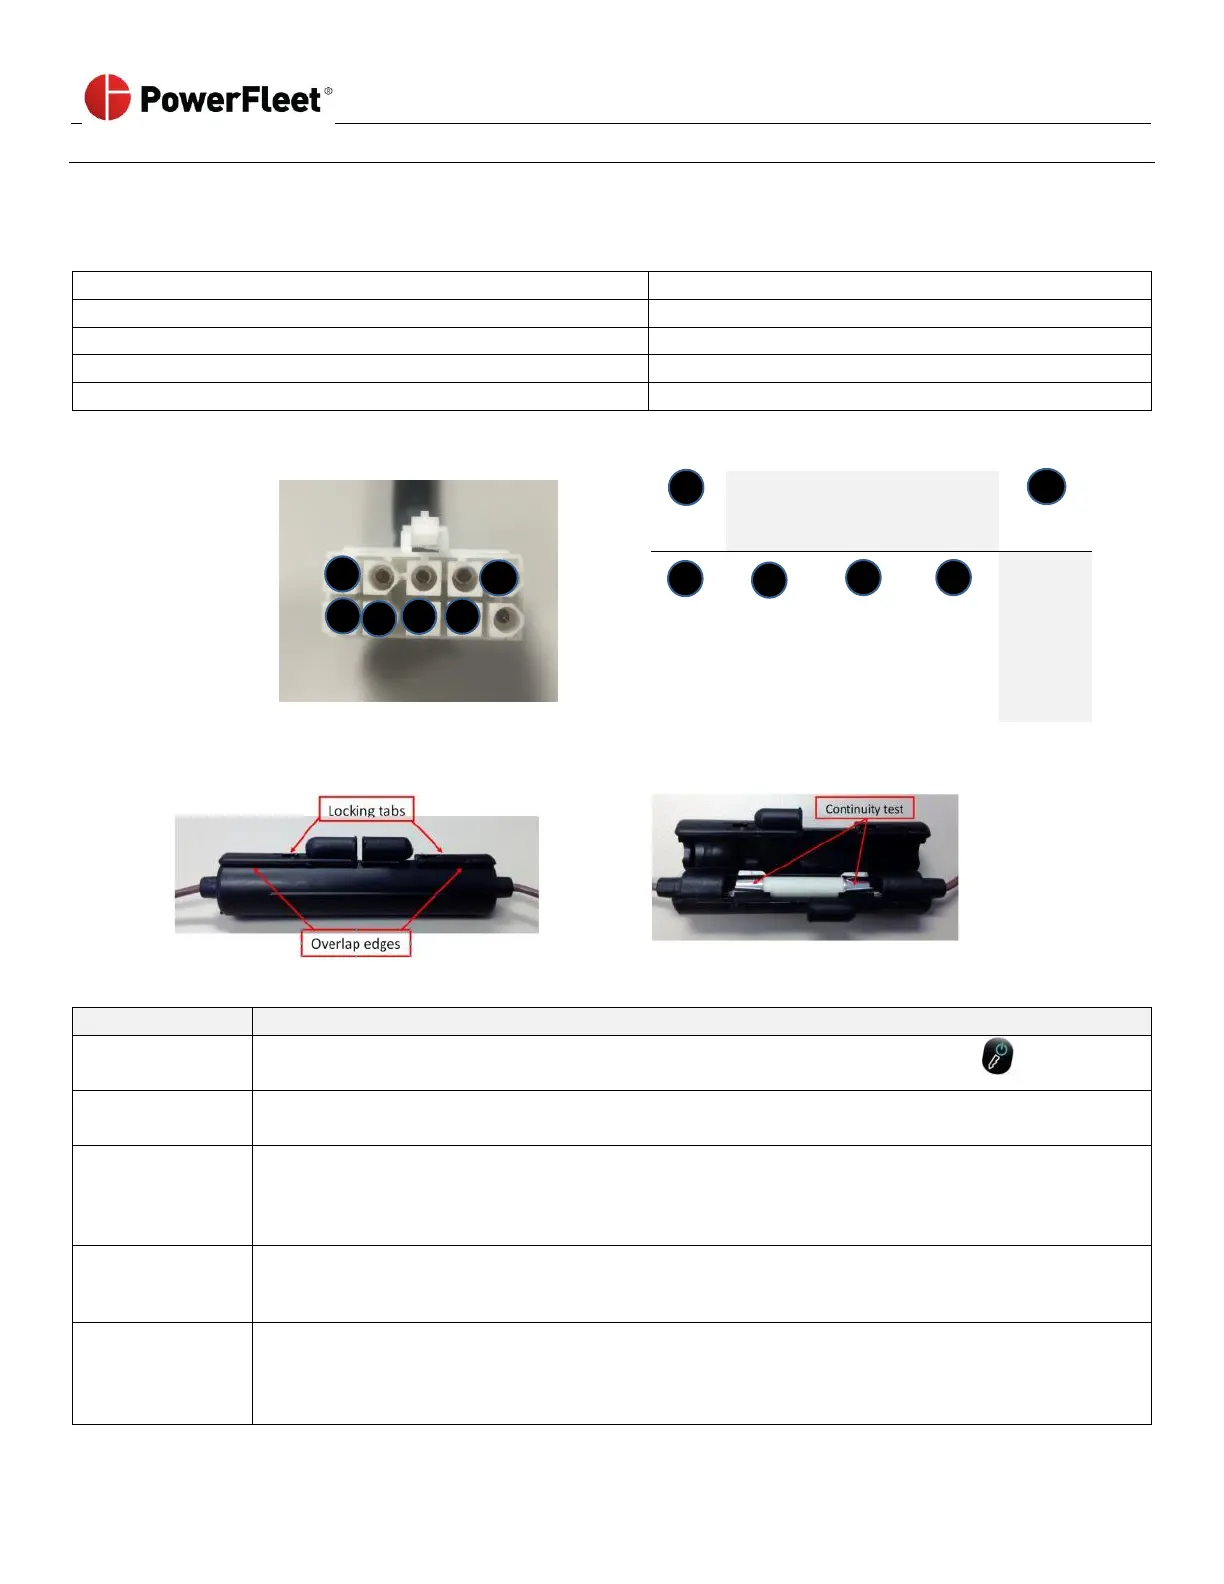
VAC to Wired vehicle cable pinout and fuses
“B-”
(black)
-AND-
“0”
(green)
Open the fuse holders by placing a flat object under the overlap edges (on each side of the fuse holder)
and lift until you clear the locking tabs.
VAC screen and LEDs do not illuminate
• Press the VAC’s POWER button or turn the vehicle’s ignition key to the ON position
(See Section 2 “Logging onto the VAC”).
Vehicle battery
NOT connected
• Check that the vehicle battery is connected.
• Check the voltage level on the “1” (B+) and “9” (B-) pins of the VAC to vehicle cable.
• Open the fuse holders for the B+ and B- wires.
• Check continuity between the ends of the fuse using a multi-meter, if continuity fails:
o Make sure a short with the vehicle chassis is not blowing the fuse by checking for proper isolation.
o Replace fuse (with 3AB type 2A, 250V ceramic fuse)
VAC to vehicle
cable damaged
• Use an ohmmeter to check resistance to verify cable integrity.
Note: An “open” or zero reading indicates a damaged cable on the “B+” and “B-” wires.
• Replace the cable as needed and retest.
• Complete an RMA Request form (Appendix A).
• Call PowerFleet Customer Service for the RMA number.
• Only the VAC should be returned for analysis /repair; Once the VAC is removed, the system MUST be
hard-bypassed to use vehicle. (see Appendix B for bypass instructions)