Section 12: BRAKE AND AIR SYSTEM
20 X3-45 Commuter PA1593 DOB 2400-2489 Section 12 Updated Sept. 2015
For common corrections, refer to the following
check list.
Excessive leakage on brake service side:
• With the primary air system at normal
operating pressure (95 - 125 psi (655 -
860 kPa)) and foot brake applied, coat all air
line connections and brake pneumatic
components with a water and soap solution.
Bubbles will indicate an air leak, and none
should be permissible. Repair or replace
defective parts.
• Listen for leaks and correct as required.
• Redo test to check all items repaired or
replaced.
To maintain your vehicle’s air disc brakes at
their original performance standard, we
strongly recommend use of only genuine,
approved service replacement parts on Bendix
and Knorr-Bremse air disc brake systems.
If non-
approved friction materials or
replacement compon
Prevost C
ar nor Bendix Spicer Foundation
Brake LLC will accept any air disc brake-
related warranty returns or claims.
For more information on this policy, refer to
Bendix-Prevost product notification annexed at
the end of Section 12 of Maintenance Manual.
30. BRAKE AIR CHAMBER
If this vehicle is equipped with Knorr-Bremse
SN7000 disc brakes on all axles, it also uses
“Knorr-Bremse” brake chambers. The drive axle
chambers consist of two separate air chambers,
each having its own diaphragm and push rod.
They are used as a service brake chamber, an
emergency brake in case of air pressure loss
and a spring-applied parking brake. Refer to
figures 29 and 30.
The front and tag axle brake air chambers are
used only for service brake duty (Fig. 29).
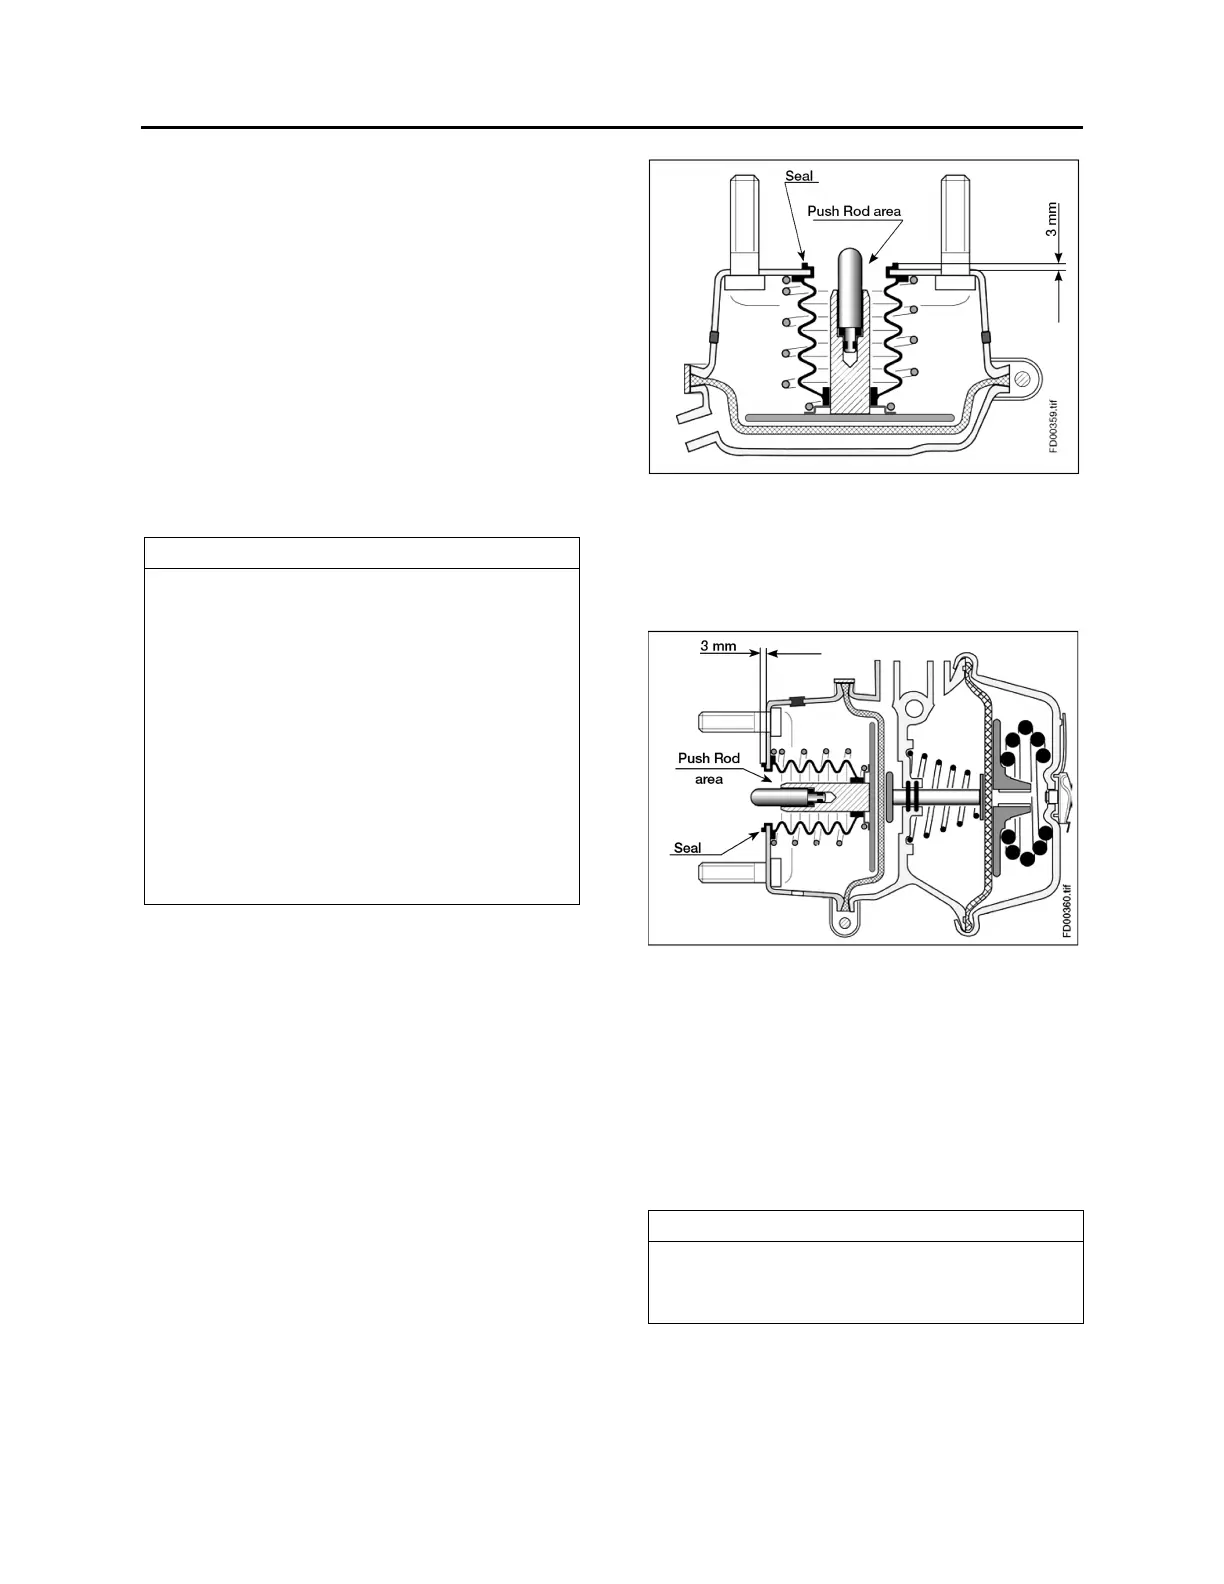
FIGURE 30: FRONT AXLE BRAKE AIR CHAMBER 12158
30.1 MAINTENANCE
Every 6,250 Miles (10 000 km) or twice a year,
whichever comes first depending on type of
operation:
FIGURE 31: DRIVE AXLE BRAKE AIR CHAMBER 12126
Check all hoses and lines. They should be
secure and in good condition.
Every 100,000 Miles (160 000 km) or once a
year, whichever comes first depending on
type of operation:
1. Disassemble and clean all parts.
2. Install new diaphragm or any other part if
worn or deteriorated.
When the diaphragm, spring, or both are
replaced, they should be replaced in the
corresponding chamber on the same axle.
3. Perform an airtighteness test:
a) Make and hold a full brake application.
b) Coat clamping ring(s) with a soapy solution.
If leakage is detected, tighten clamping ring