Section 05: COOLING SYSTEM
6 X3-45 Commuter PA1593 DOB 2400-2489 Section 05 Updated Sept.2016
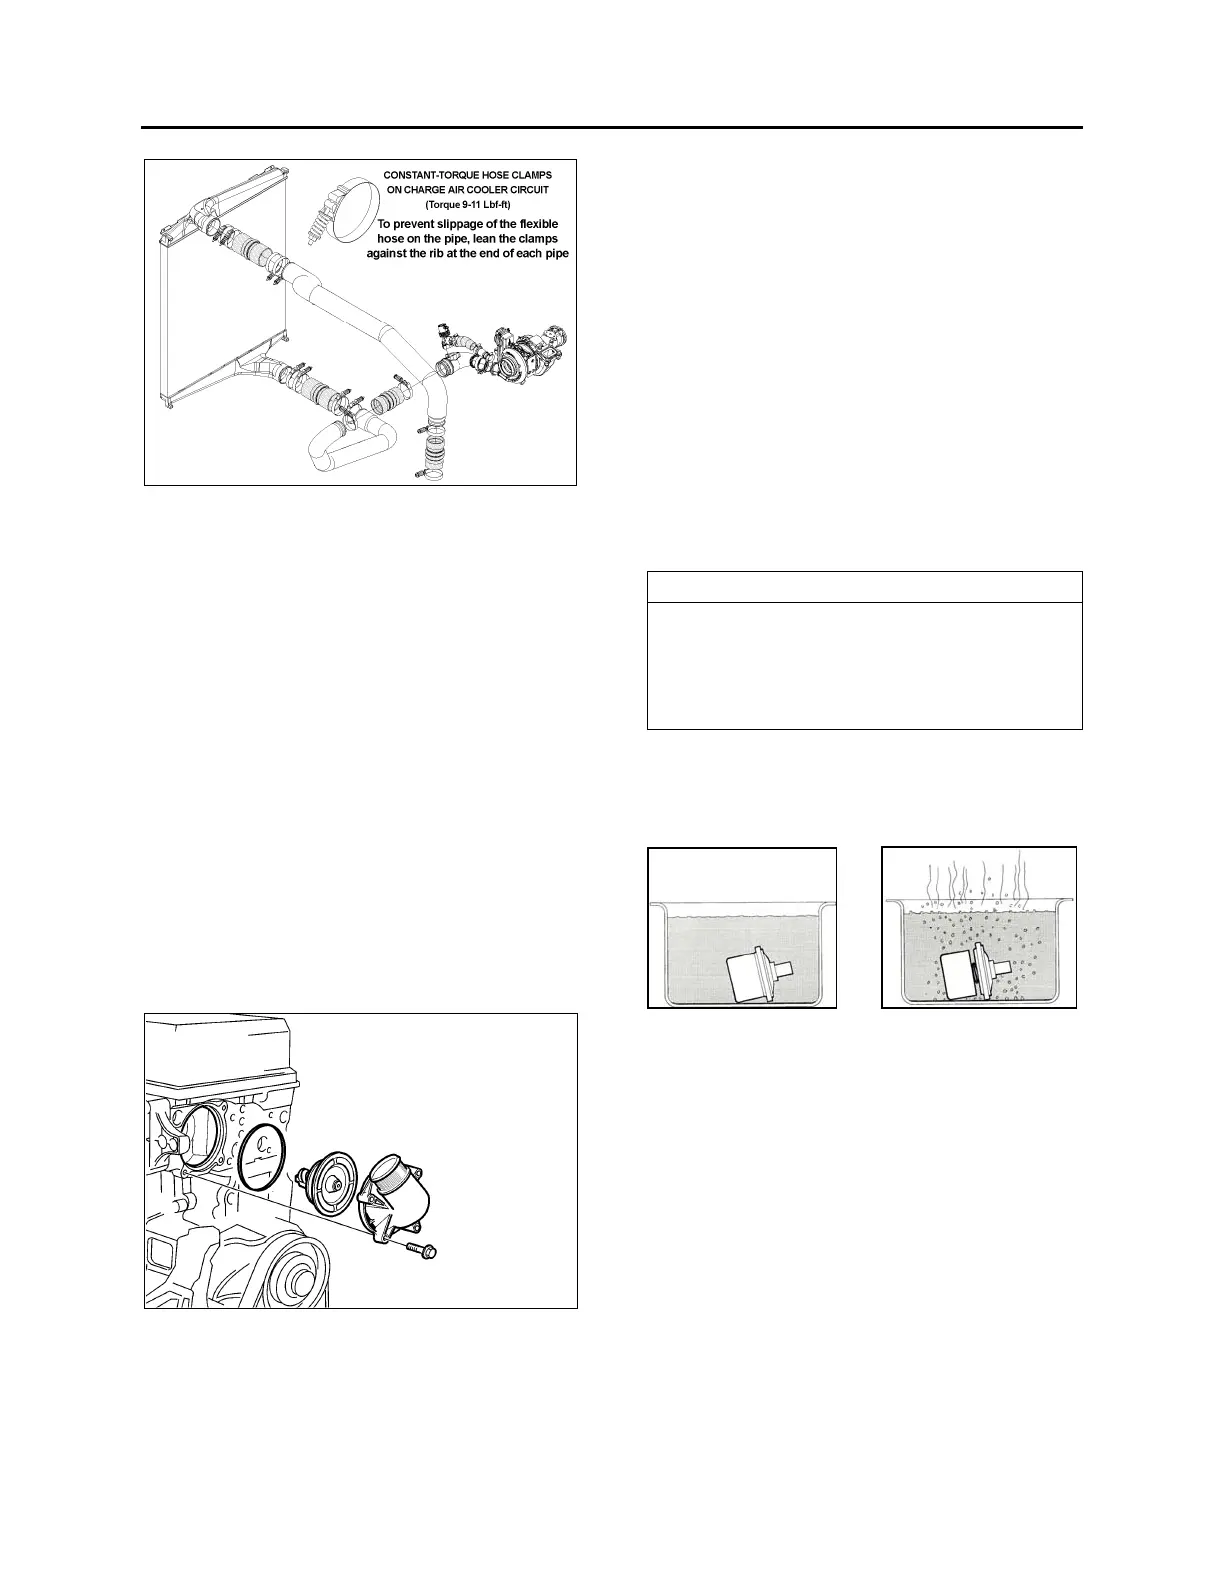
FIGURE 5: CHARGE AIR COOLER HOSE CLAMPS
3.2.1 Maintenance
Since the constant-torque clamp automatically
adjusts to keep a consistent sealing pressure,
there is no need to retorque hose clamps on a
regular basis. During vehicle operation and
shutdown, the screw tip will adjust according to
the temperature and pressure changes.
Checking for proper torque should be done
at room temperature.
4. THERMOSTAT OPERATION
4.1 THERMOSTAT REPLACEMENT
1. Drain the cooling system.
2. Remove the bolts, the thermostat housing
and the thermostat. Carefully clean the
thermostat seat and all cylinder head-to-
thermostat housing mating surfaces.
FIGURE 6: VOLVO D13 THERMOSTAT HOUSING
3. Install the new thermostat. Make sure that
the rubber seal remains properly seated.
4. Position the thermostat housing to the
cylinder head, install the bolts and torque-
tighten to 24 ± 4 Nm (18 ±3 ft-lb).
5. Install the rubber radiator hose to the
thermostat housing. Position the clamp and
tighten to secure.
6. Fill the system with the recommended
coolant.
7. Start the engine, check for leaks and proper
operation. After shutdown, replenish fluids as
necessary.
4.2 CHECKING THERMOSTAT
A function check must be carried out before
installing a new thermostat.
NOTE
Check to be sure that the thermostat closes
fully. This can be done by holding it up to the
light to check that there is no visible gap at the
opening point. If the thermostat does not close
properly, replace it.
1. Warm up water in a receptacle to 75°C
(167°F) and immerse the thermostat in the
water. Use a piece of wire attached to the
thermostat.
2. After at least 30 seconds, check that the
thermostat is still closed.
3. Now warm the water to 100°C (212°F). After
at least 30 seconds at the boiling point,
check that the thermostat has opened at
least 7mm (9/32”). If the thermostat has not
opened, it must be replaced. A good
thermostat starts to close at 95°C (203°F)
and is fully closed at approximately 85°C
(185°F).
5. COOLANT
5.1 COOLANT LEVEL VERIFICATION
If coolant level has reached the bottom of the
sight glass, add coolant. Coolant level is correct