Section 16: SUSPENSION
PA1593
18
Bushing installation
1. Lightly spray the inner and outer surfaces of
radius rod bushing with water.
CAUTION
No lubricant whatsoever is to be used on the
rubber bushing.
2. Safely support the radius rod, and place
new bushing on top of the radius rod end
(Fig. 20).
3. Place a block of wood on top of bushing and
press on it manually.
4. If necessary, use an arbor press or a suitable
driving tool. Press or drive the bushing into
the radius rod end until it extends equally on
both sides of the rod.
5. It is also possible to proceed differently.
Place radius rod bushing on a plane surface.
Spray a light coat of water on the inner and
outer surfaces of radius rod bushing.
6. Take radius rod, align the bushing. Tap
radius rod on bushing until latter is positioned
correctly.
FIGURE 20: RADIUS ROD BUSHING INSTALLATION 16012
Radius Rod Installation
1. Lightly spray the radius rod support with
water. Place the radius rod end over the
radius rod support (Fig. 21).
2. Position the retaining plate. Install the tab
washer and nuts (or bolts).
FIGURE 21: RADIUS ROD INSTALLATION 16028
CAUTION
Always use new tab washers at installation.
3. Tighten the nuts (or bolts) lightly, and repeat
at the other end.
4. Refer to heading "Suspension Height
Adjustment" later in this section, and set the
vehicle to normal ride height.
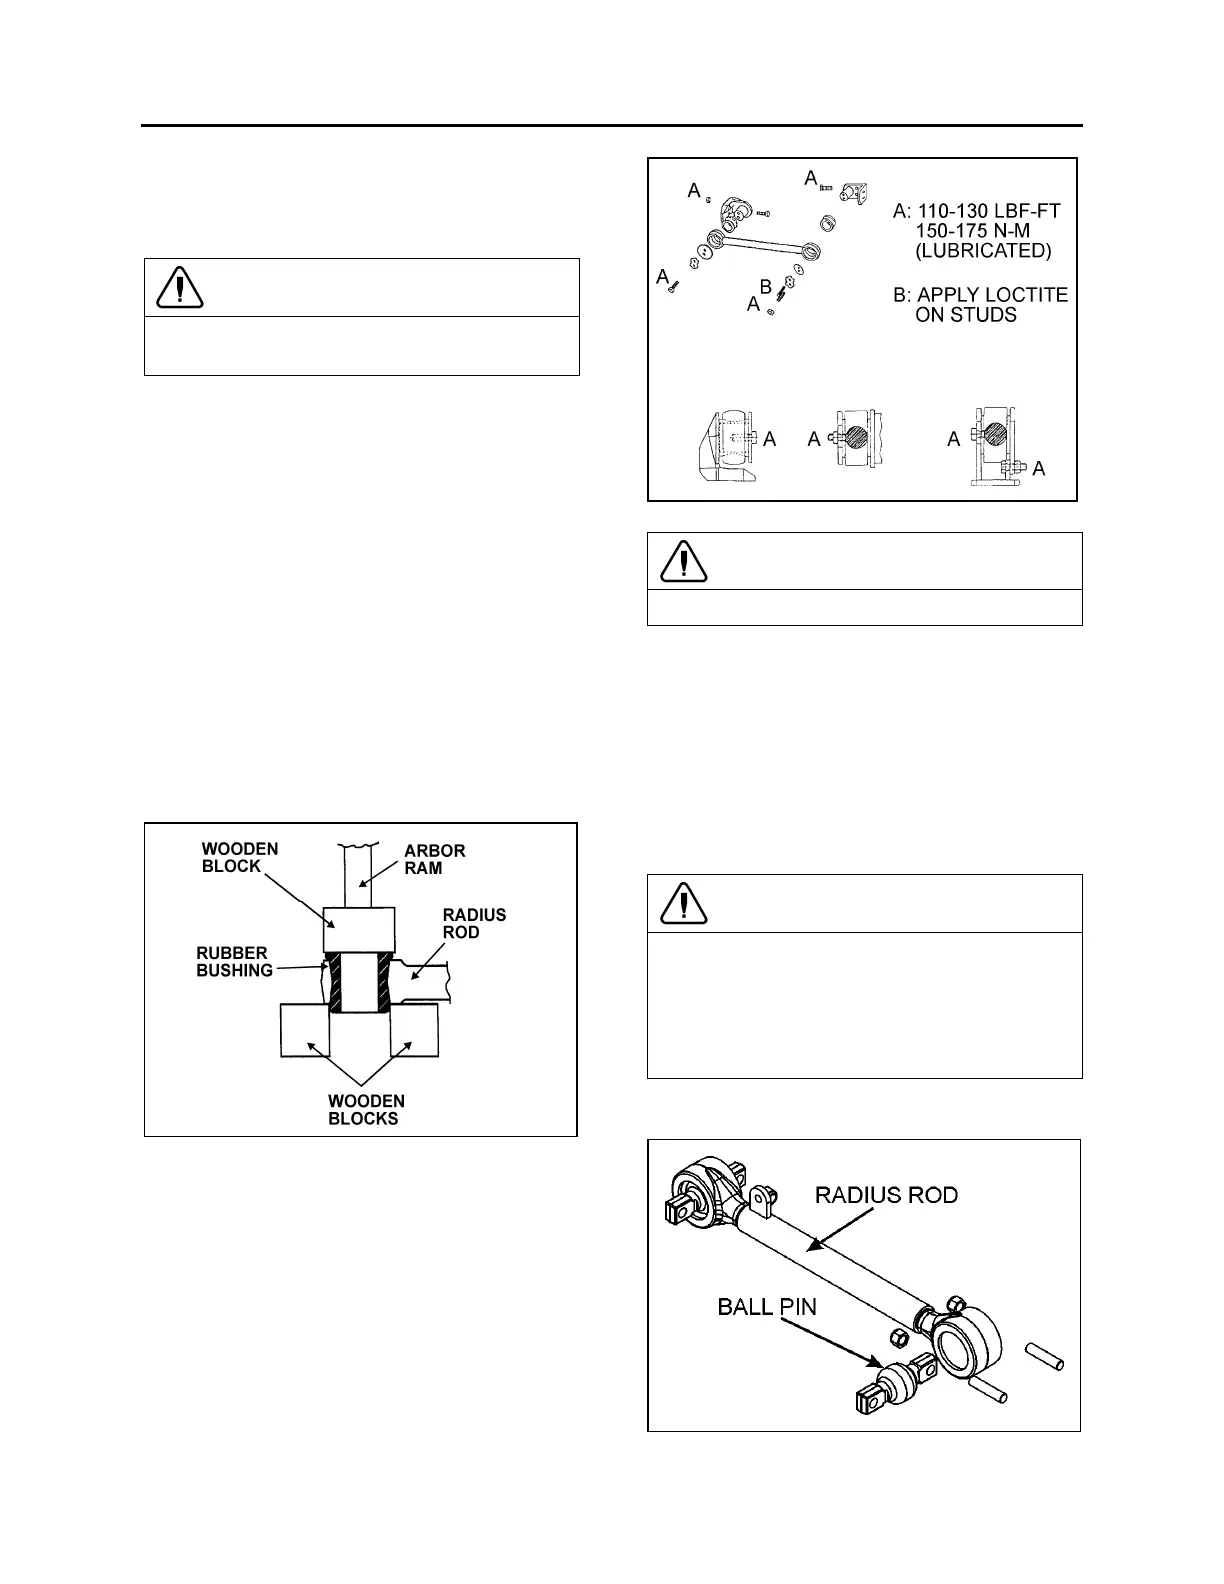
5. With the vehicle at normal ride height, apply
oil on threads and tighten all radius rod
anchor pin nuts or bolts to 110 – 130 lbf-ft
(150 – 175 Nm).
CAUTION
It is extremely important upon reconnection of
the rods that the proper clearance height
between the axle and body be maintained.
Otherwise, the rubber bushings in radius rod
ends will become preloaded, thus reducing
their life span.
3.3.2 Tag Axle Suspension
FIGURE 22: TYPICAL RADIUS ROD SETUP 16010