Section 05: COOLING SYSTEM
18 X3-45 Commuter PA1593 DOB 2400-2489 Section 05 Updated Sept.2016
Use Shell transmission oil MA 75W90.
14.2 OIL CHANGE
1. Stop engine and make sure that all engine
safety precautions have been observed.
2. Turn the ignition switch and set starter
selector switch to the OFF position to prevent
accidental starting of the engine.
3. Remove the drain plug located underneath
the right angle gearbox case and allow the oil
to drain into a suitable container.
4. Replace the seal and screw the drain plug
back in (torque: 26 lbf-ft).
5. Unscrew and remove the side filler plug.
6. Unscrew and remove the top filler plug.
7. Add gear lubricant. The oil level is correct
once the top of the oil has reached the
bottom of the side filling point.
8. Replace the seals and screw side and top
filler plug back in (torque: 26 lbf-ft).
9. Clean gear case carefully.
10. Start the engine and allow running a few
minutes. Stop the engine and check for
leaks.
WARNING
Note that warranty may be voided if proper
maintenance at oil change intervals is not
respected.
14.3 REMOVAL / INSTALLATION
To remove the right angle gearbox, proceed as
follow:
1. Turn the ignition switch and set starter
selector switch to the OFF position to prevent
accidental starting of the engine.
2. Disconnect the fan clutch electrical
connector.
3. Dismount the fan and lean it against the
radiator (refer to previous paragraph).
4. Disconnect the universal joint shaft.
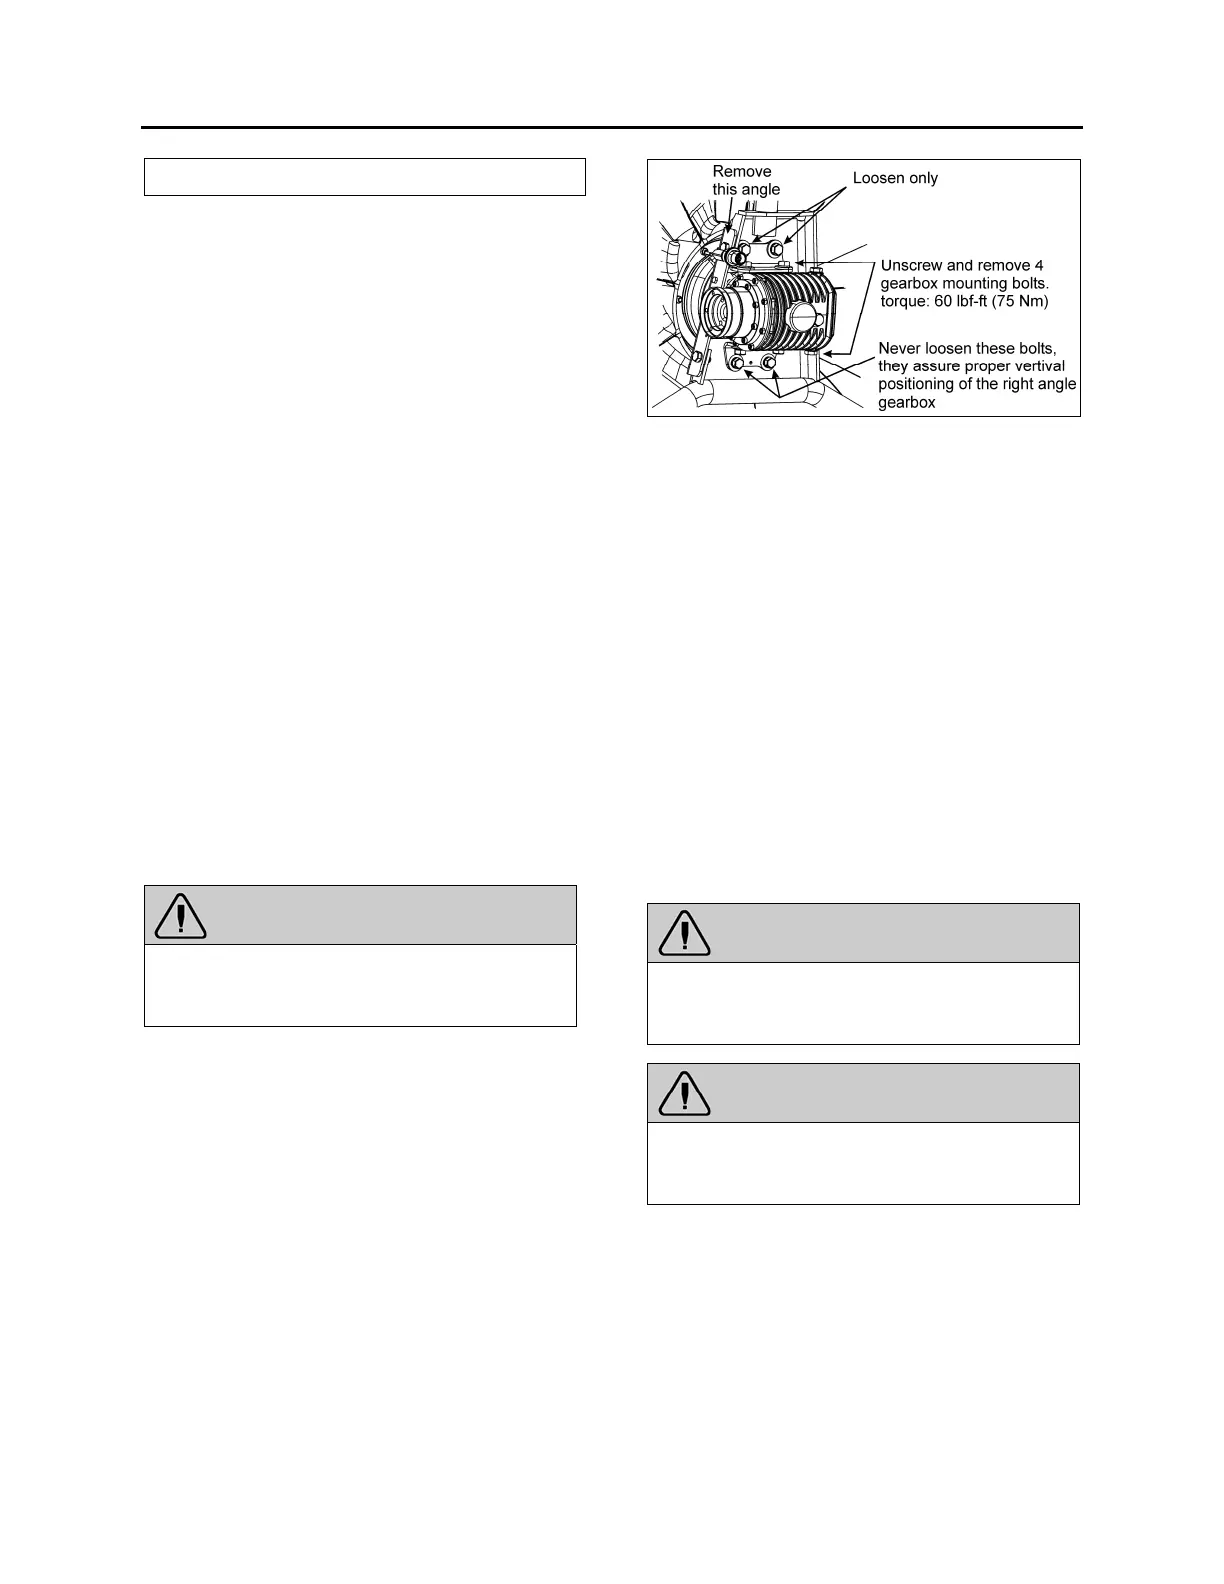
FIGURE 29: RIGHT ANGLE GEARBOX MOUNTING 05126
5. Dismount the angle (see fig. 29).
6. Loosen the gearbox support bracket top
bolts.
7. Unscrew and remove 4 gearbox mounting
bolts.
8. Slide the gearbox out of the support
assembly.
Installation procedure is the same as removal
but in reverse order. Tighten the 4 mounting
bolts as specified.
15. COOLING FAN DRIVE BELT
15.1 MOUNTING THE DRIVE BELT
To install the cooling fan drive belt, proceed as
follow:
WARNING
Turn the ignition switch and set starter
selector switch to the OFF position to prevent
accidental starting of the engine.
WARNING
Potential Accident Risk. Always use extreme
caution when working in the vicinity of hot,
rotating or moving parts.
1. Wrap the new drive belt around the fan drive
mechanism pulley, the idlers and the
automatic tensioner idler as shown on figure
30.