Replacing The Ribbon
73
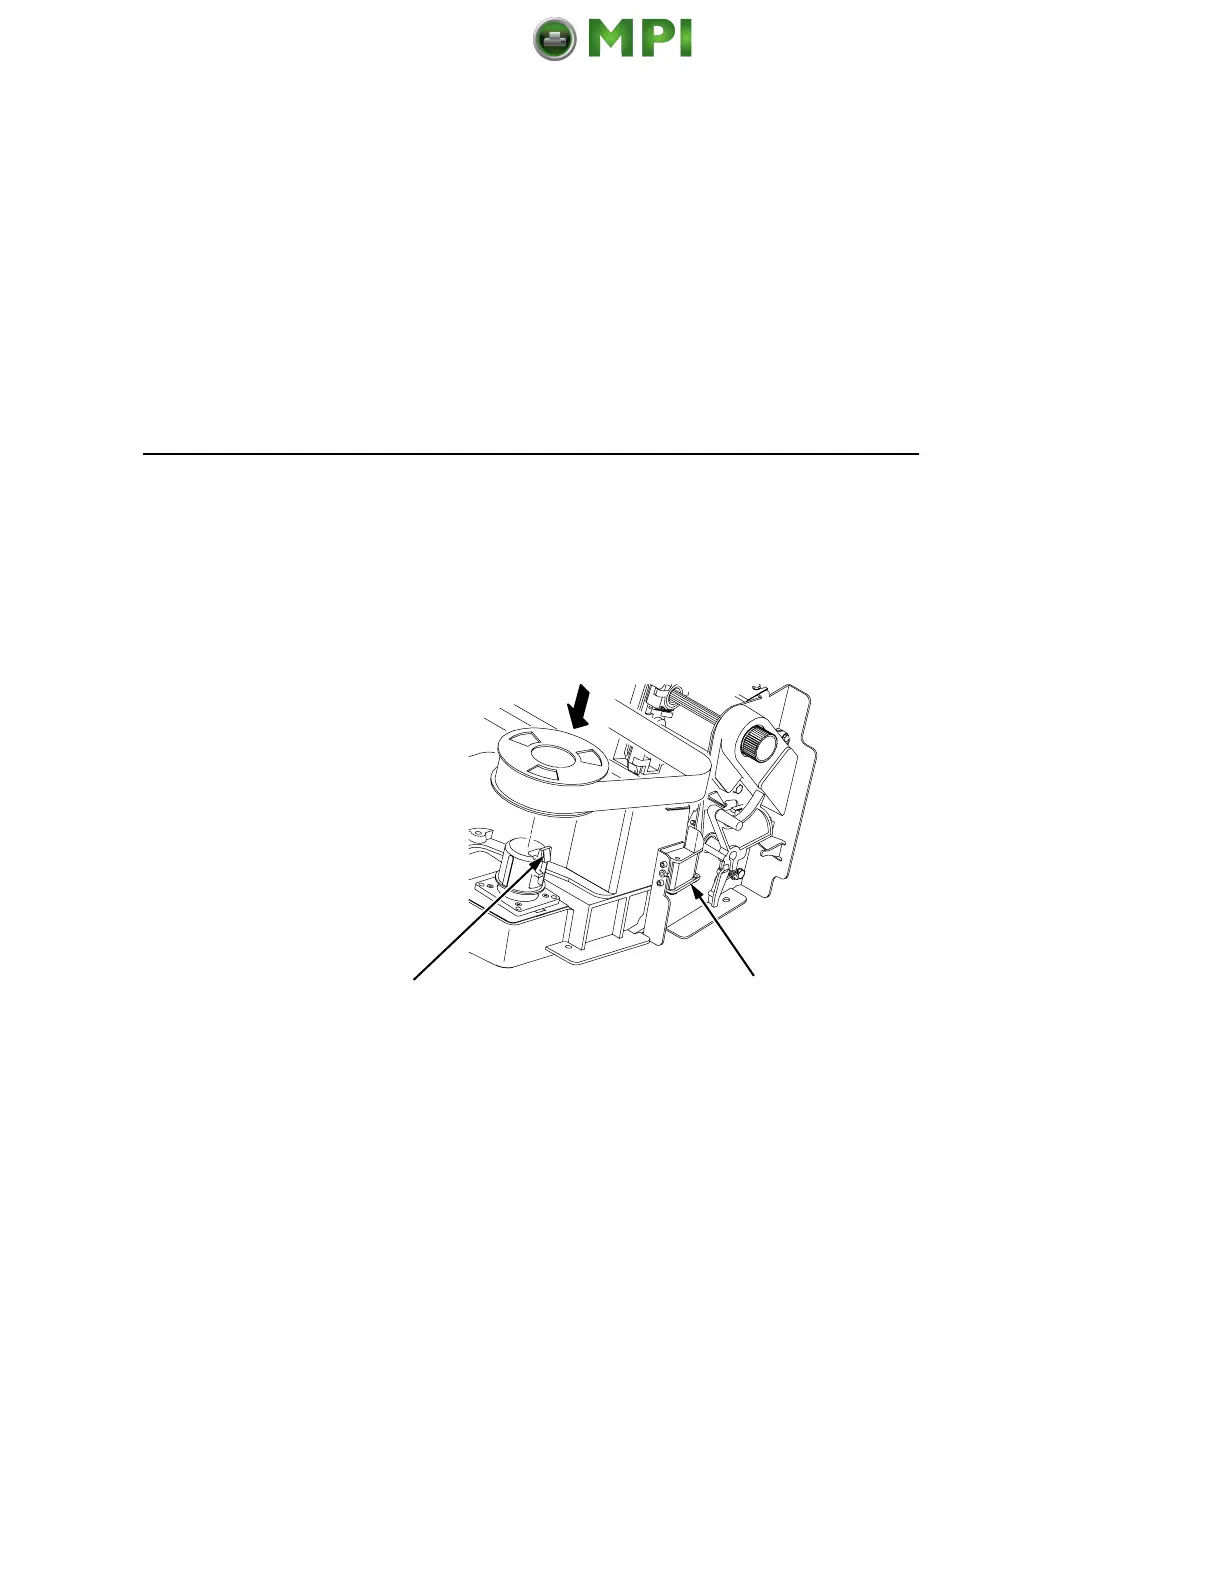
6. Install the new ribbon:
a. With the ribbon to the outside, place the full spool on the
right hub (3). Press down on the spool until the hub latch
snaps in place.
b. Thread the ribbon around the ribbon guide (4) and along
the ribbon path. (Refer to the ribbon path diagram on the
shuttle cover.) Be sure to thread the ribbon between the
hammer bank cover and the ribbon mask.
IMPORTANT
The ribbon must not be twisted. A twisted ribbon can lower
print quality, shorten ribbon life, or cause paper jams.
c. Place the empty spool on the left hub. Press down on the
spool until the hub latch snaps into place.
d. Hand turn the empty spool to make sure the ribbon tracks
correctly in the path and ribbon guides.
4
3
Mantenimiento Periféricos Informáticos SL C/Canteras, 15 28860 Paracuellos de Jarama Tel: 00 34 917481604 WEB: https://mpi.com.es