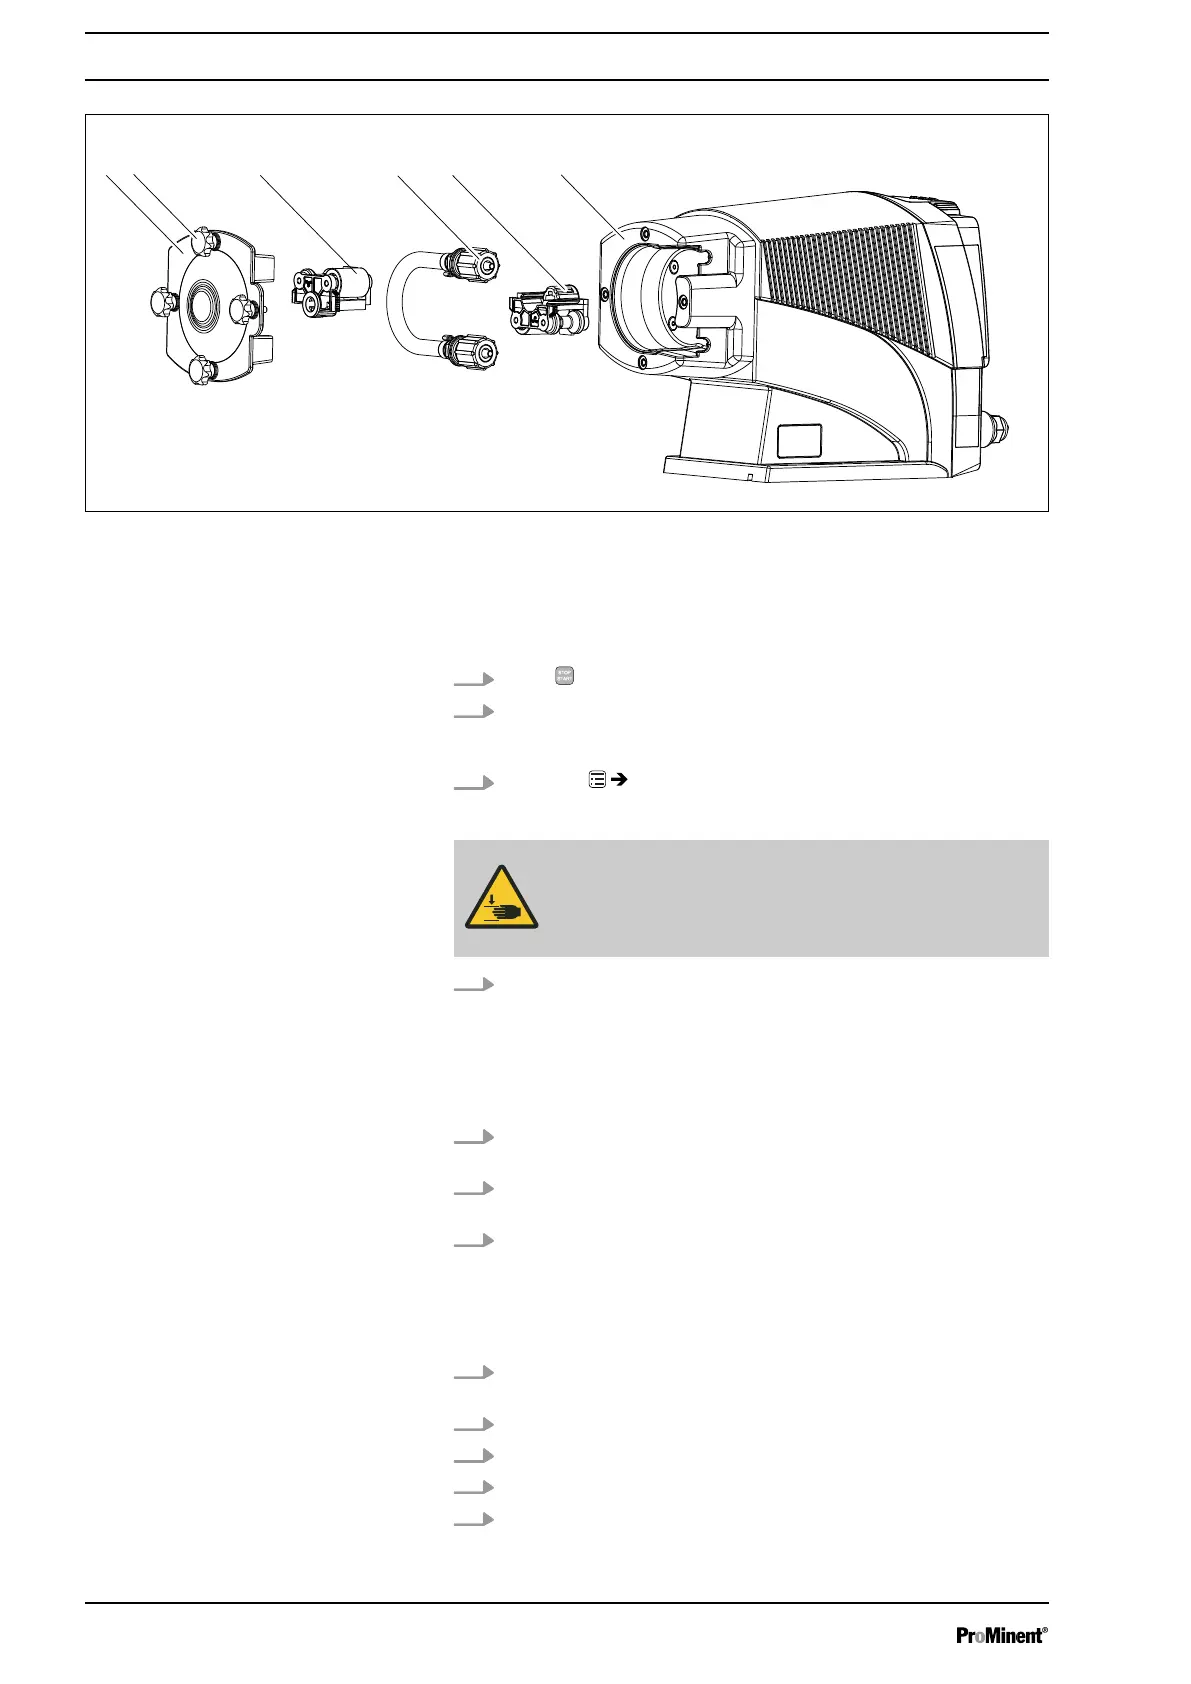
Fig. 8
n Ensure that the system is at atmospheric pressure.
n Adhere to the material safety data sheet for the feed chemical.
n Prevent the escape of feed chemical.
n If necessary take protective measures.
1.
Press
[STOP/START]
to bring the pump to a stop (manually).
2. Empty the liquid end (turn the liquid end upside down and allow the
feed chemical to run out; flush out with a suitable medium; flush the
liquid end thoroughly when using hazardous feed chemicals!).
3.
Go to the
‘Hose replacement’
menu.
ð
‘Go to change position?’
appears.
WARNING!
The rotating rotor may crush things or draw them in.
– The bearing cover must not be removed yet.
4. Confirm the question with
‘Yes’
.
ð
The rotor turns slowly and the following appears:
‘ Please wait...’
.
The rotor stops and
‘Remove cover and take out the rotor!’
appears (the corresponding rotor half flashes in the animation).
5. Loosen 4 star screws (2) on dosing head (6) and remove with
bearing cover (1).
6. Pull rotor half (3) flashing in LCD screen out of dosing head (6) (if
required, use plastic tool to release it).
7. Press the Clickwheel.
ð
The rotor turns slowly and the following appears:
‘ Please wait...’
.
The rotor stops and
‘Please change the tube!’
appears.
8. Snap two hydraulic connectors out of dosing head (5) - away from
pump - and remove along with hose (4).
9. Also pull 2nd rotor half (5) out of dosing head (6).
10. Remove 4 Torx screws from rear of dosing head.
11. Align dosing head as desired (to left, to right, up, down).
12. Put 4 Torx screws back in and manually tighten.
Assembly
24