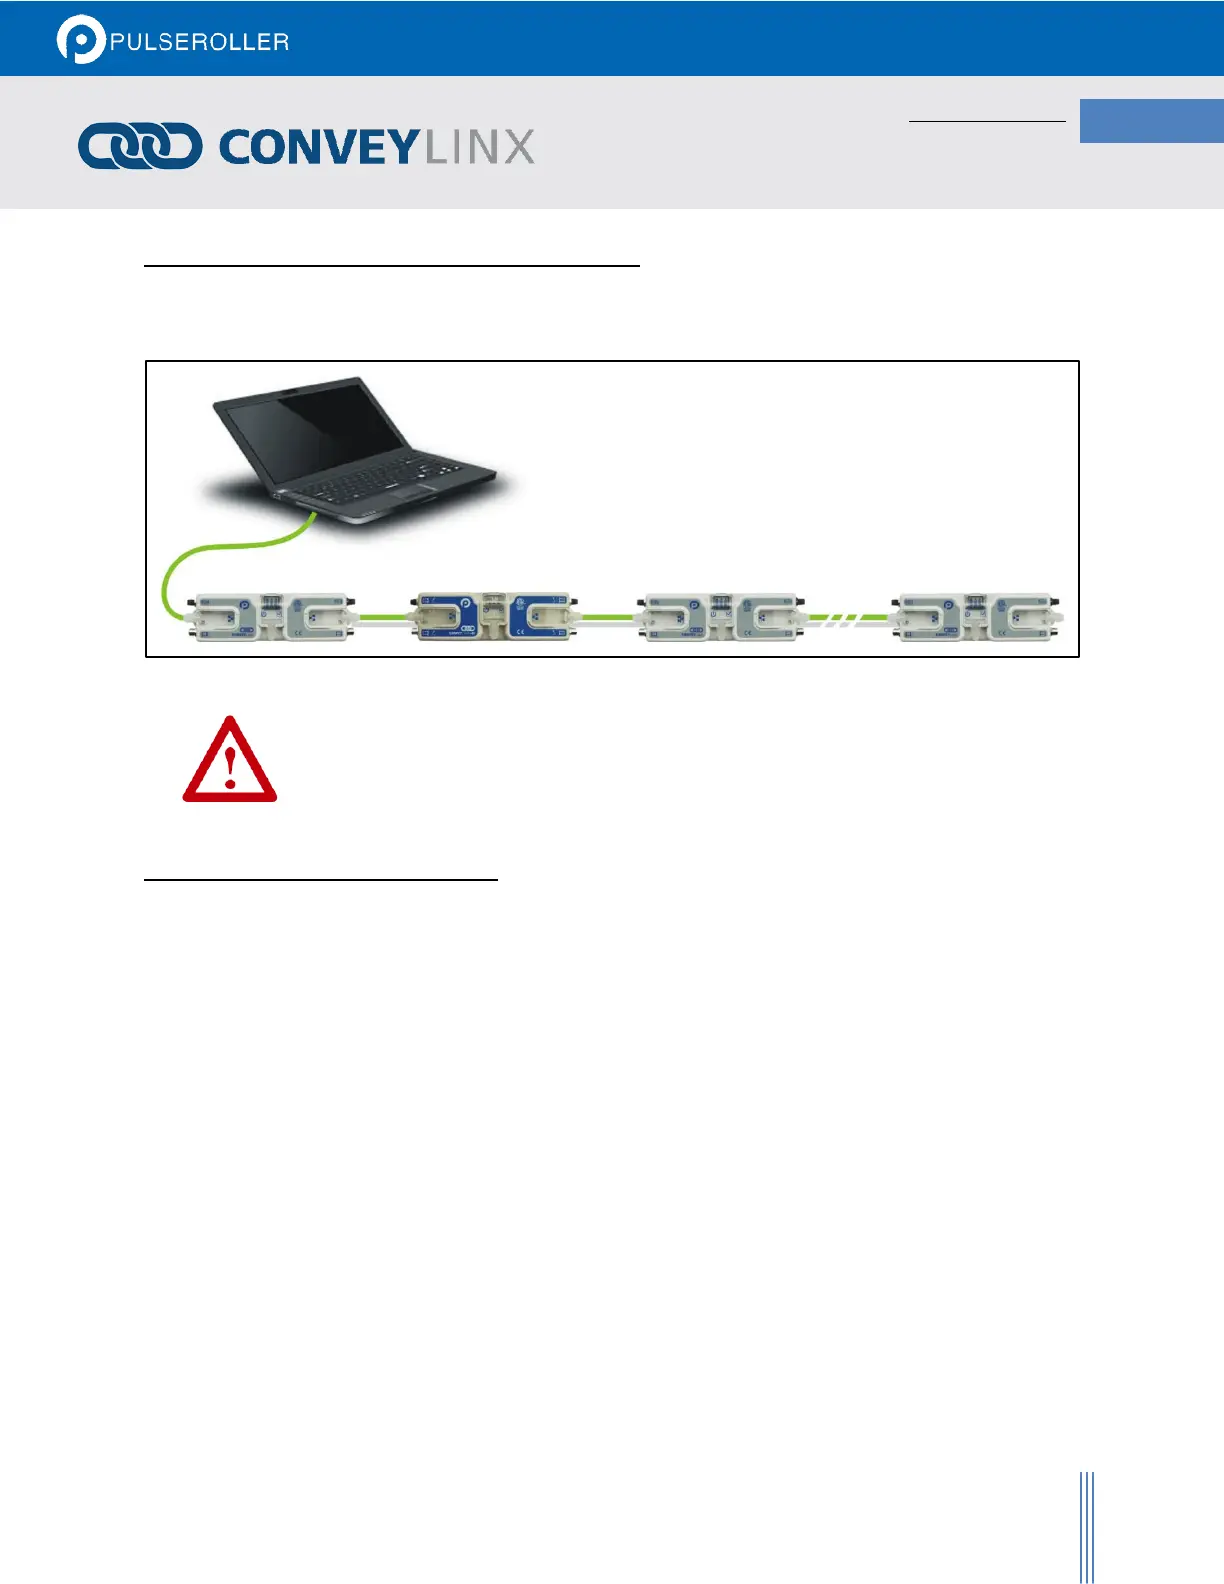
CONNECTING YOUR PC TO CONVEYLINX NETWORK
Using an Ethernet cable, connect your PC’s Ethernet port to the Auto-Configuration Master as shown below in
Figure 18
FIGURE 18 - INITIAL PC CONNECTION TO CONVEYLINX SUBNET
It is highly recommended to connect the PC directly to the ConveyLinx network. Avoid
trying to connect via Ethernet switches or wireless router/switches. If a wireless switch is
not setup properly then the Discover Feature will not work. Also ensure that network
firewall is turned off for proper discovery.
AUTO-CONFIGURATION PROCEDURE
The ConveyLinx module located at the most upstream or in-feed end of the conveyor is defined as the Auto-
Configuration Node. The Auto-Configuration procedure is initiated from the Auto-Configuration Node. Because of
its physical location on the conveyor path and physical location in the Ethernet connection chain; the Auto-
Configuration Node will automatically connect to all downstream modules and set their I.P. address for
communication. Then the routine automatically sets the direction of flow. The following is the procedure to
follow:
1. Start EasyRoll V4.11 or higher and press F2. In the pop-up panel select “Network Services” and click
“Discover”.
2. When the ConveyLinx modules appear in the module table, select the ones that you want to configure and
click “ConveyLinx tree” as shown in Figure 19.
3. When the topology is drawn, select the ConveyLinx module from which you want to configure the line and
click “Auto-Configure from selected node” as shown in Figure 20.
4. This starts the Auto-Configuration procedure which will spread to all subsequent ConveyLinx modules and
configure the entire line.