511026 Rev. 07-01-19
103
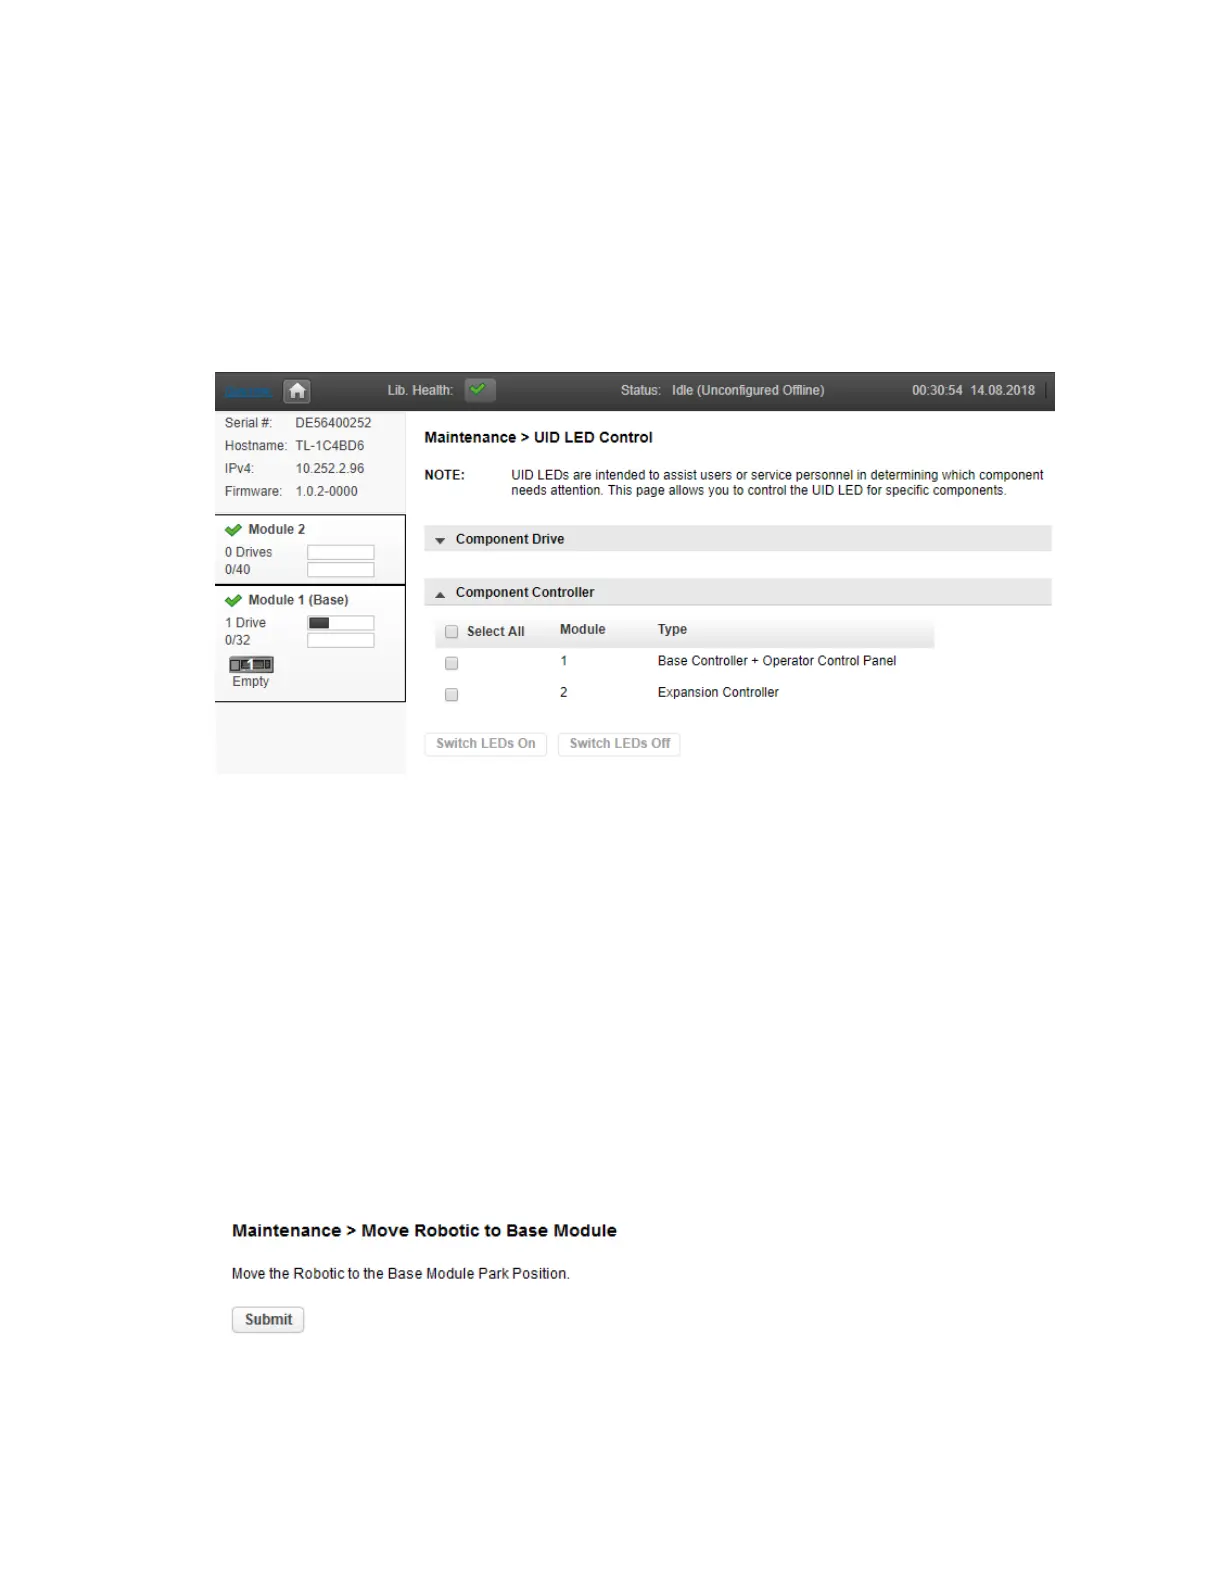
6.16 Controlling the UID LEDs
The UID (Unit Identification) LED refers to blue LEDs on the tape library that assist users and service
personnel in determining which component requires attention.
U
ID LEDs can be found on the controller board of each base and expansion module. Additionally, there
is one UID LED on the Operator Control Panel OCP. Control of this LED is linked to the base controller
UID LED (i.e. if the base controller is selected and its UID LED is switched on, the OCP UID LED will be
switched on as well).
To use UID, navigate to Maintenance > UID LED Control.
1. Expand the Component Module list, if necessary, by clicking the down arrow next to Component
Controller.
2. Select the desired module.
3. Click the Switch LEDs On button (or the Switch LEDs Off button to turn off any UID LED)
6.17 Moving the Robotic Assembly to the Base Module
Before removing a module from the rack, the robotic assembly must return to the Base Module. Under
normal circumstances, when the library is powered off using the front power button the robot
automatically parks and locks into the Base Module behind the OCP. After powering off the library and
before proceeding with removing a module from the rack, look inside the upper or lower expansion
module windows to verify that the robotic assembly is behind the OCP.
If the library did not move the robotic assembly to the base module, you can do so from the Maintenance
> Move Robotic to Base Library screen.