Q40 Tape Library Installation and Operations Manual
511026 Rev. 07-01-19 32
3.13 Aligning and Connecting Modules
Skip this step if the library does not have Expansion Modules.
Aligning the modules ensures that the robot can move freely between the modules. The library will not
operate unless the alignment mechanism is in the locked position.
1. F
rom the front of the library, loosen the screws on each of the modules two full turns.
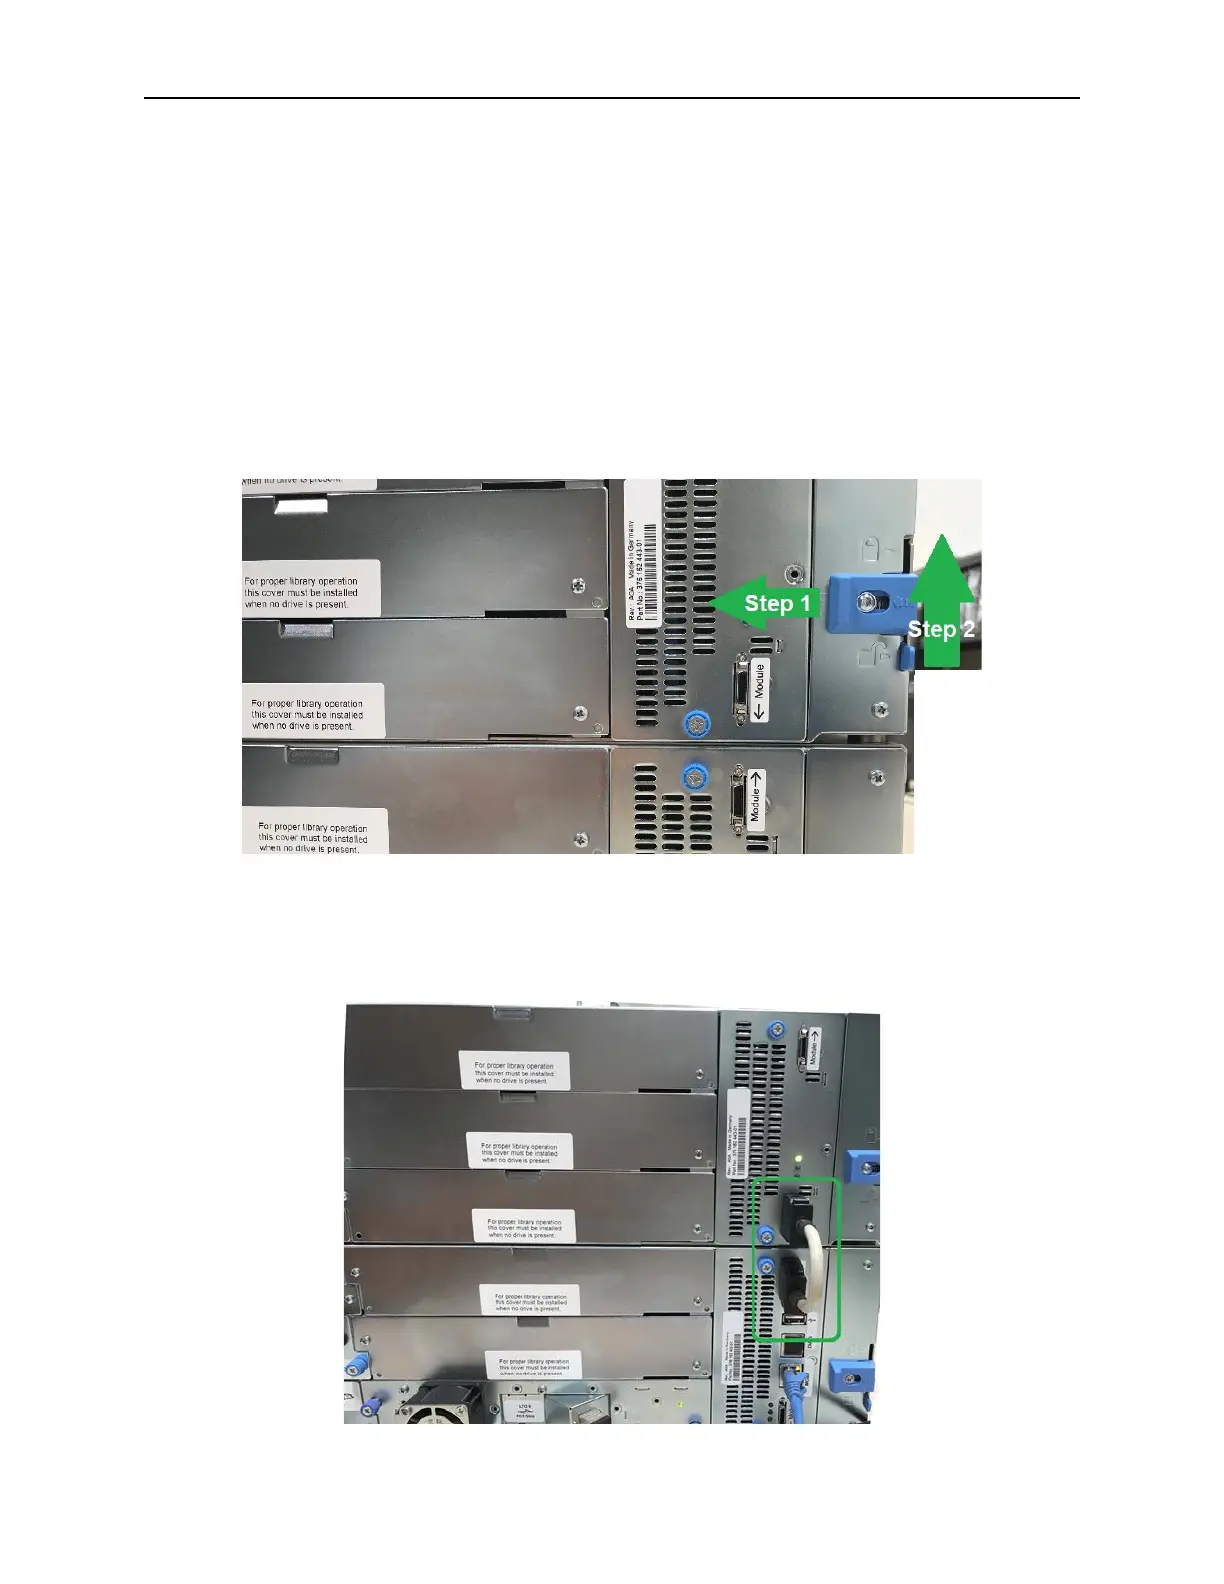
2. From the back of the library, starting with the bottom pair of modules, align each module with th
e
m
odule below. Repeat for each pair of modules.
a. Move the alignment lever to the locked position. If you encounter resistance, adjust the position
of the upper module so the pin of the alignment mechanism moves into the mating hole in the
lower module.
3. V
erify that the lowest module in the library has its alignment mechanism in the unlocked position
4. From the front of the library, tighten the Philips screws on each of the modules to secure the modules
to the rack.
5. From the back of the library connect the modules of each pair to its adjacent module using t
he
ex
pansion interconnect cable as shown.