EasyManuals Logo

Rain Bird ESP-LX User Manual

Rain Bird ESP-LX
88 pages
To Next Page IconTo Next Page
To Previous Page IconTo Previous Page
Page #73 background imageLoading...
Page #73 background image
ESP-LX Modular Controller 71
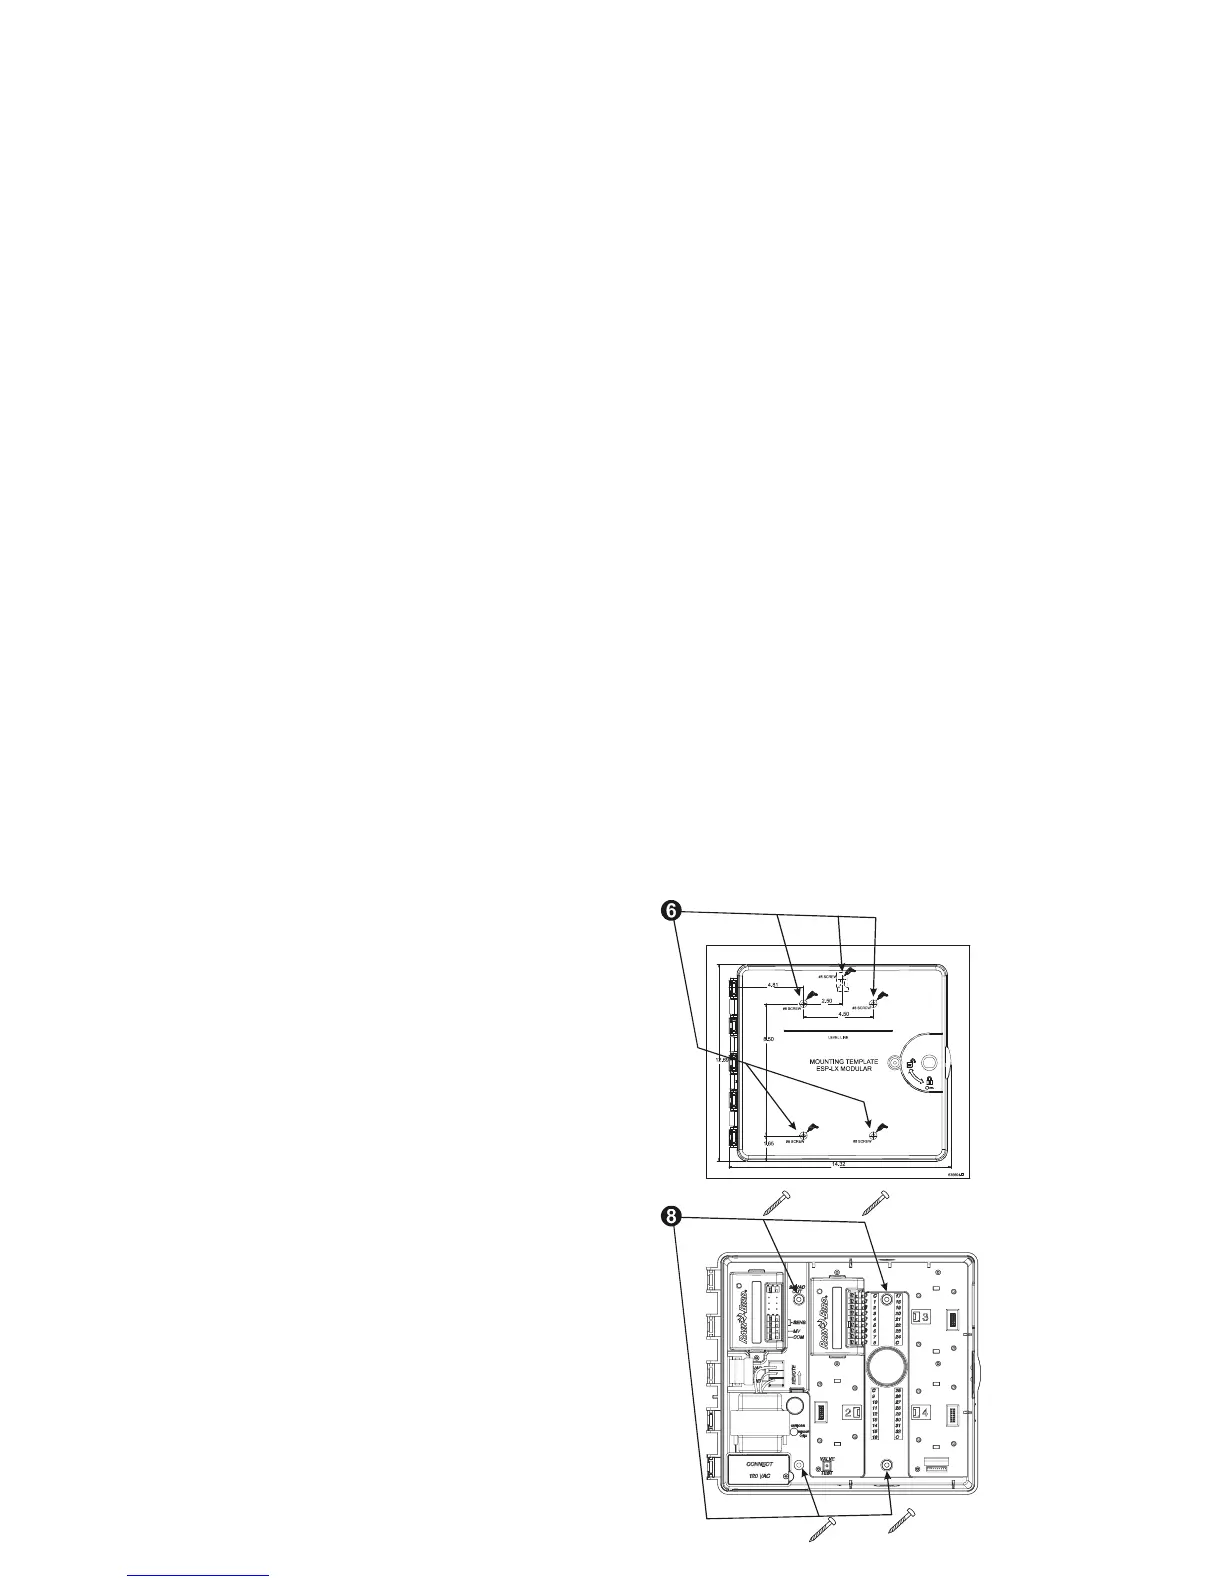
Attach the mounting template to the mounting surface at eye
level. Make sure that at least one of the mounting holes lines
up with a wall stud or other solid surface. Make sure the
template is level.
Drill or tap a pilot hole on each mark for the mounting holes.
Remove the mounting template from the surface. If necessary,
install wall anchors. Drive a #8 screw into the top center pilot
hole.
Slide the controller over the top center screw. Line up the
controller cabinet with the remaining four pilot holes. Drive
the appropriate fastener(s) through the mounting holes into the
mounting surface. Verify that the cabinet is secure.

Table of Contents

Other manuals for Rain Bird ESP-LX

Questions and Answers:

Question and Answer IconNeed help?

Do you have a question about the Rain Bird ESP-LX and is the answer not in the manual?

Rain Bird ESP-LX Specifications

General IconGeneral
Enclosure ratingNEMA 3R
Sensor inputYes
TypeModular
EnclosureIndoor/Outdoor
DisplayLCD
Programs4
Master Valve/Pump StartYes
Power Source120V AC
Power supplyIncluded
Battery backupYes (for memory retention)
Cycle and soakYes
MountingWall mount

Related product manuals