EasyManuals Logo

Rain Bird ESP-LX User Manual

Rain Bird ESP-LX
88 pages
To Next Page IconTo Next Page
To Previous Page IconTo Previous Page
Page #72 background imageLoading...
Page #72 background image
70 ESP-LX Modular Controller
Mount Controller
OPTIONAL: Before you mount the controller, we recommend
you remove the front panel. Although this is not absolutely
necessary, it will make installation easier.
If necessary, unlock the door with the supplied key. Open the
door of the cabinet and swing it to the left.
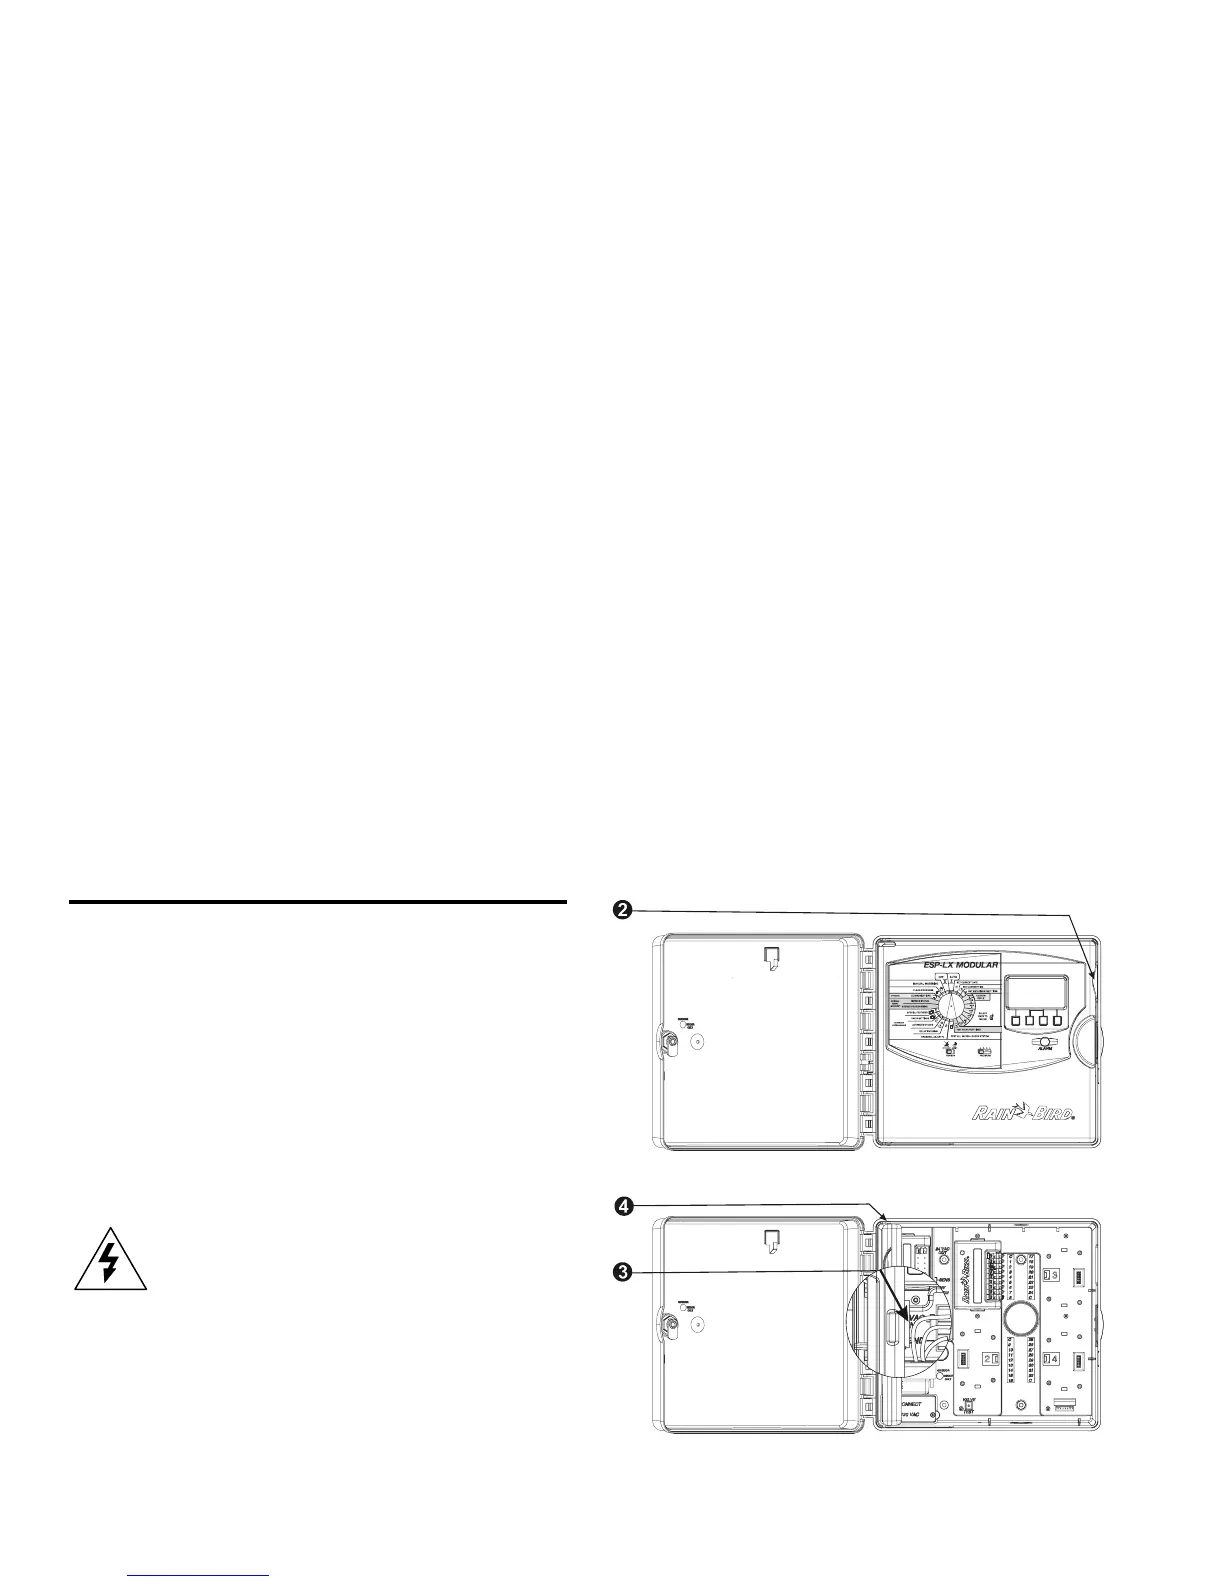
Open the front panel by grasping the crescent-shaped finger
hold on the top right side of the cabinet. Open the front panel
approximately 90 degrees.
Disconnect the ribbon cable from the front panel by gently
pulling the connector out and away from the socket.
CAUTION: Be careful NOT to bend the pins in the
socket.
Shift the front panel up and remove the lower hinge pin.
Remove the front panel.

Table of Contents

Other manuals for Rain Bird ESP-LX

Questions and Answers:

Question and Answer IconNeed help?

Do you have a question about the Rain Bird ESP-LX and is the answer not in the manual?

Rain Bird ESP-LX Specifications

General IconGeneral
Enclosure ratingNEMA 3R
Sensor inputYes
TypeModular
EnclosureIndoor/Outdoor
DisplayLCD
Programs4
Master Valve/Pump StartYes
Power Source120V AC
Power supplyIncluded
Battery backupYes (for memory retention)
Cycle and soakYes
MountingWall mount

Related product manuals