78 ESP-LX Modular Controller
Complete Installation
WARNING: To prevent electrical shock, make sure
all supply power is OFF before completing
installation. Electrical shock can cause severe injury
or death.
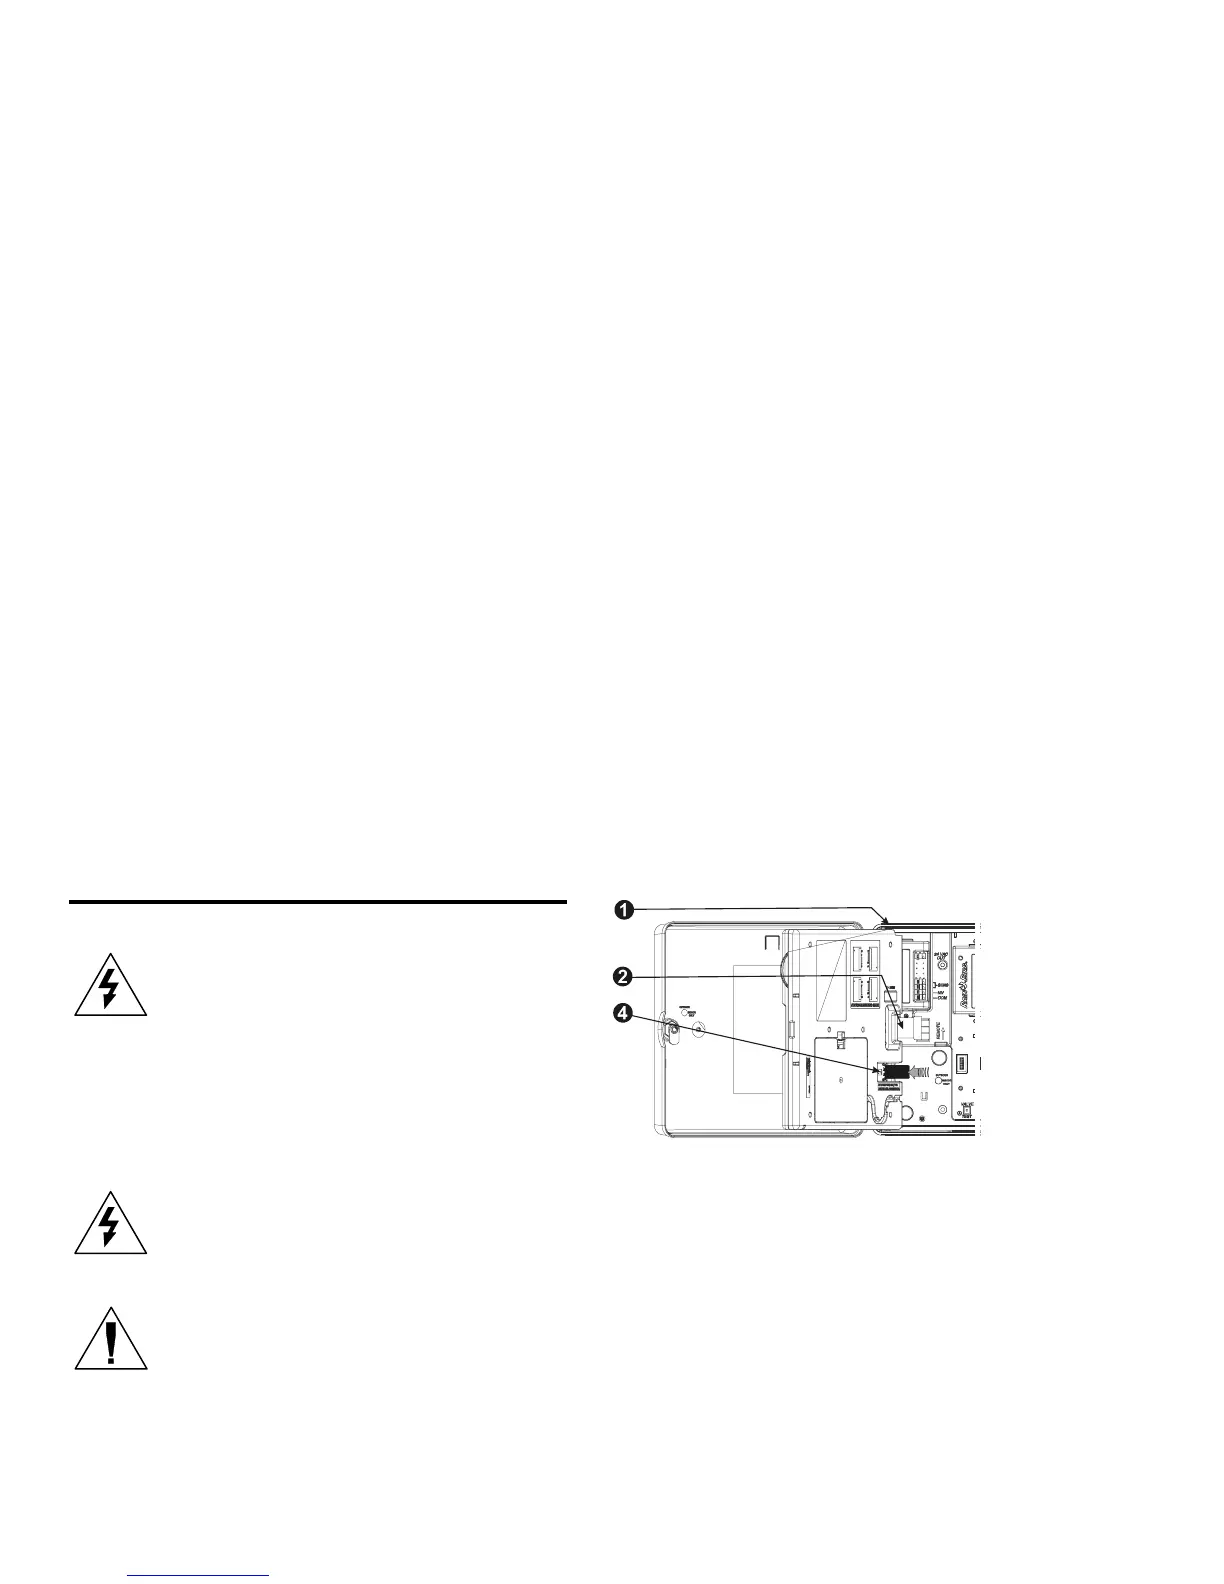
If you removed the front panel, reinstall it now by inserting the
top corner pin into the top pin hole. Push up and rock the lower
corner into the lower pin hole.
Reconnect the ribbon cable to the front panel by gently
pushing the connector into the socket.
CAUTION: Be careful NOT to bend the pins in the
socket.
Turn on the power source.
NOTE: The first time you power up the controller,
the display will prompt you to select the language you
wish to use. See page 40 for instructions.
OPTIONAL: Install a 9-Volt battery into the battery
compartment on the inside of the front panel. This battery will
allow you to program the controller with the front panel
disconnected from the cabinet. To irrigate, you will need to re-
connect the front panel to the cabinet and connect the
controller to source power.