RAUMED NeuroSmart Instruction Manual
Manufacturer: RAUMEDIC AG, Hermann-Staudinger-Strasse 2, 95233 Helmbrechts, Germany
zwo-541EN Rev 3 / 2022-05-03
Page 35 of 61
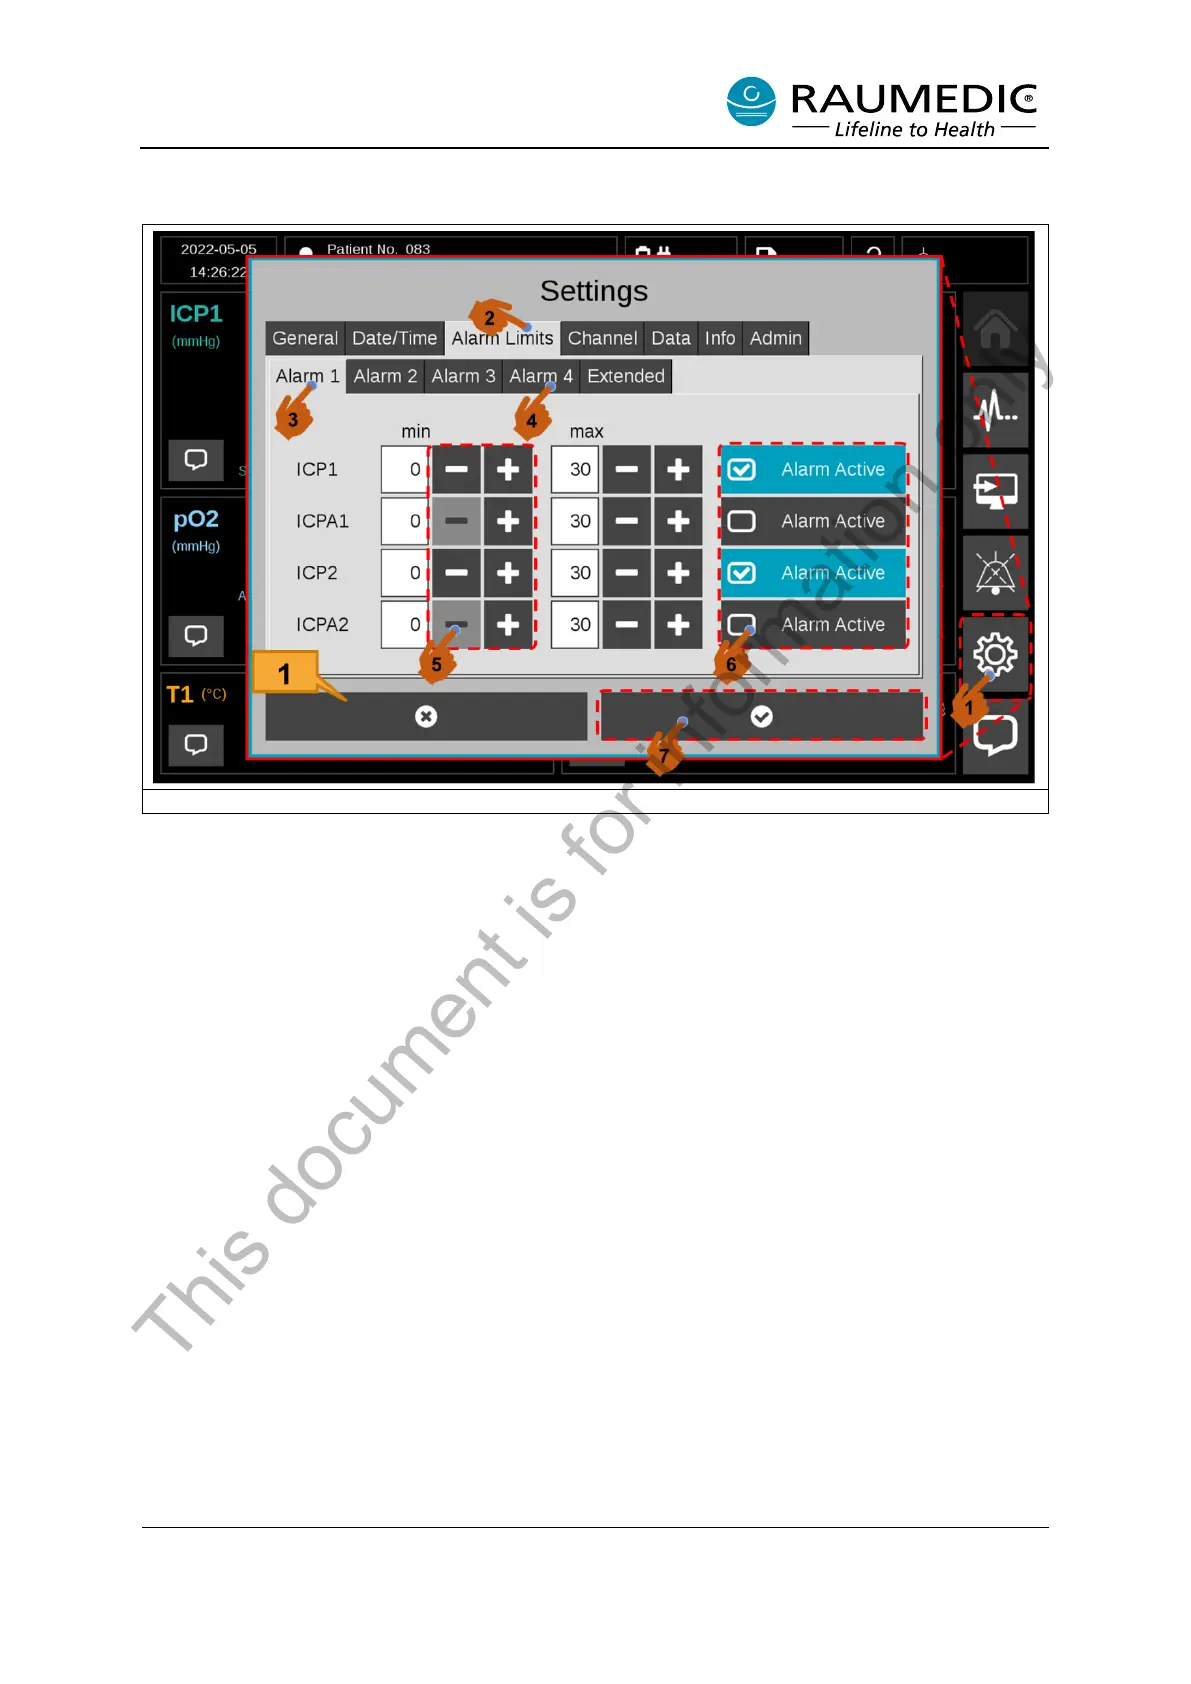
Second approach: Adjust the alarm limits and alarm activation for all measuring positions.
Figure 22: Adjust the alarm limits and alarm activation for the individual measuring positions.
The first method lets you adjust the alarm limits of activated measuring positions. To adjust the alarm
limits for all measuring positions and inactive measuring positions, please use the following procedure.
<1> Setting <2> Alarm Limits <3> Alarm 1 <4> The alarm of other measuring positions can be adjusted
in the Limit 2-4 tabs. <5> The lower and upper alarm limit can be adjusted with the Plus/Minus buttons.
<6> If you wish to change the alarm activation status, you can do so with the “Alarm Active” button. <7>
To make the change, quit the menu with the Confirm button. See Figure 22.
[1] If you do not want to make any change but wish to quit the menu, tap the “Cancel” button. Figure
22.
Clinic-specific alarm limits
You can save the modified alarm limits in the clinic-specific alarm limits. This allows customised alarm
limits to be applied at the beginning of the measurement as shown in Figure 6.
To do so, proceed as follows: <1> First, set the alarm limits as shown in Figure 22 . <2> Extended <3A>
Save. You will be prompted to enter the password to confirm the new alarm limits (see section 3.6.1).
<4> Close the Settings window. The new alarm limits are immediately applied to the current measure-
ment. At the same time, the clinic-specific alarm limits are saved under the name "Clinic" and can be
selected as shown in Figure 6.
This document is for information only