EasyManuals Logo

RED Epic User Manual

RED Epic
224 pages
To Next Page IconTo Next Page
To Previous Page IconTo Previous Page
Page #45 background imageLoading...
Page #45 background image
RED DSMC OPERATION GUIDE: EPIC/SCARLET
COPYRIGHT © 2015 RED.COM, INC 955-0020_V6.0, REV-J | 45
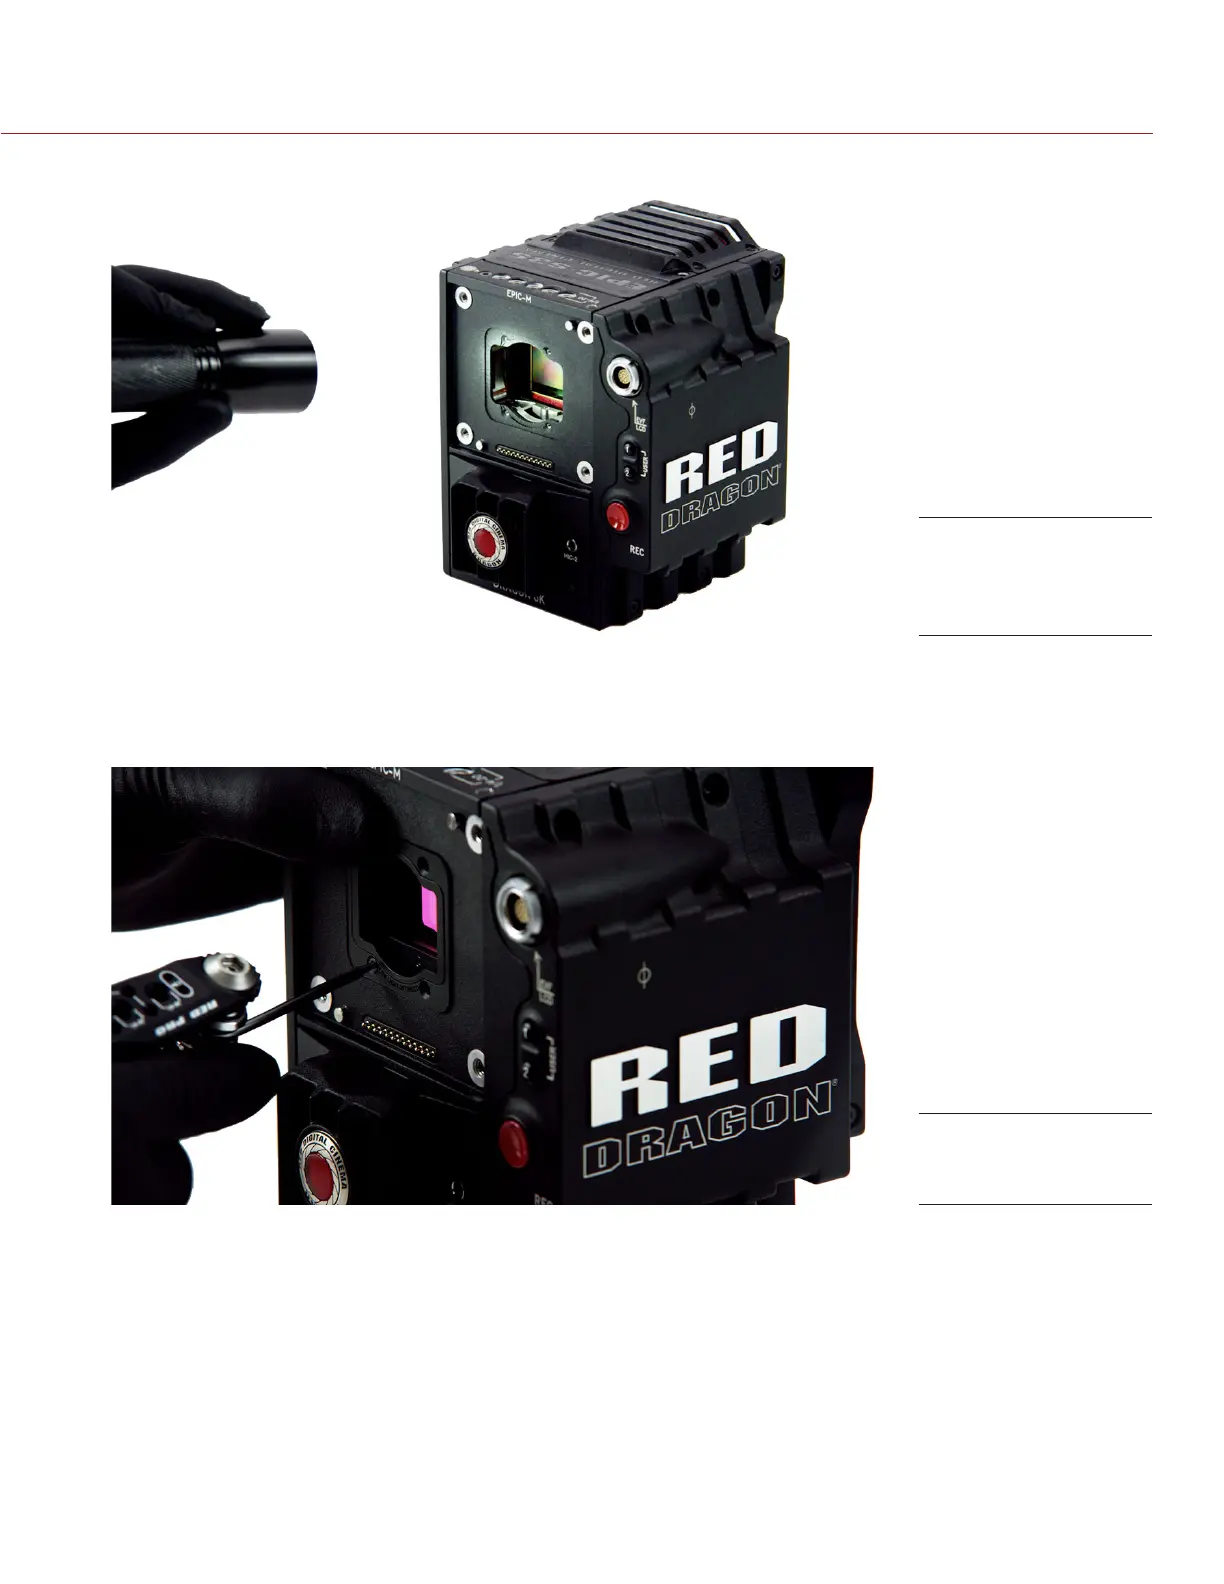
8. Use an LED light to ensure that the optical cavity is clean and free from dust or debris.
9. Ensure the desired OLPF module is clean and free of debris.
10. Insert the OLPF module.
11. Replace and loosely tighten the four (4) M2x0.4 x 4 mm OLPF module screws (P/N 600-0224) in a cross
pattern (“X” pattern) using a T6 TORX driver. DO NOT FULLY TIGHTEN.
12. Fully tighten the four (4) OLPF module screws in a cross pattern (“X” pattern) using a T6 TORX driver. DO
NOT exceed 30 in-oz, or damage may occur.
WARNING: DO NOT OVERTIGHTEN.
13. Replace the lens mount.
Ensure optical cavity
is clean and free of
debris
Replace the OLPF
module and screws

Table of Contents

Other manuals for RED Epic

Questions and Answers:

Question and Answer IconNeed help?

Do you have a question about the RED Epic and is the answer not in the manual?

RED Epic Specifications

General IconGeneral
SensorMysterium-X
Resolution5120 x 2700 (5K)
Lens MountPL Mount
Frame Rates1-120 fps
Dynamic Range13.5 stops
Recording FormatREDCODE RAW
MediaREDMAG (SSD)
Weight5 lbs (2.3 kg) body only
Sensor Size27.7 mm x 14.6 mm
Operating Temperature32°F to 104°F (0°C to 40°C)

Related product manuals