EasyManuals Logo

Ricoh MP C407 User Manual

Ricoh MP C407
1241 pages
To Next Page IconTo Next Page
To Previous Page IconTo Previous Page
Page #1089 background imageLoading...
Page #1089 background image
1.Installation
7
13. Open the line and telephone connector covers [A] with a flat-head screw driver.
14. Reassemble the machine.
15. Make two loops with the telephone cord, and then attach the ferrite core [A].
16. Connect the end of the telephone cord with the ferrite core to the "LINE" jack.
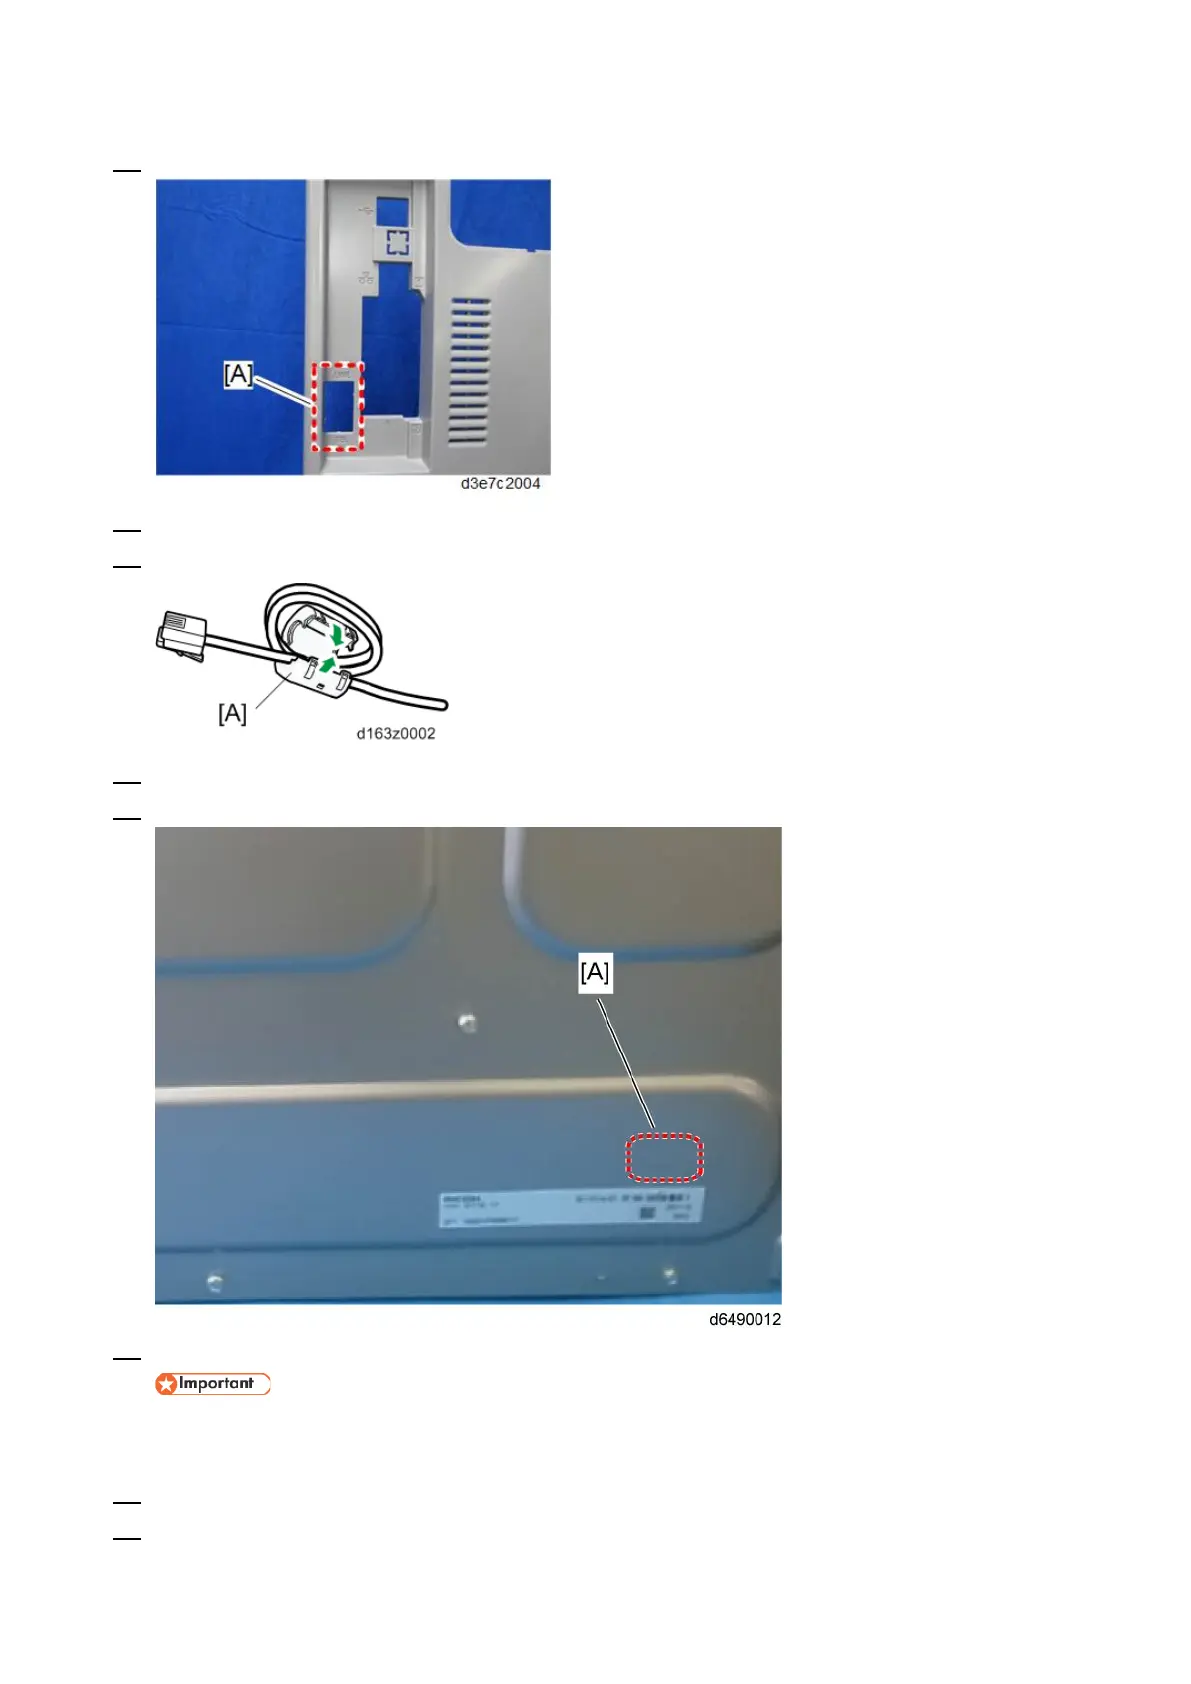
17. Attach the EMC Address Decal at [A] on the rear cover (EU only).
18. Plug in the machine and turn the main power ON.
• After you turn the machine on, if you see a message that tells you that the SRAM has been
formatted due to a problem with SRAM, turn the machine off and on again to clear the message.
19. Enter the "User Tools" mode and set date and time.
20. Do SP3-102-000 in the fax SP mode and enter the serial number for the fax unit.

Table of Contents

Questions and Answers:

Question and Answer IconNeed help?

Do you have a question about the Ricoh MP C407 and is the answer not in the manual?

Ricoh MP C407 Specifications

General IconGeneral
Print TechnologyLaser
FunctionsPrint, Copy, Scan, Fax
Print Speed (B/W)42 ppm
Print Speed (Color)42 ppm
Max Print Resolution1200 x 1200 dpi
Duplex PrintingYes
Monthly Duty Cycle150, 000 pages
Paper SizeA4, A5, B5
ConnectivityUSB, Ethernet, Wi-Fi
Mobile PrintingApple AirPrint, Google Cloud Print, Mopria
Operating System CompatibilityWindows, Mac OS, Linux

Related product manuals