EasyManuals Logo

Ricoh MP C407 User Manual

Ricoh MP C407
1241 pages
To Next Page IconTo Next Page
To Previous Page IconTo Previous Page
Page #95 background imageLoading...
Page #95 background image
Anti-condensation Heater (for Mainframe Paper Tray)
89
7. Remove the PSU fan. (PSU Fan)
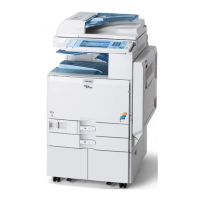
8. Connect the connector to CN600 on the PSU and route the junction harness along the red dotted line in the
photo. ( × 1)
• A: Not used (For the drum heater: If installing the anti-condensation heater for the mainframe)
• B: Not used
• C: For the heater harness
• D: For the PSU (CN600)
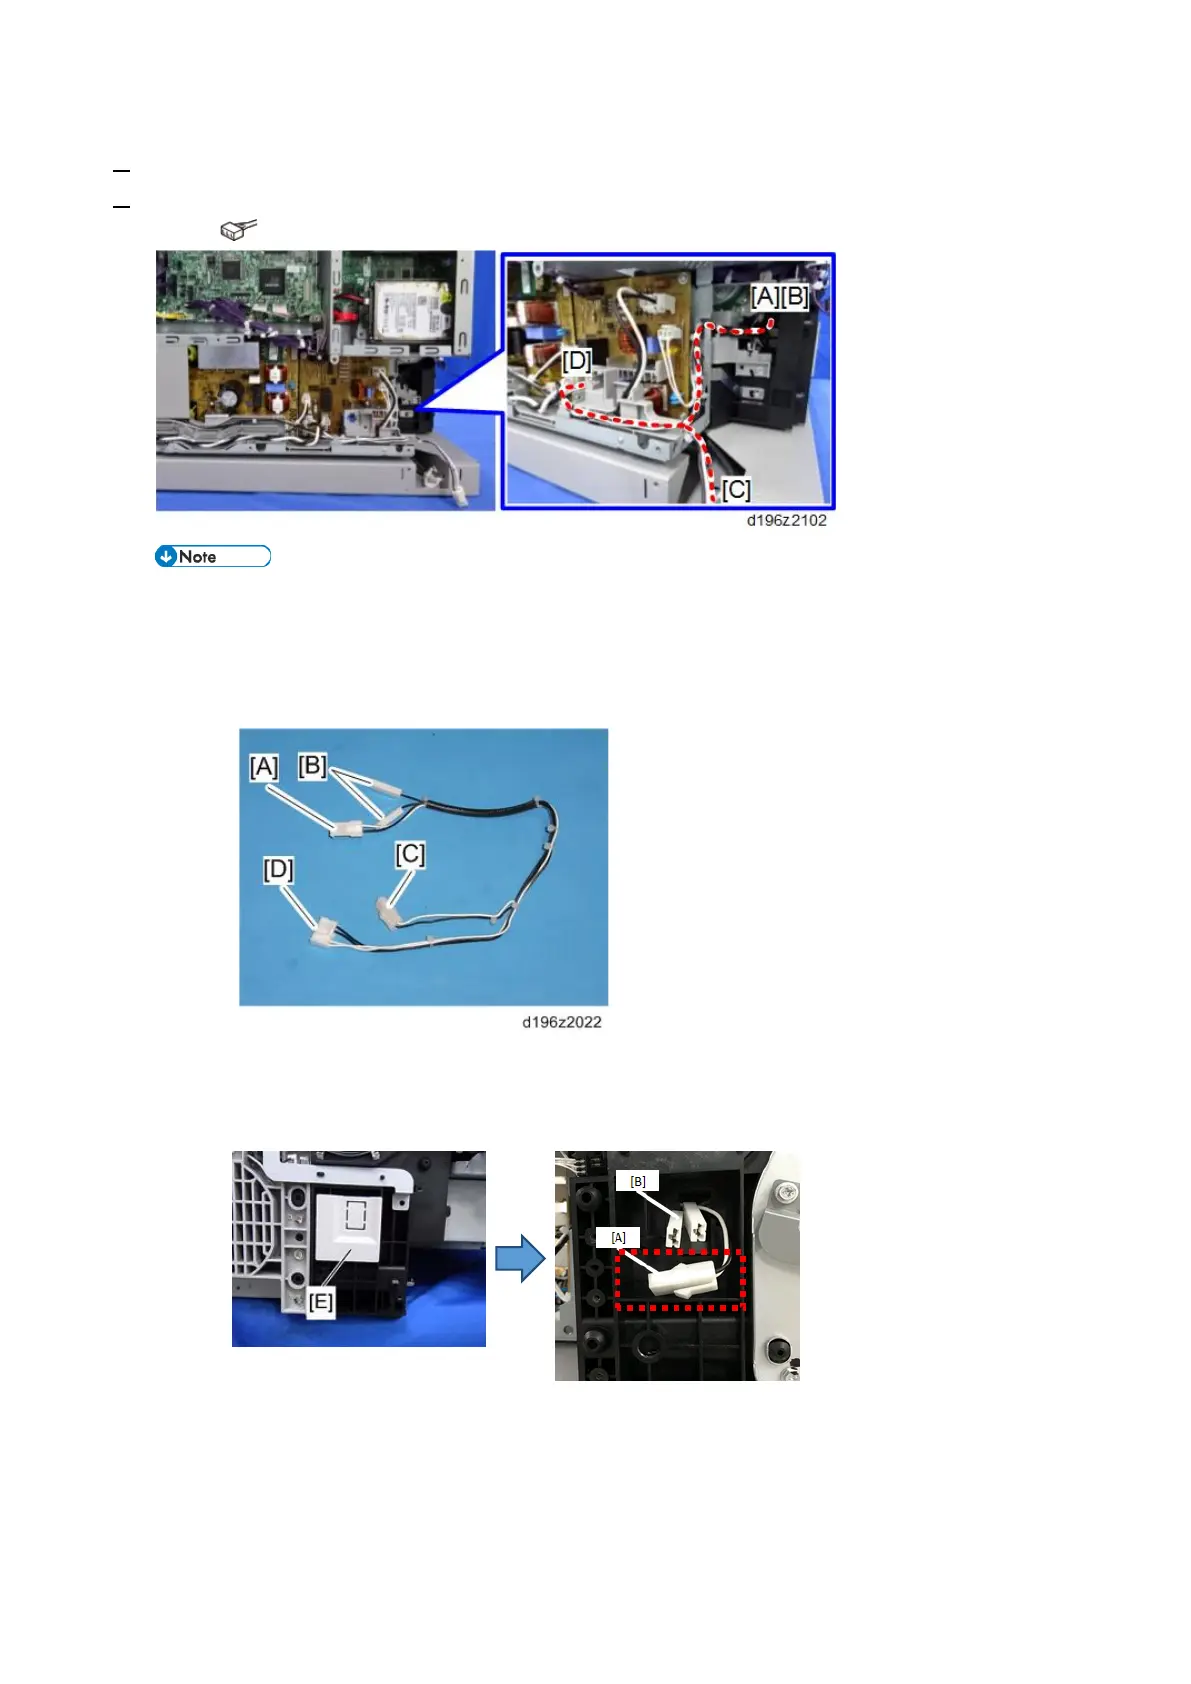
If the anti-condensation heater for mainframe is not going to be installed, do the following.
• Remove the cover [E], and then pull out the junction harness connectors [A] and [B].
• Store the connector [A] in the open space shown below.

Table of Contents

Questions and Answers:

Question and Answer IconNeed help?

Do you have a question about the Ricoh MP C407 and is the answer not in the manual?

Ricoh MP C407 Specifications

General IconGeneral
Print TechnologyLaser
FunctionsPrint, Copy, Scan, Fax
Print Speed (B/W)42 ppm
Print Speed (Color)42 ppm
Max Print Resolution1200 x 1200 dpi
Duplex PrintingYes
Monthly Duty Cycle150, 000 pages
Paper SizeA4, A5, B5
ConnectivityUSB, Ethernet, Wi-Fi
Mobile PrintingApple AirPrint, Google Cloud Print, Mopria
Operating System CompatibilityWindows, Mac OS, Linux

Related product manuals