Robotiq Screwdriving Solution - Instruction Manual
7. Tap the Zero button in Robotiq’s ActiveDrive Toolbar to zero the force and torque values.
8. Tap the Contact button in Robotiq’s ActiveDrive Toolbar to go into ‘’Snail’’ contact mode; thiswill allow for a precise inser-
tion.
9. Make sure the Screwdriver’s bit holder isaligned with the rundown adapter.
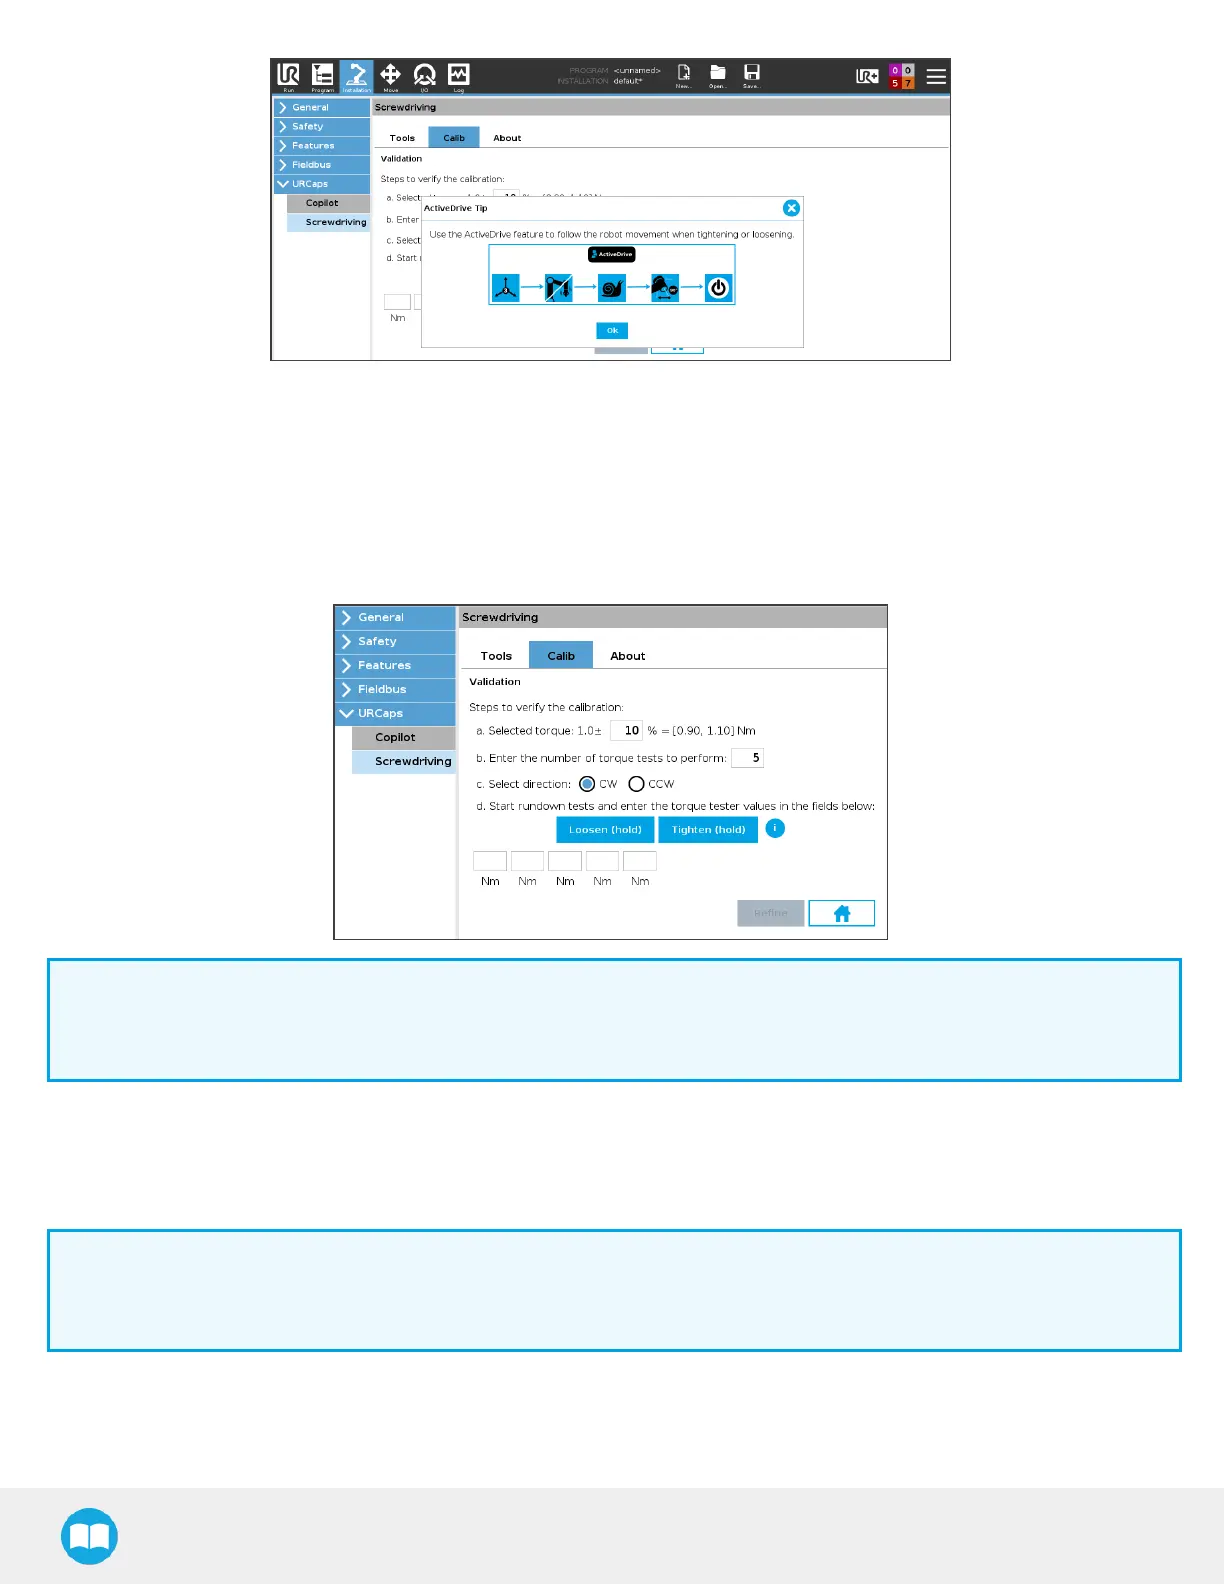
10. In the Calib tab, next to Selected torque, adjust the tolerance value according to the requirements of your application. The
default value is 10%.
Info
The tolerance value isonly used for user interface friendliness purposes. It will not be used for the actual calibration
process. The refinement processwill remain as much aspossible within the Screwdriver’s tolerance specifications.
11. Align the Screwdriver’s bit holder with the rundown adapter so that the male and female hexagonal patterns correspond to
each other.
12. Slip the Screwriver’s bit holder on the rundown adapter. Make sure it is completely inserted. You should be able to rotate
the bit holder freely.
Info
If the robot appears to be struggling or vibrating, the alignment of the bit holder and torque tester adapter might be
slightly off. Try zeroing the force and torque values.
13. Define the number of tests you need to perform according to your calibration requirements. The default value is5.
14. Select the rotational screwing direction. The default value is clockwise (CW).
65