33
Reference Manual
00809-0100-4809, Rev DA
Section 2: Installation
September 2015
Installation
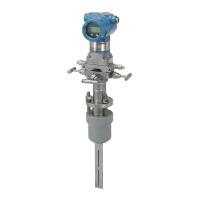
Step 5: Insert the Annubar sensor
1. If opposite side support is threaded, apply an appropriate thread sealing compound to
the support plug threads and tighten until no leakage occurs.
2. Align the flow arrow on the head with the direction of flow. Assemble the Annubar
sensor to the mounting flange using a gasket, bolts, and nuts.
3. If opposite side support is a socket weld fitting, insert the plug into the sockolet fitting
until the parts contact. Retract the plug
1
/16-in. (1.5 mm), remove the Annubar sensor
and apply fillet weld per local codes.
4. Tighten the nuts in a cross pattern to allow even compression of the gasket.
Step 6: Mount the transmitter
Direct mount head
With valves
1. Place PTFE O-rings into grooves on the face of head.
2. Align the high side of the transmitter to the high side of the probe (“Hi” is stamped on
the side of the head) and install.
3. Tighten the nuts in a cross pattern to 400 in-lb. (45 N-m).
Without valves
1. Place PTFE O-rings into grooves on the face of head.
2. To install a manifold, orient the equalizer valve or valves so they are easily accessible.
Install manifold with the smooth face mating to the face of the head. Tighten in cross
pattern to a torque of 400 in-lb. (45 N-m).
3. Place PTFE O-rings into grooves on the face of the manifold.
4. Align the high side of the transmitter to the high side of the probe (“Hi” is stamped on
the side of the head) and install.
5. Tighten the nuts in a cross pattern to 400 in-lb. (45 N-m).
 Loading...