Ocean 2014 - Main screen
56
Ocean 2014 User's Manual
2014-06-02/3.2A
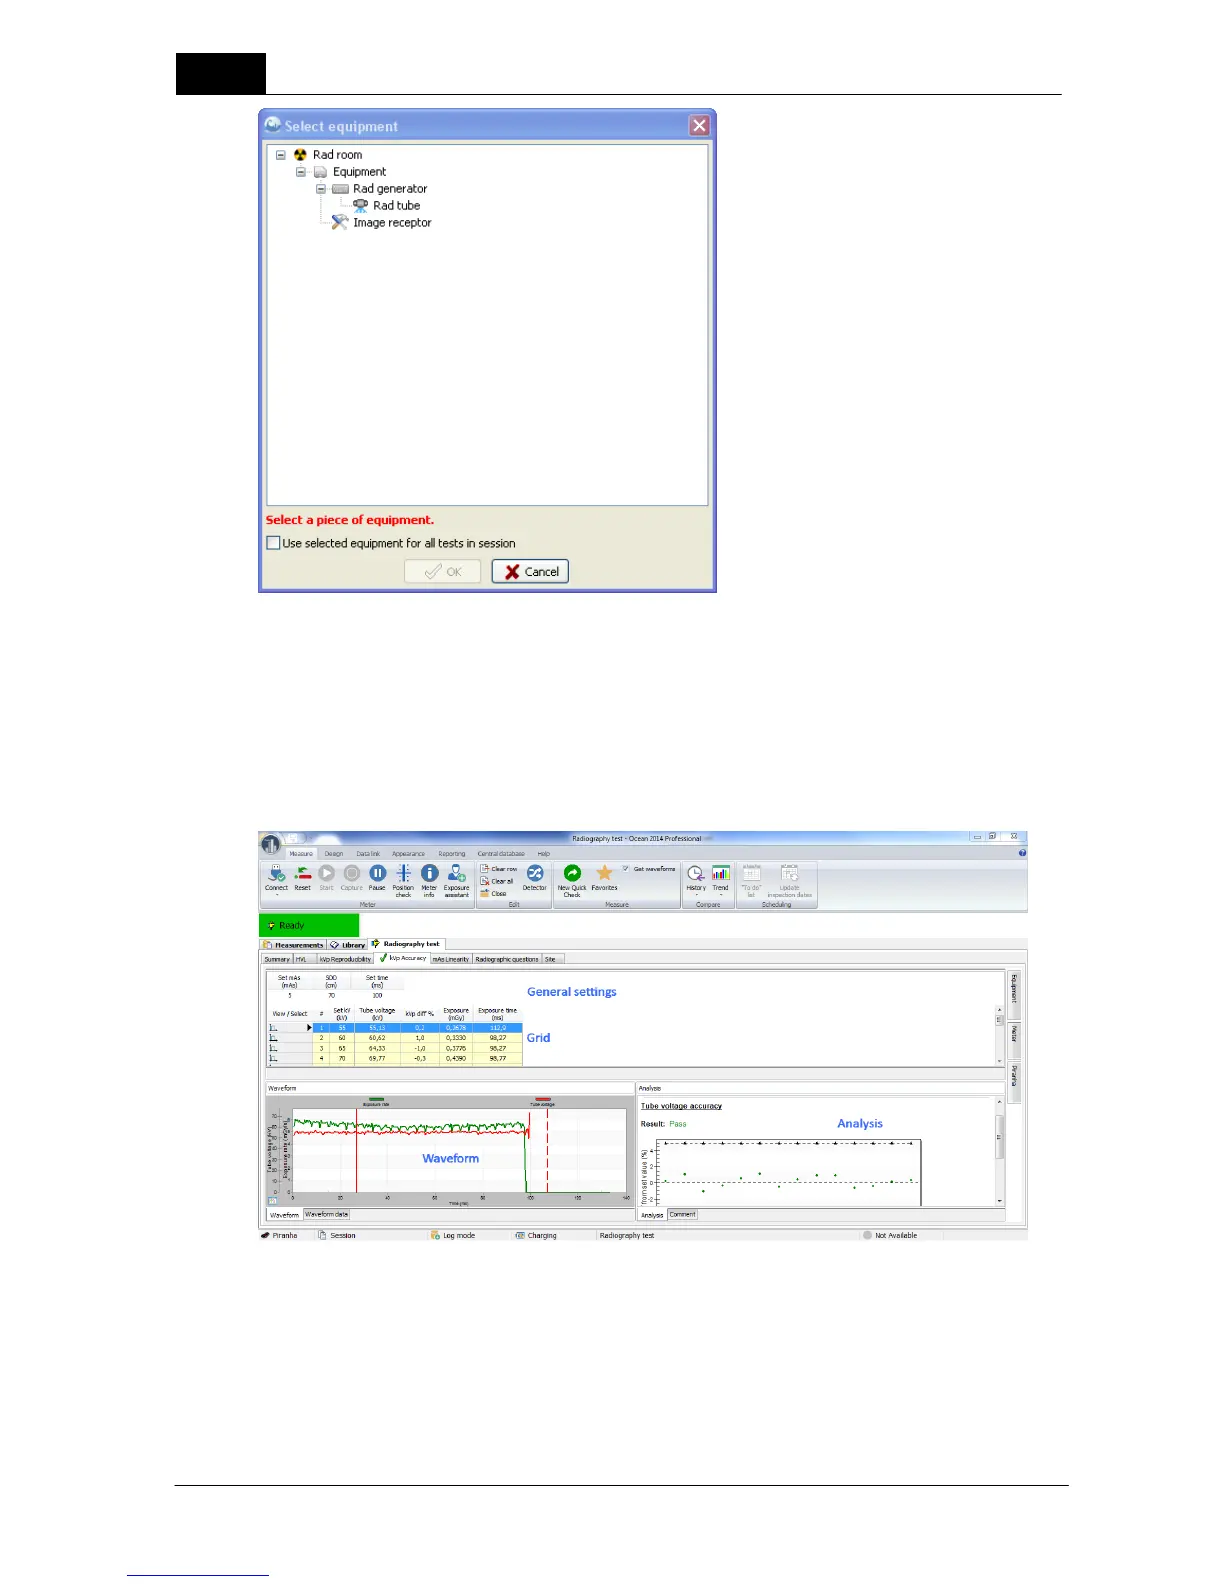
15. For this example, choose the "Rad tube" and click OK.
16. The first test in the session (in this case the HVL test) is activated and your cursor is positioned on
the first row in the grid. You are now ready to make exposures according to the conditions specified in
the test.
17. As you make your exposures, you will see measured data appearing in the grid along with the
corresponding waveforms in the waveform window to the bottom left of the grid and the analysis will
appear in the analysis window next to the waveform window.
s
18. Click on the save button to save your measurements. You don't need to choose a name here, since
we left the session name at the default date and time stamp earlier.
You can load any template from the Favorites screen by clicking on the Favorites button, or from the
Library tab located to the left of the displays. Read the topics below for more information:
- How to start a new session - read the topic Start a new session
- How to design a test template - read the topic Design a test template