9
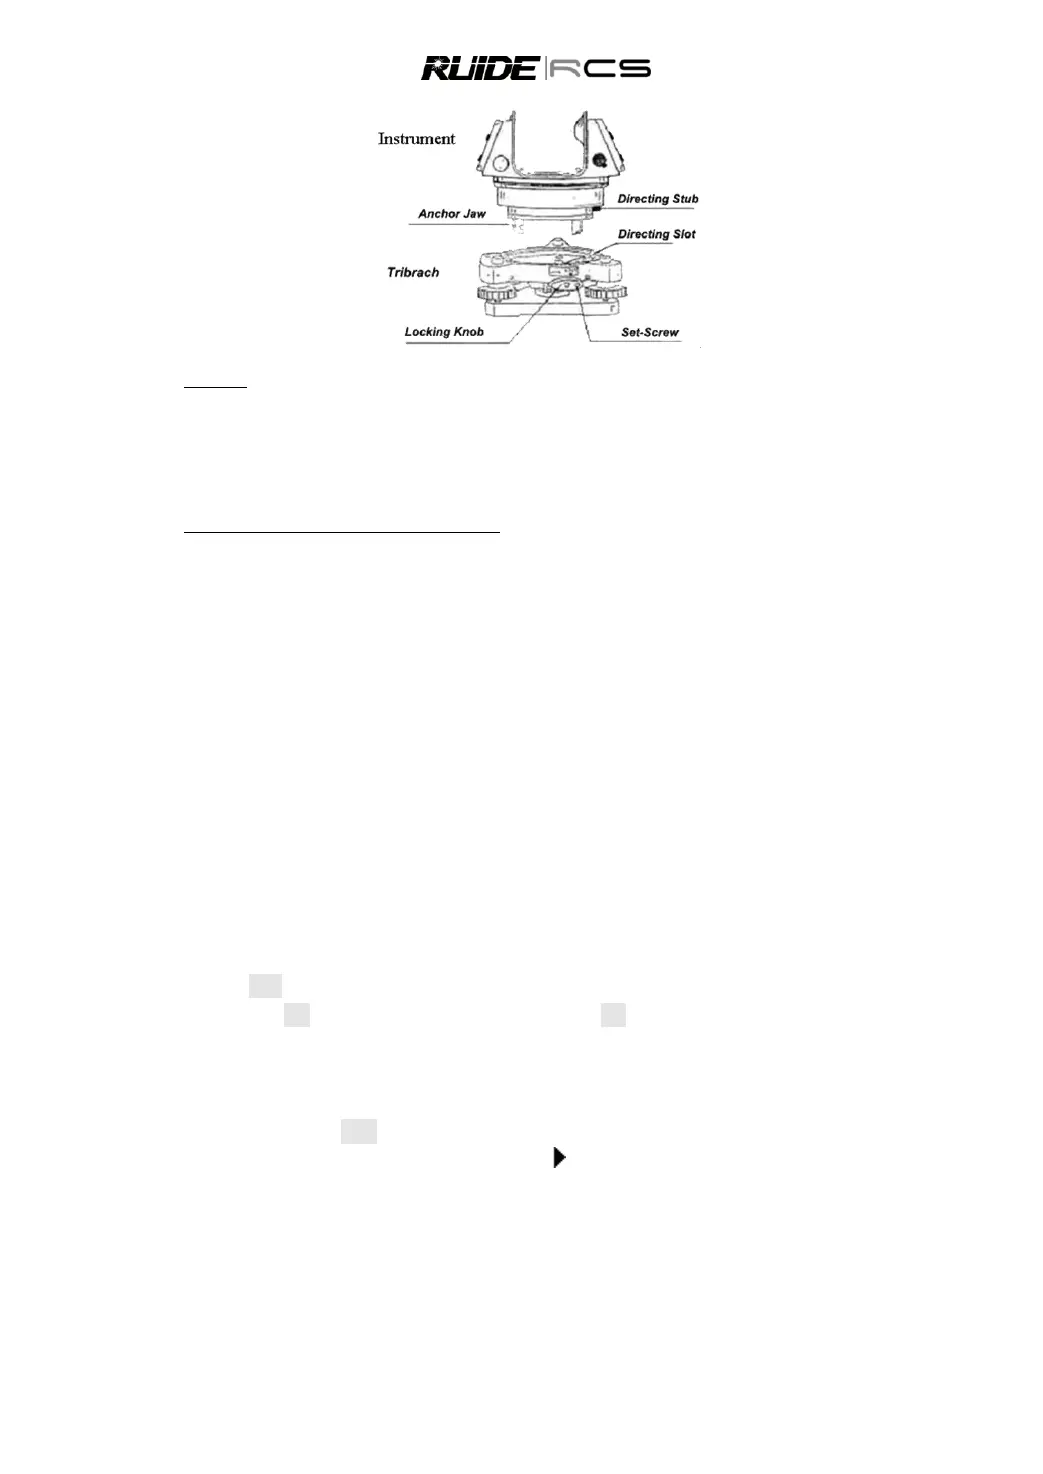
Mounting
Insert three anchor jaws into holes in tribrach and line up the directing stub with the directing slot. Turn the
locking knob about 180° clockwise and tighten the locking screw with a screwdriver.
2.6 EYEPIECE ADJUSTMENT AND COLLIMATING OBJECT
Method of Collimating An Object (for reference)
1) Sight the Telescope to bright place and rotate the eyepiece tube to make the reticle clear.
2) Collimate the target point with top of the triangle mark in the coarse collimator. (Keep a certain
distance between eye and the coarse collimator).
3) Make the target image clear with the telescope focusing screw.
If there is parallax when your eye moves up, down or left, right, it means the diopter of eyepiece lens or
focus is not well adjusted and accuracy will be influenced. You should adjust the eyepiece tube carefully
to eliminate the parallax.
2.7 INPUTTING MODE
All characters can be input in the screen.
Press [BS] to delete one character in the left of the cursor.
When the inputting scale is wider than the screen, it can be moved to left automatically. When the
inputting scale is full, it cannot be input anymore.
When an ABC is displayed on the upper right corner of the screen, capital letters can be input via the
keypad. While 123 is displayed, numbers can be input. When abc is displayed, lowercase letters can be
input. In any measurement screens or screens that need to be input manually, press [MODE] to shift
between alphabet mode and numeric mode.
In letter inputting mode, 3 letters are set in one key. Every pressing can display one of the letters in the
cursor. For example, in ABC mode, press [9] 3 times to input the letter of I.
Characters that have been input can be edited. Press [ ] to move the cursor to the item that needs to be
edited, the cursor will stay on the character and twinkle, input the new character.
2.8 LEVELING
As the tilt sensor is activated, automatic correction of vertical angle for mislevelment is displayed.
To ensure a precise angle measurement, tilt sensor must be activated. The display can be used to fine
level the instrument.