10
If the instrument hasn‟t been leveled roughly, the screen displays that the instrument is out of the
automatic correction range, and that it needs to be leveled manually. Please refer to “2.2 Instrument
Setup” for detailed leveling instruction.
RCS compensates the vertical angle reading as well as both vertical and horizontal angle reading due to
inclination of the vertical axis in the X direction and XY directions.
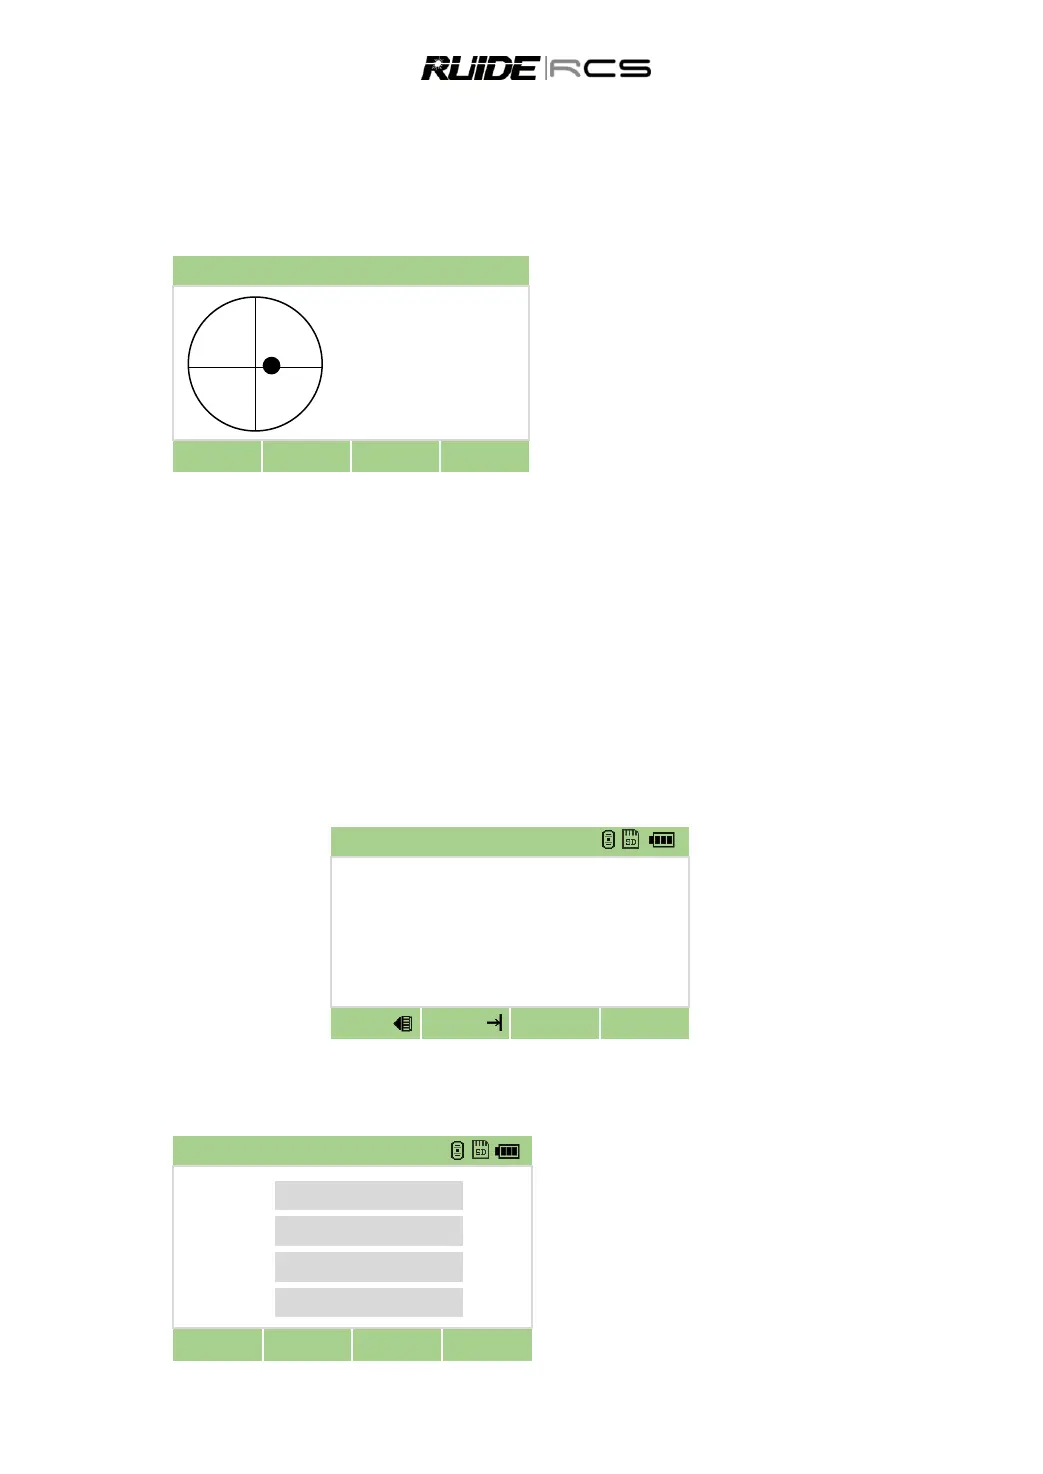
Press 0 to enter to automatic compensation
function.
Rotate the foot screws to make both values
within 1‟.
Press [▼] to turn on/off the laser plummet
When the instrument is placed on an unstable stage or in a windy weather condition, the display of vertical
angle is unstable. You can switch off the auto tilt correction function of vertical angle.
If the mode of auto correction is ON, in the condition that the instrument has not been leveled, the
program will demand that the instrument must be leveled at first, so as to enter other functions.
3. ROUTINE MEASUREMENTS
3.1 CAUTIONS FOR DISTANCE MEASUREMENT
After setting up and switching on correctly, the Total Station is immediately ready for measuring.
All shown displays are examples. It is possible that local software versions are different from the basic one.
Example of a possible measuring display:
3.2 EDM SETTING
Press [MSR1] or [MSR2] for 1 second to enter each measurement function it is specified.
Hod [MSR1] for 1 secod
Press navigation key [▲] [▼] [◄]
[►] to select the setting
Press [OK] to save the setting