"~~"'."
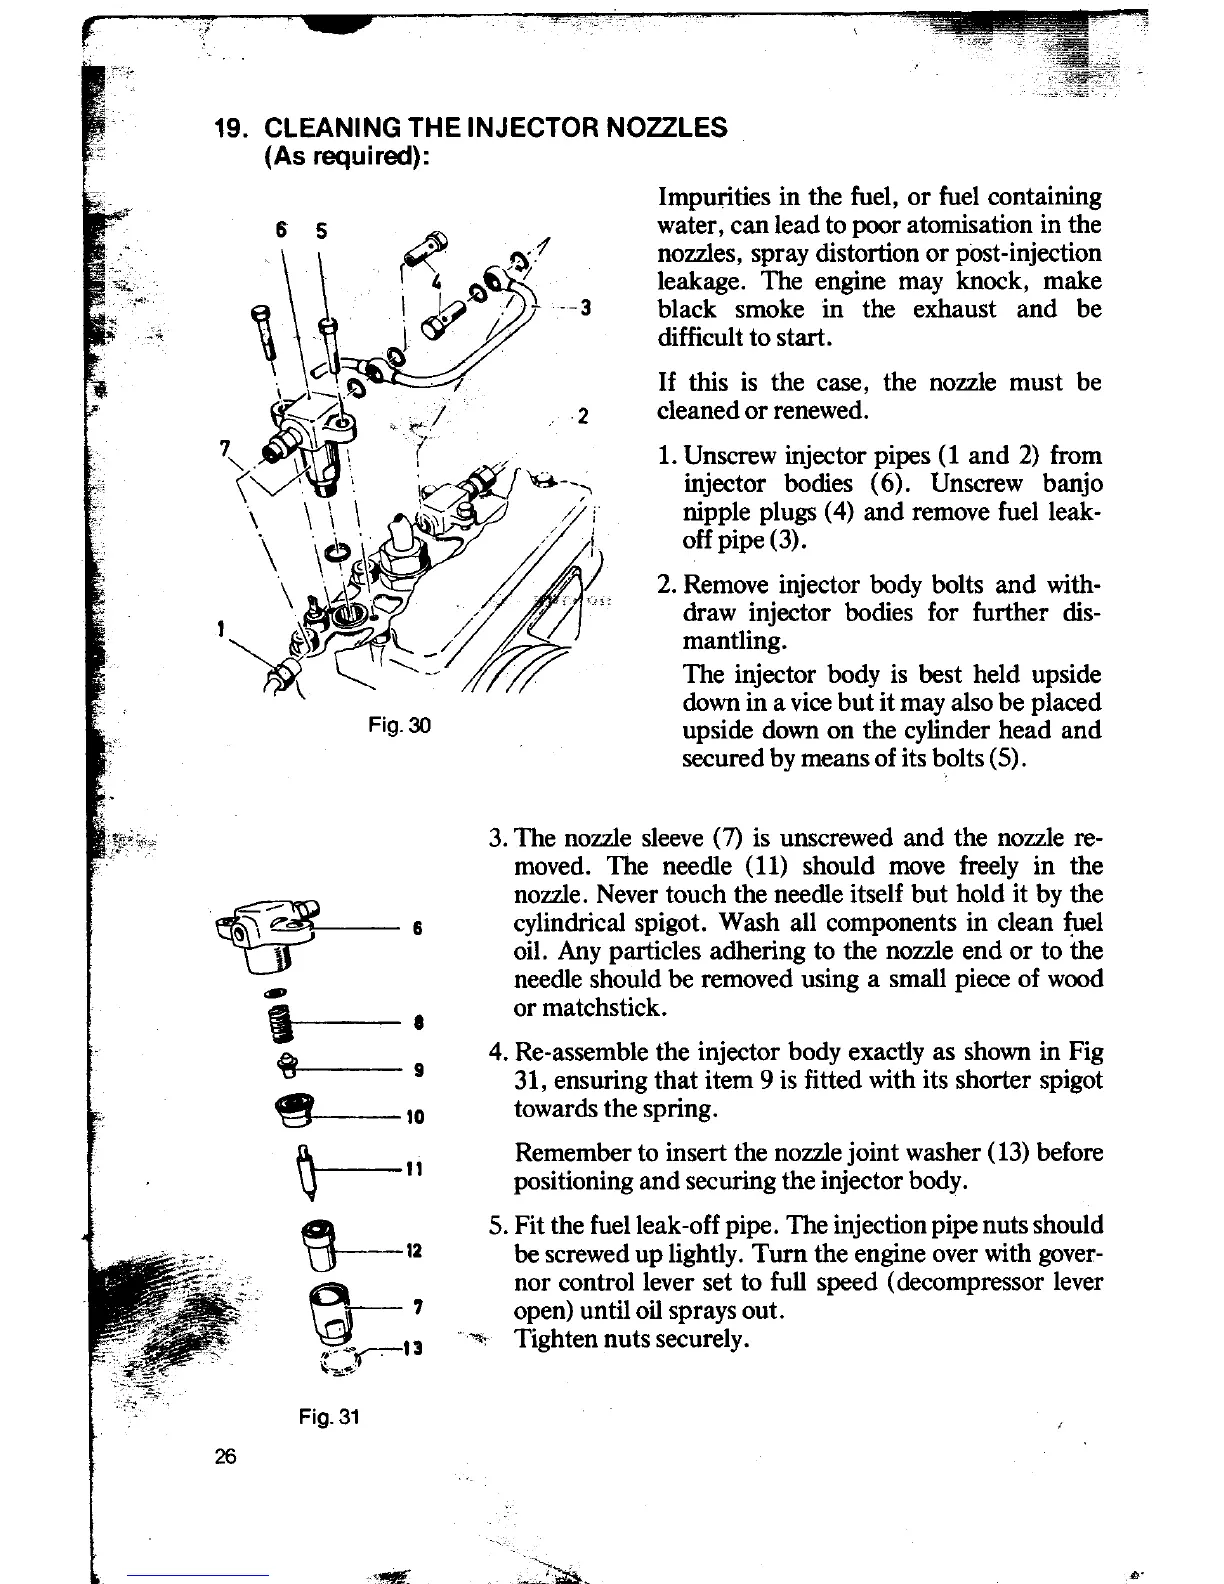
19. CLEANING THE INJECTOR NOZZLES
(As required):
Impurities in the fuel, or fuel containing
6 5 water, can lead to poor atomisation in the
\~ . , .! nozzIes, spray distortion or post-injection
leakage. The engine may knock, make
'" --3 black smoke in the exhaust and be
~ difficult to start.
i .~~ If this is the case, the nozzle must be
~-,:,:; ~...1 2 cleanedorrenewed.
7" \ \\ \ cf. / 1. ~~screw inj~tor pipes (1 and 2) fr°t;n
\ ' , IV"~!~--~ mjector bodies (6). Unscrew banjo
\ \ \ \ !~~ ///1 nipp~e plugs (4) and remove fuelleak-
'\ \6'\,
~/ f offplpe(3).
\ ,,\~&\~ ~ T 2, 2. Remo~e.injector h?dy balts and wit.h-
1 ~p // " '/ draw .injector bodies tor further dis-
~~ \... _/ mantlmg.
~ -.. -' ff7J;:;:' The injector body is best held upside
down in a vice but it may also be placed
Fig. 30 upside down on the cylinder head and
secured by means of its balts (5).
3. The nozzIe sleeve (7) is unscrewed and the nozzle re-
moved. The needle (11) should move freely in the
nozzIe. Never touch the needle itself but hold it by the
~~- - 6 cylindrical spigot. Wash all components in clean ~el
U- oil. Any particles adhering to the nozzIe end or to the
needie should be removed using a small piece of wood
i . or matchstick.
~ 4. Re-assemble the injector body exactly as shown in Fig
9 31, ensuring that item 9 is fitted with its shorter spigot
~ 10 towards the spring.
f\ Remember to insert the nozzIe joint washer (13) before
\J I I positioning and securing the injector body.
~ 5. Fit the fuelleak-off pipe. The injection pipe Duts should
0--12 be screwed up lightly. Turn the engine over with gover-
~ nor control lever set to fuIl speed (decompressor lever
7 open) untiloil sprays out.
0 13 "%,- Ti ghten Duts securel
y.
,,--~
'j.:~;, ~"""';
: Fig. 31
26
,
"--.
c'. ;-~~- ...