90
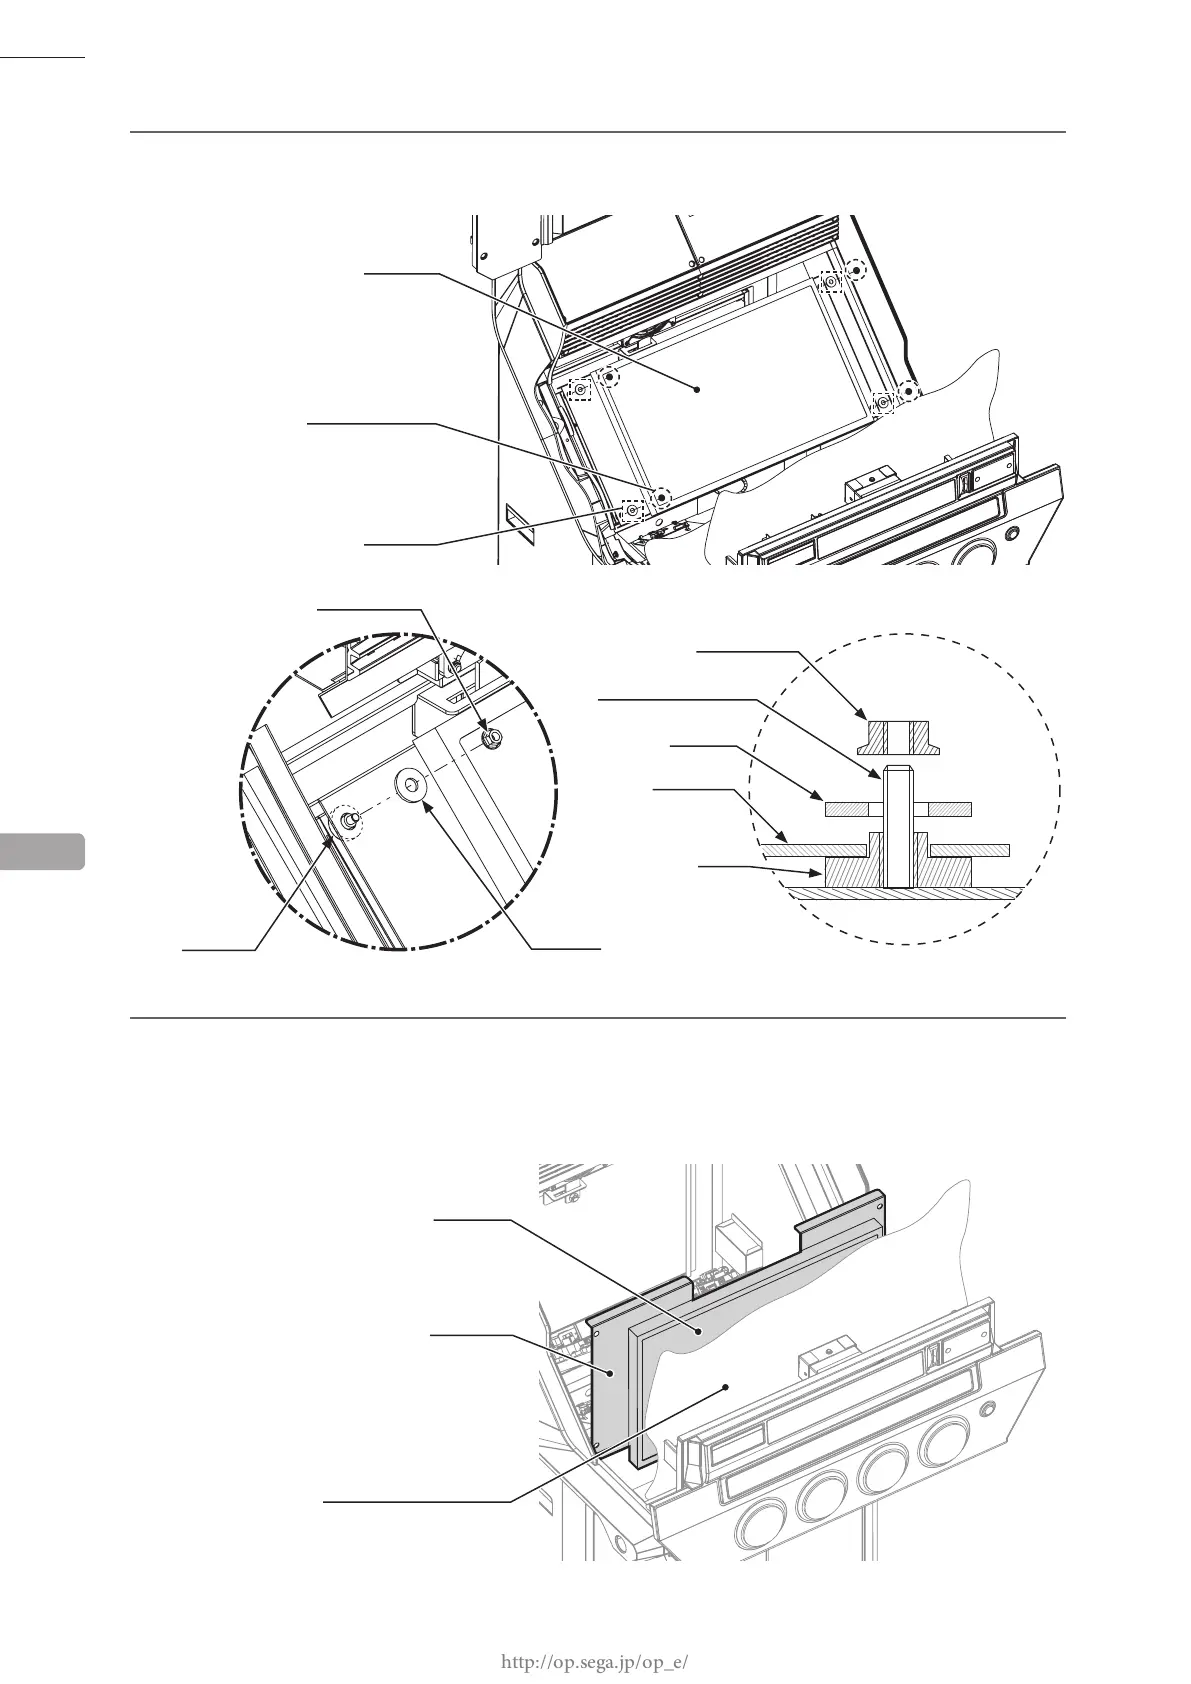
LCD
PROTECTIVE MATERIAL
8
Remove 4 ange nuts and take off the spacers.
9
Take off the LCD unit. On the back of the LCD unit are wiring connections. After freeing the metal LCD
base from the studs (screw axes), place it on top of the protective material. Separating it too far could
damage the wiring.
In addition, to prevent damage to the LCD, make sure the control panel does not close.
LCD UNIT
LCD BASE
13
LCD UNIT
FLANGE NUT (4)
M5
SPACER
253-5258
FLANGE NUT
M5
BUSH
253-5543
SPACER
253-5258
FLANGE NUT
STUD (SCREW AXIS)
SPACER
LCD BASE
BUSH
 Loading...