Breakdown Assistance 丨 187
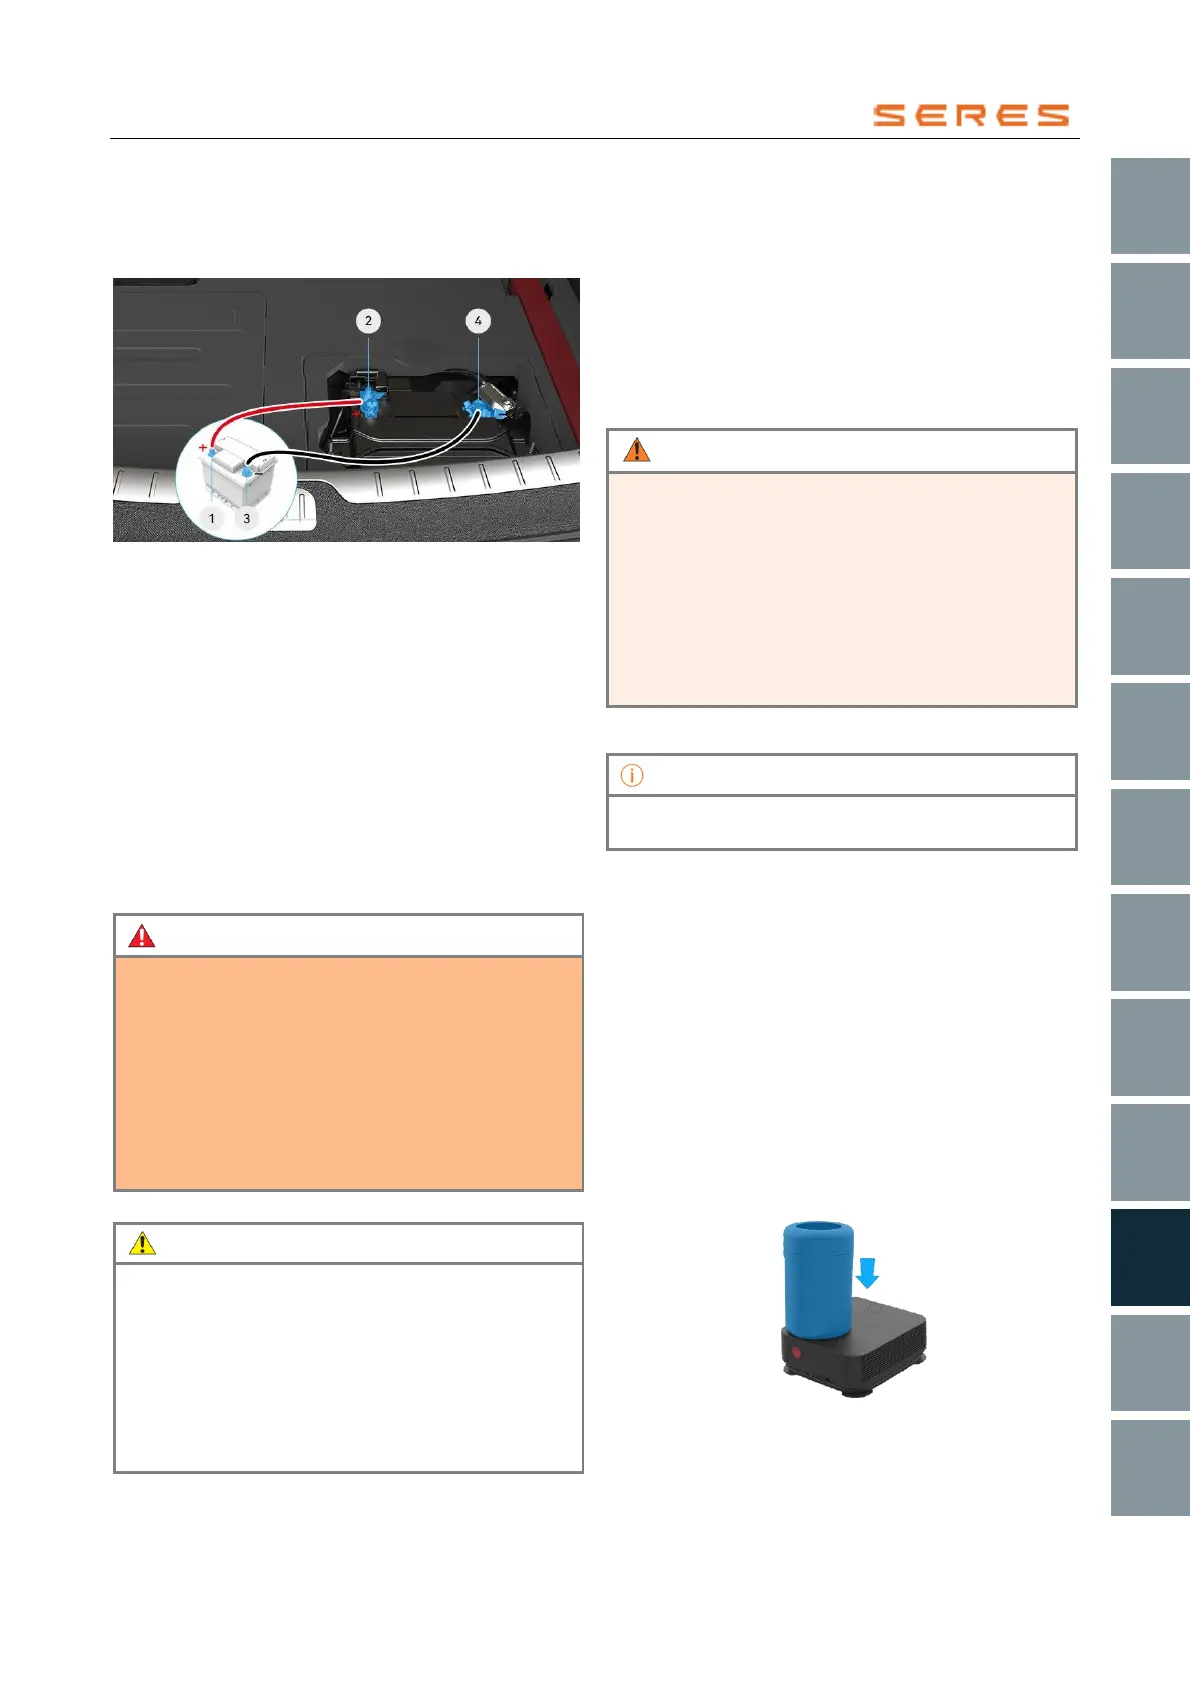
4. Connect the red jumper cable to the positive terminal
① of the rescue vehicle's 12V battery, then connect
the other end of the red jumper cable to the positive
terminal② of the vehicle being rescued.
* The image is for reference only; please refer to the actual
product
5. Connect the black jumper cable to the negative
terminal③ of the rescue vehicle's 12V battery, then
connect the other end of the black jumper cable to
the negative terminal④ of the vehicle being rescued.
6. Start the rescue vehicle first, then step on the brake
pedal to start the vehicle.
7. After the range extender is started, remove the black
jumper cable from the negative terminal④ first, then
remove and move away the black jumper cable from
the negative terminal③.
8. Then remove the red jumper cable connected to the
positive terminal ②, followed by removing the red
jumper cable connected to the positive terminal ①
and safely moving away the red jumper cable.
Strictly adhere to the following instructions, as failure to
do so may result in damage to electrical components
and even cause personal injury or death.
• Do not touch the high-voltage components inside
the Rear Trunk.
• Do not use a 12V battery with a voltage greater
than 12V.
• When connecting the jumper cables, be careful to
avoid contact with other metal components inside
the Rear Trunk to prevent a short circuit.
• Check and ensure that the jumper cables and the
terminals of the 12V battery are securely
connected to prevent sparks during attempted
starting.
• The voltage of the power supply must be the same
as the rated voltage of the vehicle's 12V battery.
• Connect the cables in the correct sequence,
starting with the positive cable and then
connecting the negative cable.
Temporary tire repair
When a tire is punctured, causing a leak, or when a vehicle
has been parked for an extended period leading to tire
deflation, you can use the quick tire repair tool to
temporarily fix the tire. The quick tire repair tool is located
under the Rear Trunk floor (see page 181 for reference).
The tire repair tool includes an inflation pump and a tire
repair fluid can (sufficient to repair one tire). After injecting
the tire repair fluid into the tire, it permeates small
punctures on the tire's tread (tread puncture diameter ≤
6mm), providing temporary repair.
• Before repairing a tire, please read and follow the
safety tips and instructions on the tire repair tool.
• For punctures larger than 6mm, severe damage to
the tread, damage to the tire sidewall, tire tearing,
or if the tire detaches from the hub, call for road
rescue.
• When temporarily repairing a tire with tire repair
fluid, the driving speed should not exceed 80km/h.
• If you notice that a vehicle's tire is deflated, do not
continue driving, as it may cause serious damage.
Please refer to the actual vehicle for the equipment of
the inflation pump.
Using the tire repair tool
Please follow the steps below to temporarily repair small
punctures in the tire:
1. Drive the vehicle to a safe location, instruct
passengers to exit the vehicle, and wait in a safe
area.
2. Activate the Hazard Warning Flashers and place a
warning triangle in a secure location to prevent
accidents.
3. Once the leak point is identified, move the vehicle so
that the leaking point is away from the road surface.
4. Take out the tire repairDriver’s Tool, install the tire
repair fluid can onto the inflation pump interface, and
secure it firmly.
* The image is for reference only; please refer to the actual
product