188 丨 Breakdown Assistance
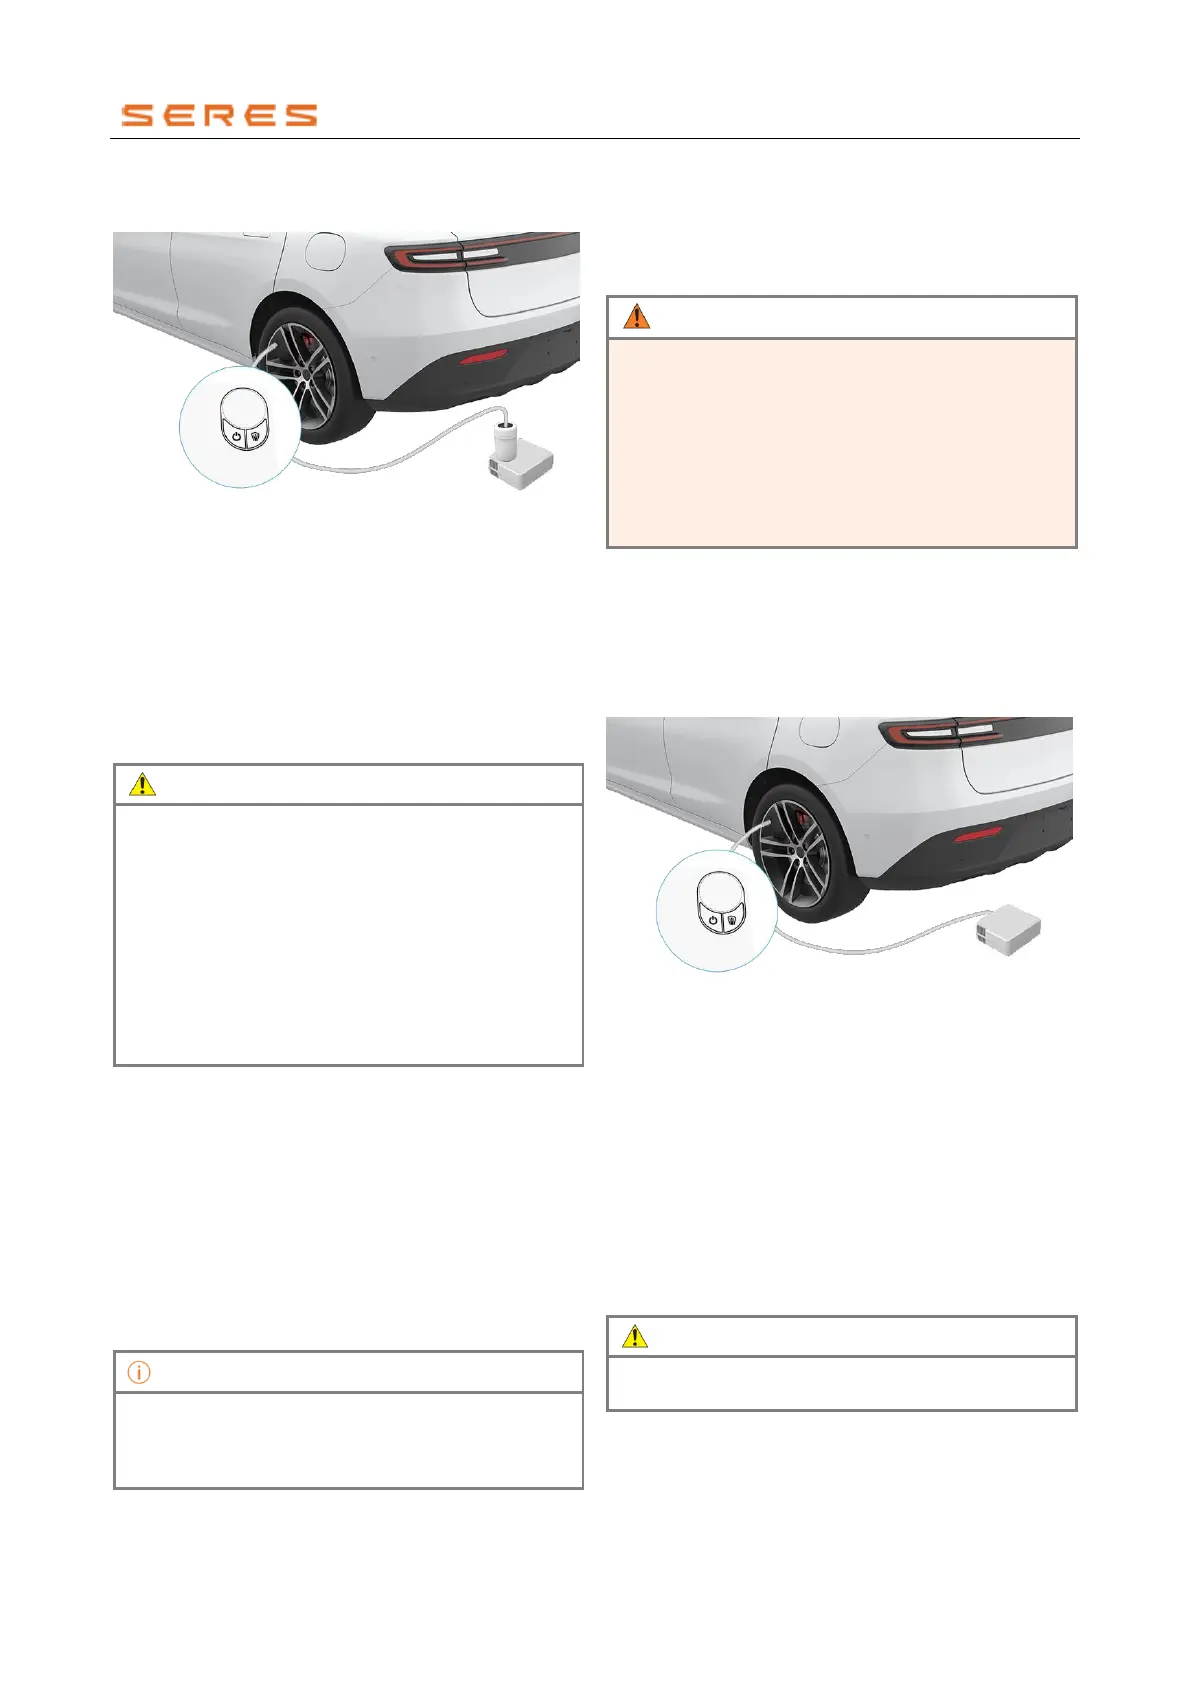
5. Remove the tire valve dust cap, connect the tire
repair fluid hose to the tire valve nozzle.
* The image is for reference only; please refer to the actual
product
6. Ensure that the inflation pump start button is in the off
position.
7. Insert the inflation pump power plug correctly into the
vehicle's 12V power socket, ensure the vehicle is
unlocked, the door is open, and the instrument
display screen is the light on state.
8. Press the inflation pump start button to activate the
inflation pump and inflate the tire to the
recommended tire pressure specifications. For
specific values, (refer to page 200).
If, after the inflation pump has been running for 10
minutes, the pressure gauge still shows tire pressure
below 1.3bar, please turn off the inflation pump,
disconnect the tire repair fluid hose, remove the tire
repair fluid can, start the vehicle, and let the tires roll for
about 5 turns. The tire repair fluid inside the tire will be
evenly distributed on the inner wall of the tire. At this
point, stop the vehicle and reinflate the tire. If the tire
pressure is still below 1.3bar, it indicates severe
damage to the tire and emergency repair is not
possible. Please stow the tire repairDriver’s Tool back
into the vehicle and call for road rescue.
9. Press the inflation pump button to turn off the inflation
pump, disconnect the tire repair fluid hose, remove
the tire repair fluid can, and reinstall the tire valve
dust cap.
10. Remove the sticker with the words "MAX80km/h and
50mph" from the adhesive on the tire repair fluid can
and place it on the steering wheel to remind the driver
that, after using this product, the vehicle speed
should be kept within 80km/h. Avoid sudden
acceleration or braking. Drive the vehicle at a speed
of 25km/h to 30km/h for more than 10 minutes, park
the vehicle in a safe location, and recheck the tire
pressure.
When the pressure is below 1.3 bar, the tire is severely
damaged and cannot be repaired. Please retract the tire
repairDriver’s Tool into the vehicle and call for road
rescue.
11. Once the driving tire pressure stabilizes, it indicates
that the tire has been successfully repaired. Please
repeat the inflation process to replenish the pressure
to the recommended tire pressure specifications
(refer to page 200).
• Exercise caution while driving after repairing the
tire to avoid abrupt steering maneuvers and
emergency stops.
• The tire repair fluid is intended for single-use
temporary tire repair. After use, it is essential to
promptly visit the dealership for a tire repair or
replacement of the damaged tire.
• If you experience abnormal vibrations or noises
while driving, decelerate and safely pull over.
Tire Inflation
The vehicle's equipped air pump can be used for tire
inflation to achieve the normal tire pressure. Follow the
steps below for tire inflation:
1. Retrieve the air pump from the Rear Trunk toolbox.
2. Remove the tire valve dust cap and connect the
inflation tube to the tire valve.
* The image is for reference only; please refer to the actual
product
3. Insert the 12V power connector correctly into the
vehicle's 12V power socket, ensure the vehicle is
unlocked and the door is open, and the instrument
display screen is the light on state.
4. Turn on the air pump switch, inflate the tire, observe
the pressure gauge, and close the switch when the
tire pressure reaches the recommended specification.
Remove the inflation tube and 12V power connector.
5. To release air, turn off the air pump, press the
pressure relief valve button, observe the pressure
gauge until the tire pressure decreases to the desired
value.
6. Install the tire valve dust cap.
During the use of the air pump, the inflation tube may
heat up, which is a normal phenomenon.