Repairs
FLOWSIC600-XT · Service Manual · 8019179/V0-2/2016-03 · © SICK Engineering GmbH 29
Subject to change without notice
3.4.2.2 Fit the new p/T sensor
1 Unpack the new sensor and check for transport damage. Do not use the sensor when
any damage can be seen at the sensor or the seal.
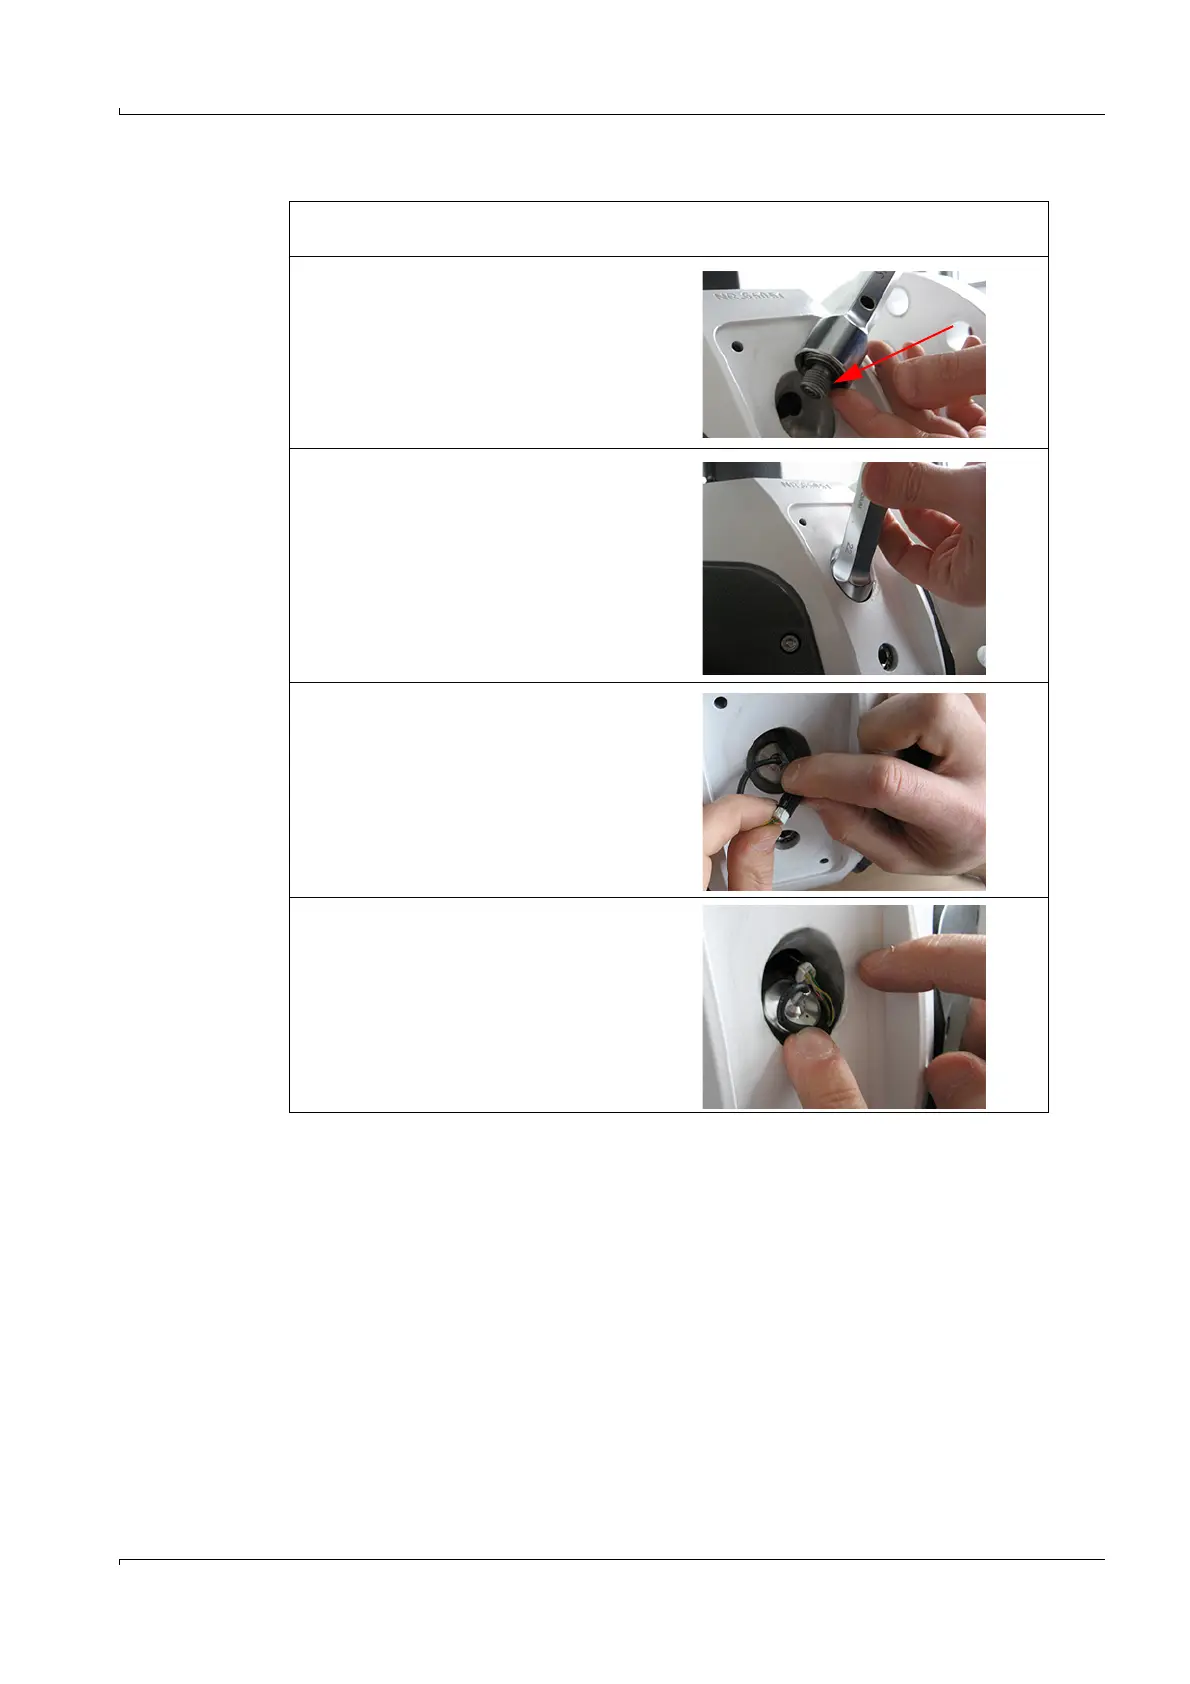
2 Position the p/T sensor in the SW 22
socket wrench (push the cable in
first).
3 Grease the thread (separating agent
that does not rub on stainless steel).
4 Insert the sensor as straight as pos-
sible and screw tight (tightening
torque: 20 Nm).
5 After sensor replacement, perform a
leak tightness check. Apply leak
detection spray to the sensors and
slowly increase the pressure in the
device.
6 Connect the plug connection again.
7 Fold the sensor cable as small as
possible so that it is not crimped
under the sensor cap.

 Loading...