Scanner Features and Icons
27
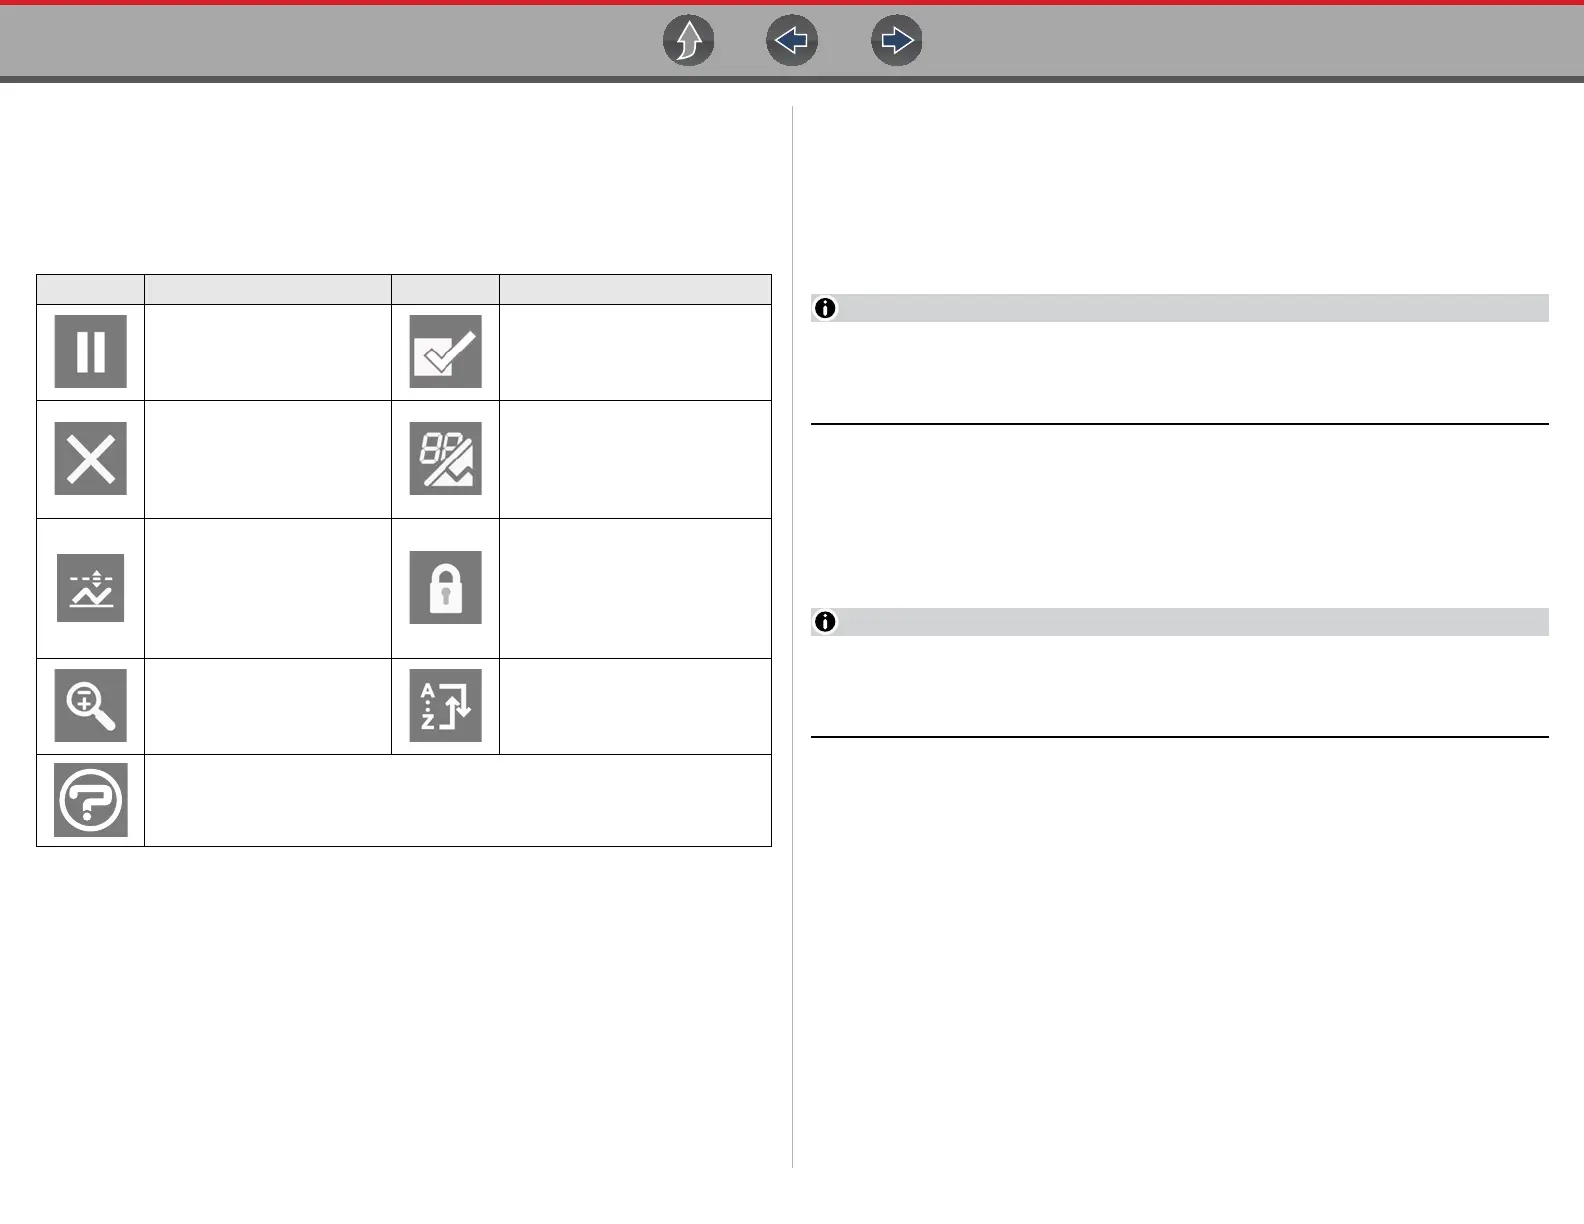
6.2.2 Scanner Control Icons
The scanner toolbar contains control icons. Control icons may vary depending on
the active function or test. An inverted (highlighted) icon indicates it is selected.
Other control icons (not shown) are described in Common Toolbar Control Icons on
page 9.
6.2.3 Basic Scanner Operation (Quick Start)
This section lists the basic scanner operation steps, and is only intended as a
quick-start reference. Refer to the supporting topics in this section for detailed
operation information.
z Getting Started (Basic Steps)
Menus, options and procedures may vary by vehicle. The following
instructions apply to most OBD-II vehicles. Not all vehicles support the Auto ID
and, or Instant ID feature.
1. Turn the vehicle ignition switch on.
2. Connect the data cable to the vehicle DLC. See Data Cable / Connections on
page 11.
The diagnostic tool will turn on automatically when connected to the vehicle.
3. Select Scanner from the Home screen.
While using the Scanner and OBD-II/EOBD functions, on-screen data cable
connection instructions are provided. The instructions may include the location
of the vehicle DLC.
4. Depending on the vehicle, Instant ID may occur. See Instant ID on page 30 for
additional information.
5. If Instant ID is not supported, after selecting vehicle make (and year if needed),
choose Automatic ID or Manual ID and enter the vehicle information at the
screen prompts to continue. See Vehicle Identification on page 28.
If Automatic ID is selected, the identification process automatically completes
(if supported by the vehicle).
6. Select a Vehicle System (e.g. Engine, Transmission).
7. Select a Vehicle System Test/Function (e.g. Codes Menu) to perform. See
System Main Menu Options on page 31.
Icon Function Icon Function
Pause - Indicates PID data
from the vehicle is being
displayed. Selecting pauses
data collection.
Custom Data List - Opens a
menu for selecting which PIDs
display in the list.
Clear - Erases all the PID
data in the buffer and begins
a new recording. Selecting
opens a confirmation
message.
Change View - Changes
display options between PID list
or graph displays.
Trigger - Opens a menu that
allows you to set, arm, and
clear threshold values that
automatically trigger PID
data to be saved from buffer
memory to a file.
Lock/Unlock - Locks or unlocks
the highlighted parameter.
Locked PIDs move to the top of
the list and do not scroll as you
move through the data.
Zoom - Incrementally
increases and decreases the
scale of the data being
displayed.
Sort - Determines the order in
which PIDs are listed on the
screen.
Help - Opens the Getting Started with Intelligent Diagnostics slideshow. See
Getting Started (Demonstration) on page 24.